Module 1 Formstorming
Weekly Activity Template
Freddy Hu This project studied and learned about the physical interaction behaviors in reality as well as the production of creative interactions.
Project 1
Module 1
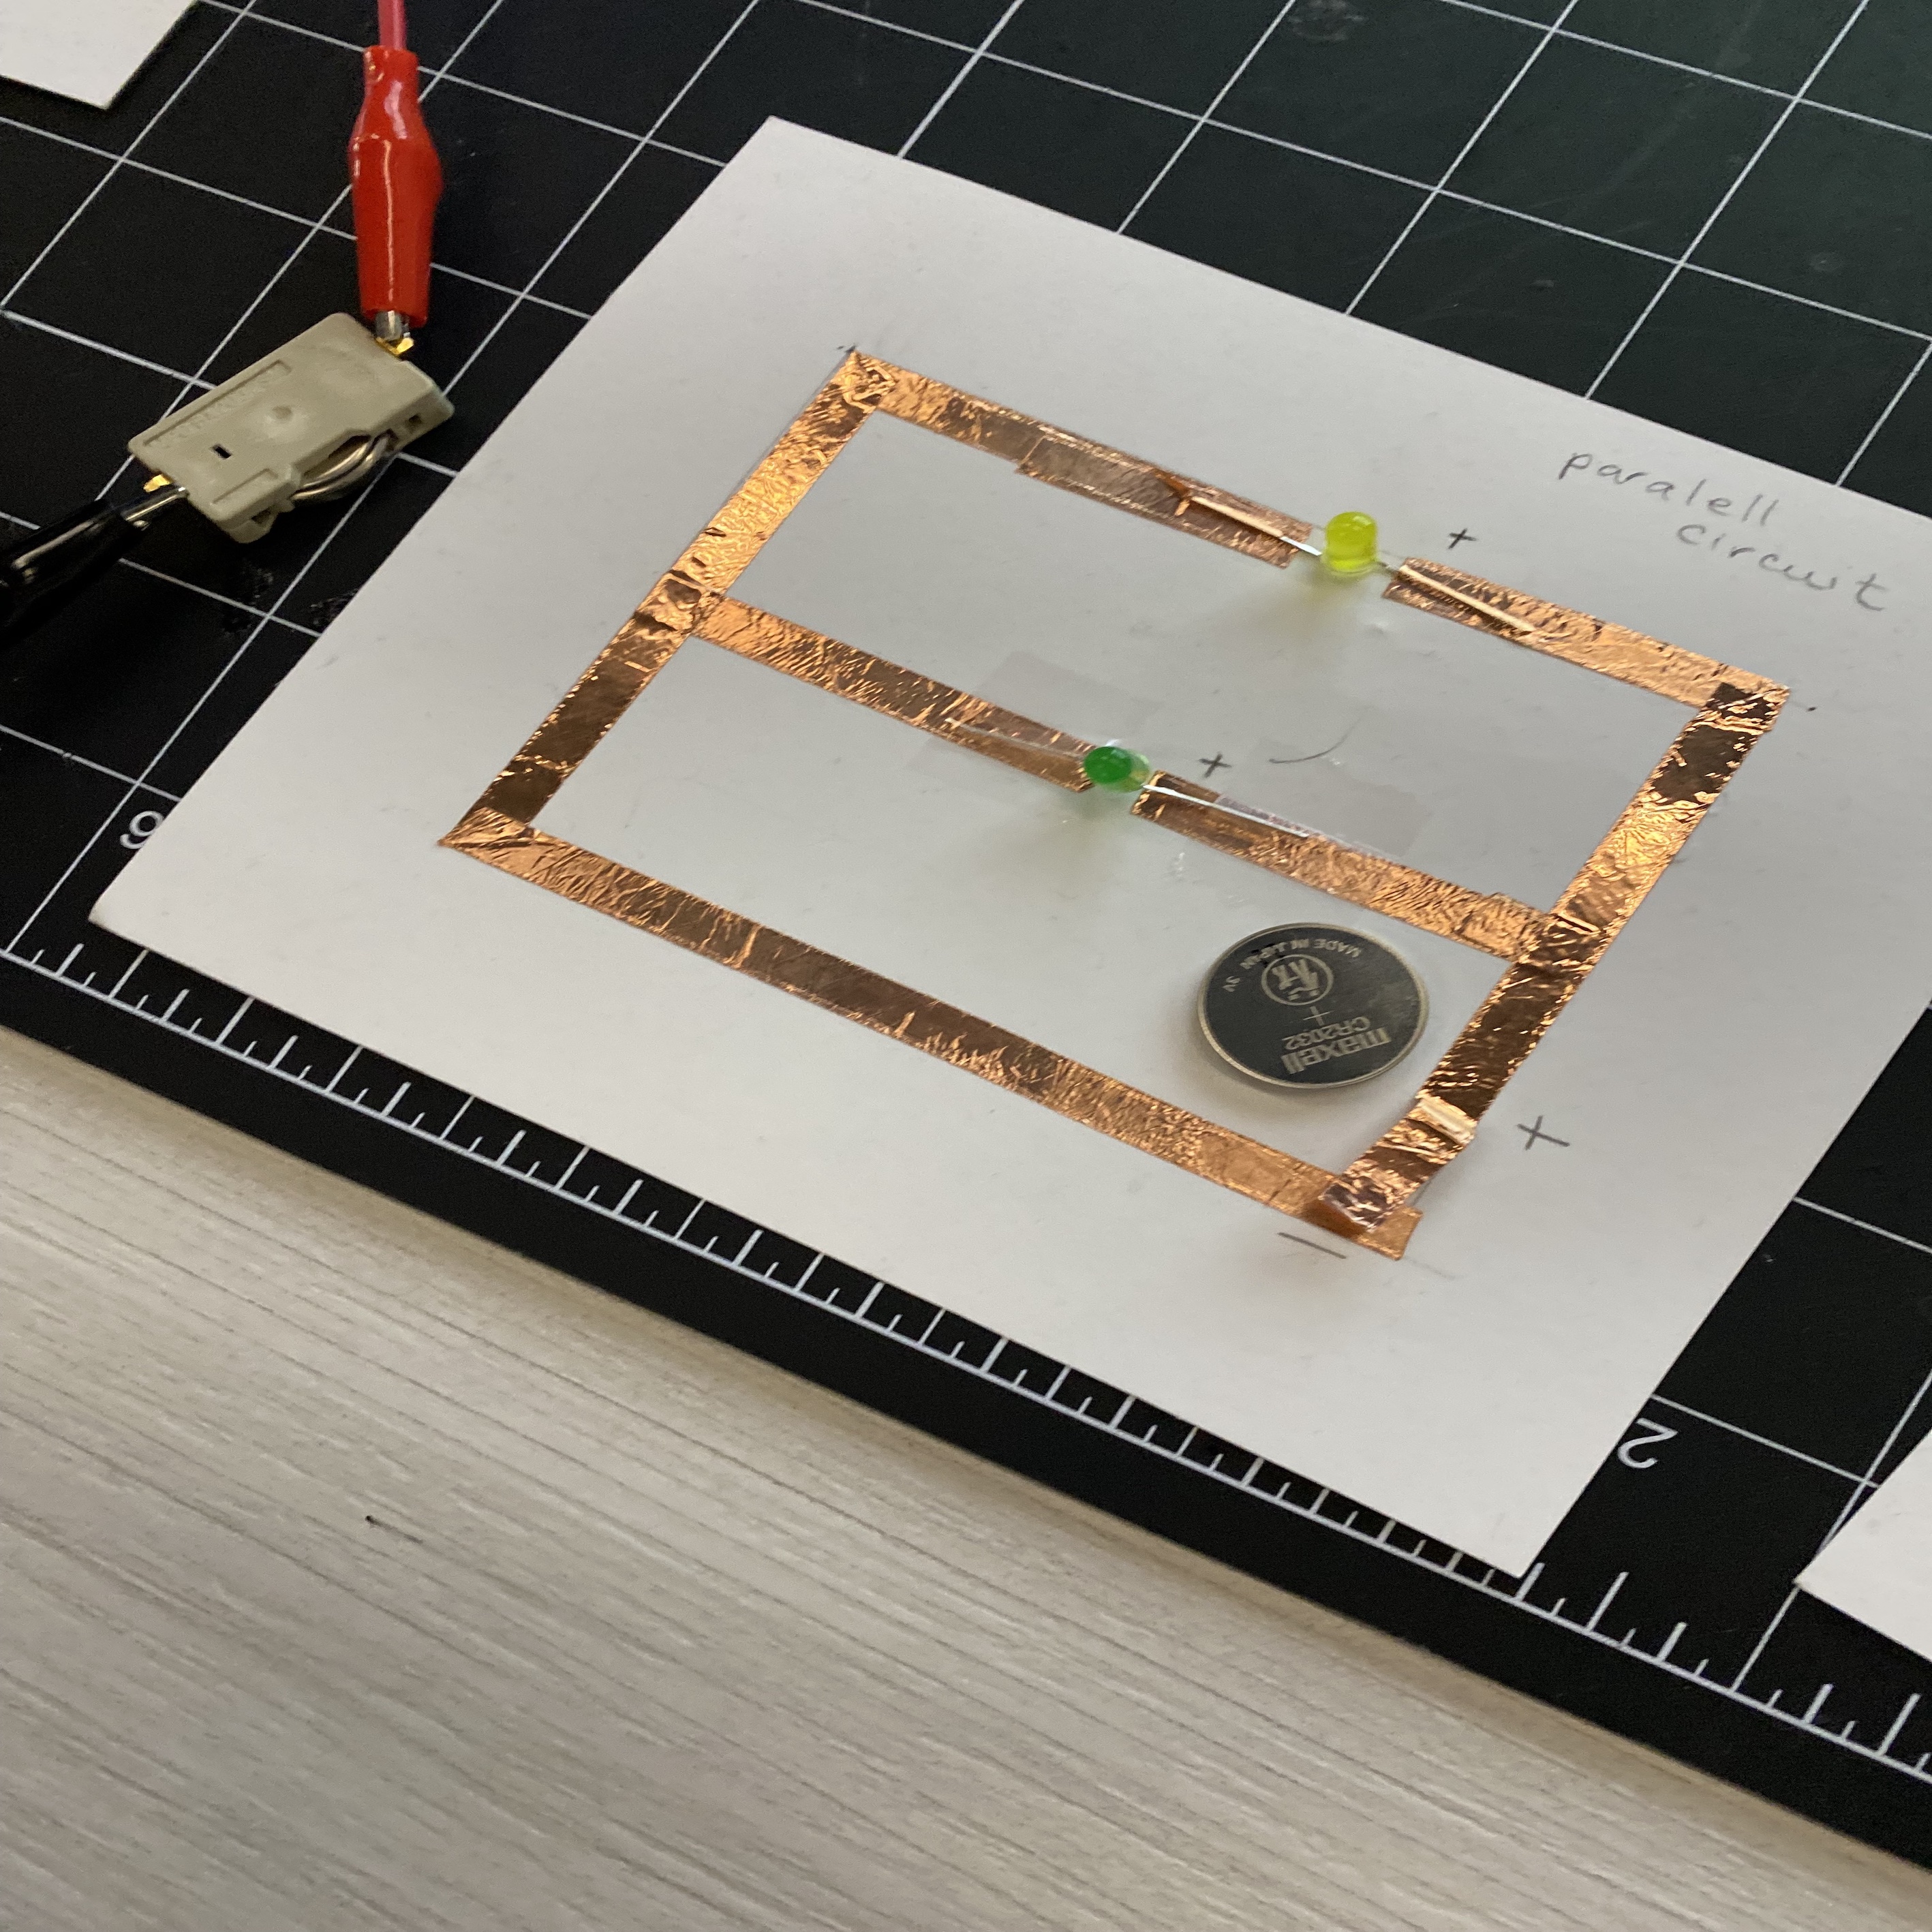
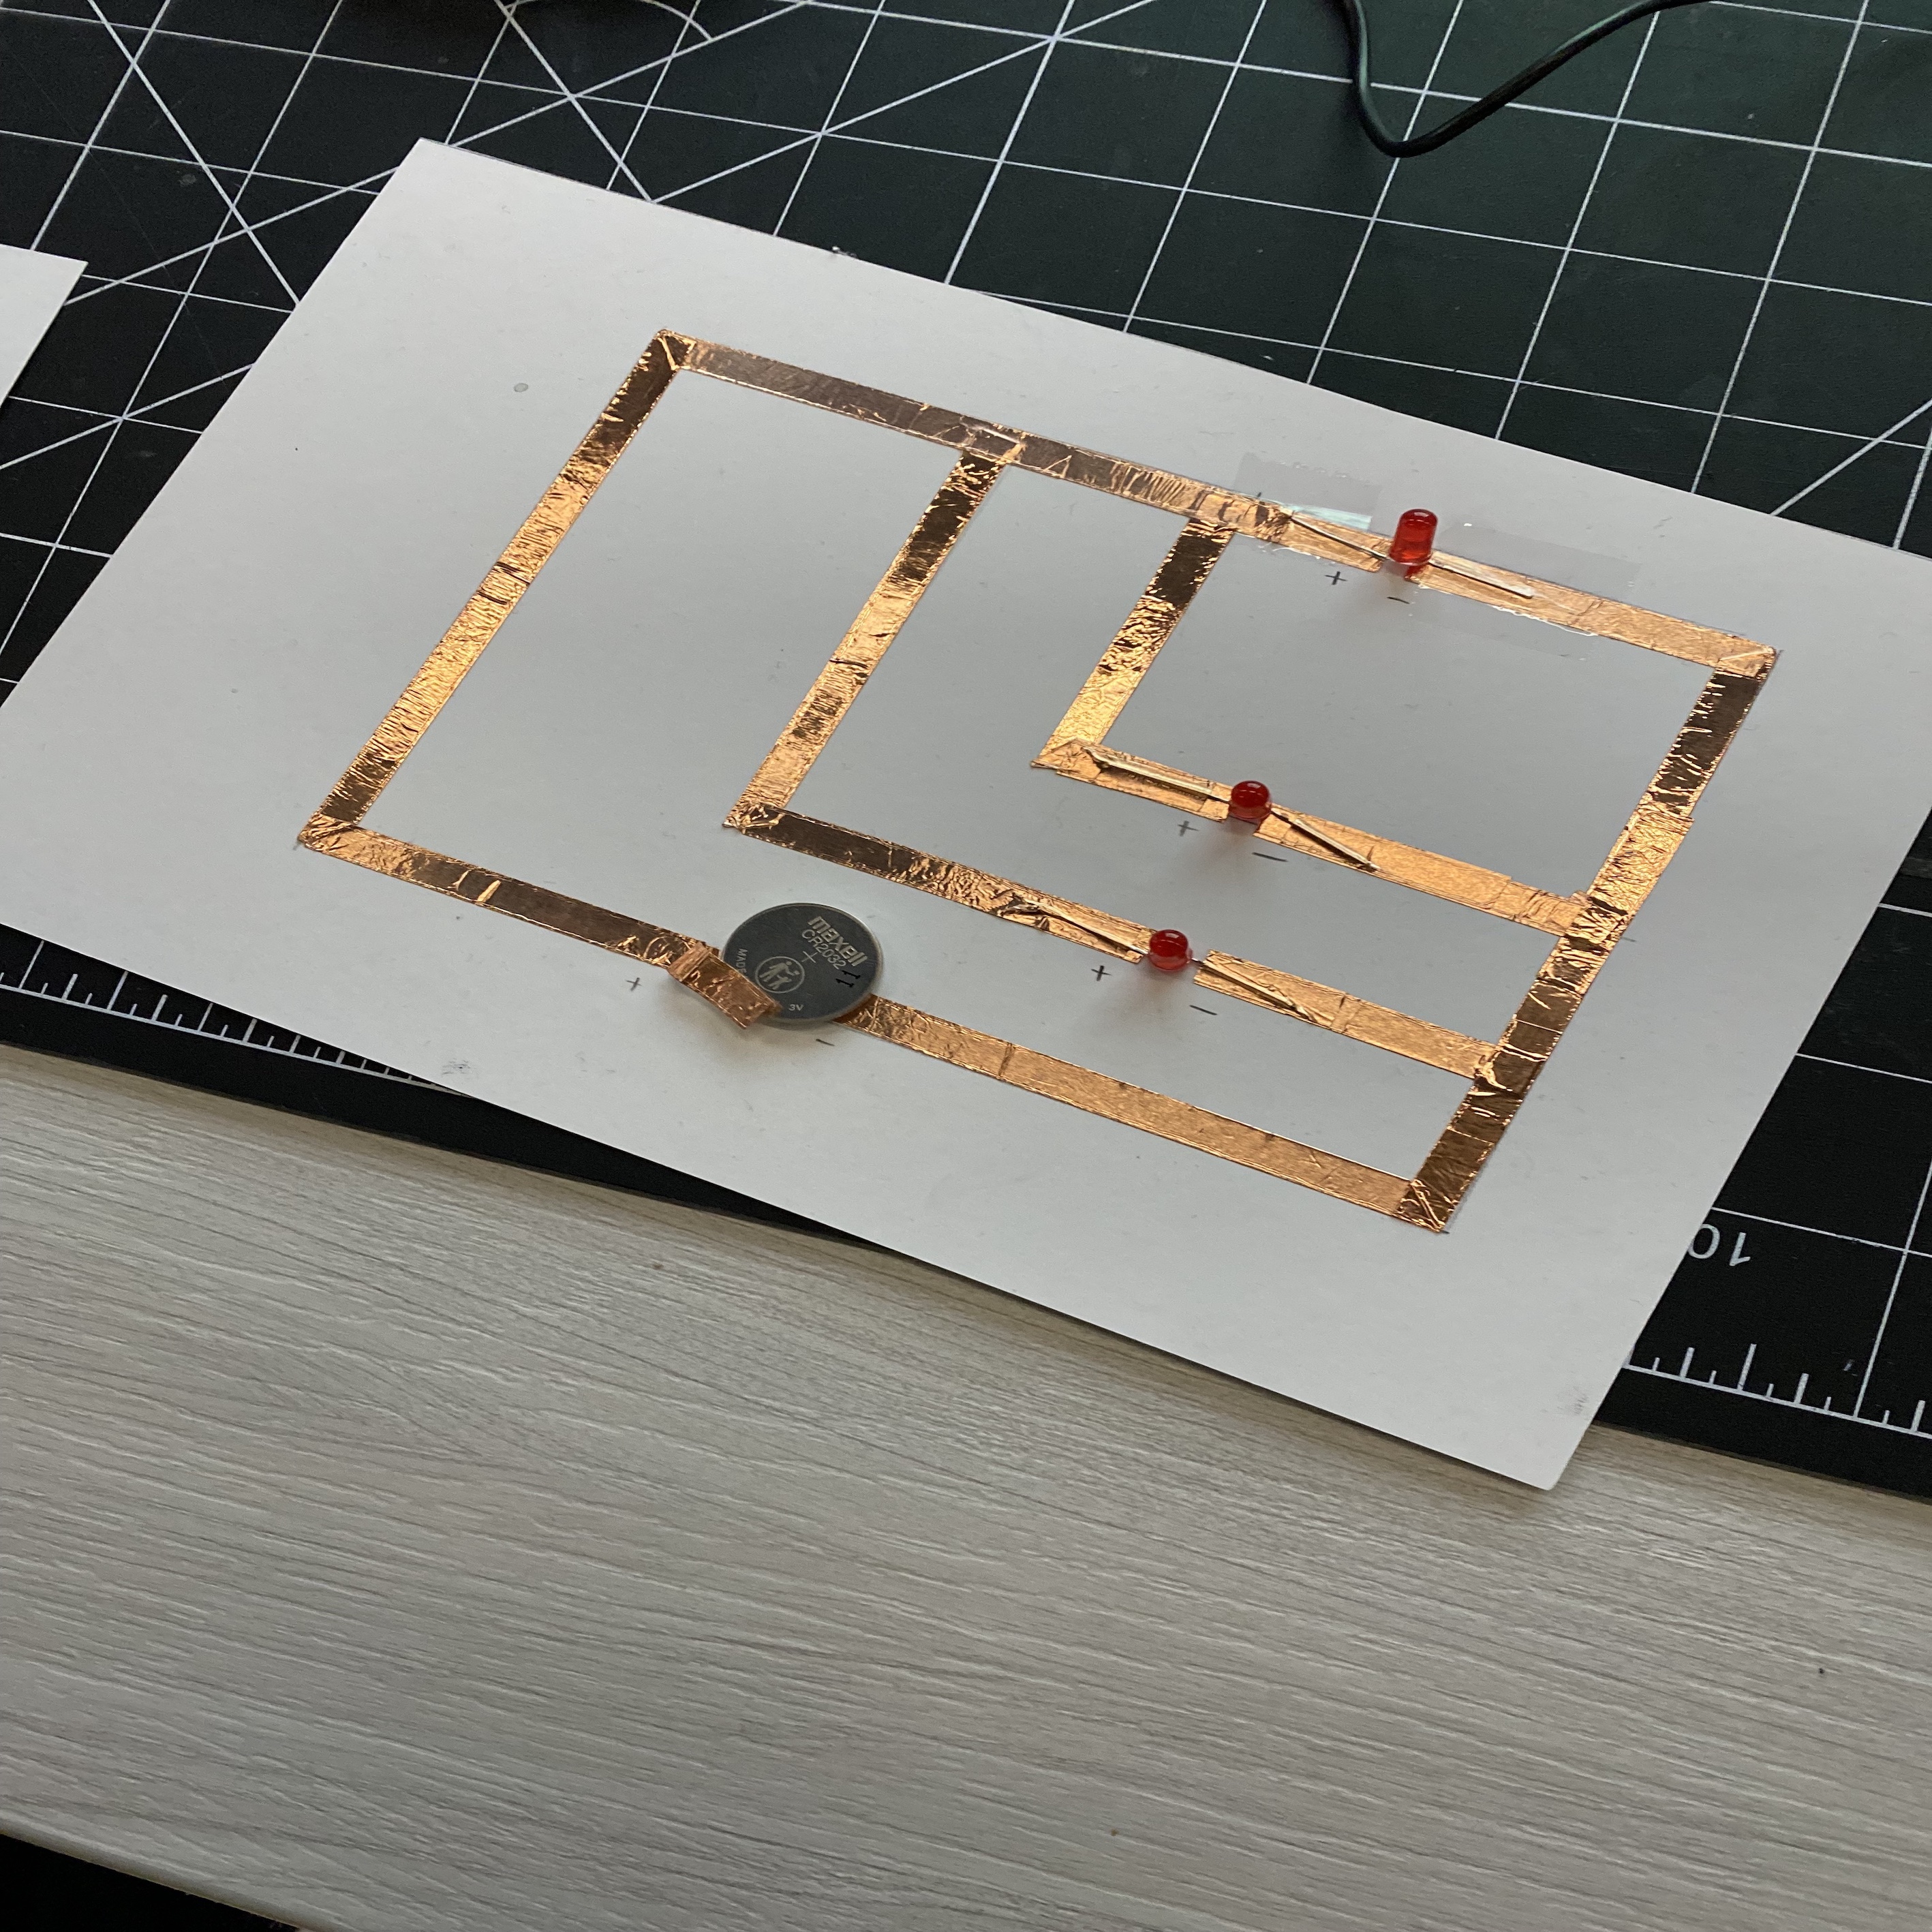
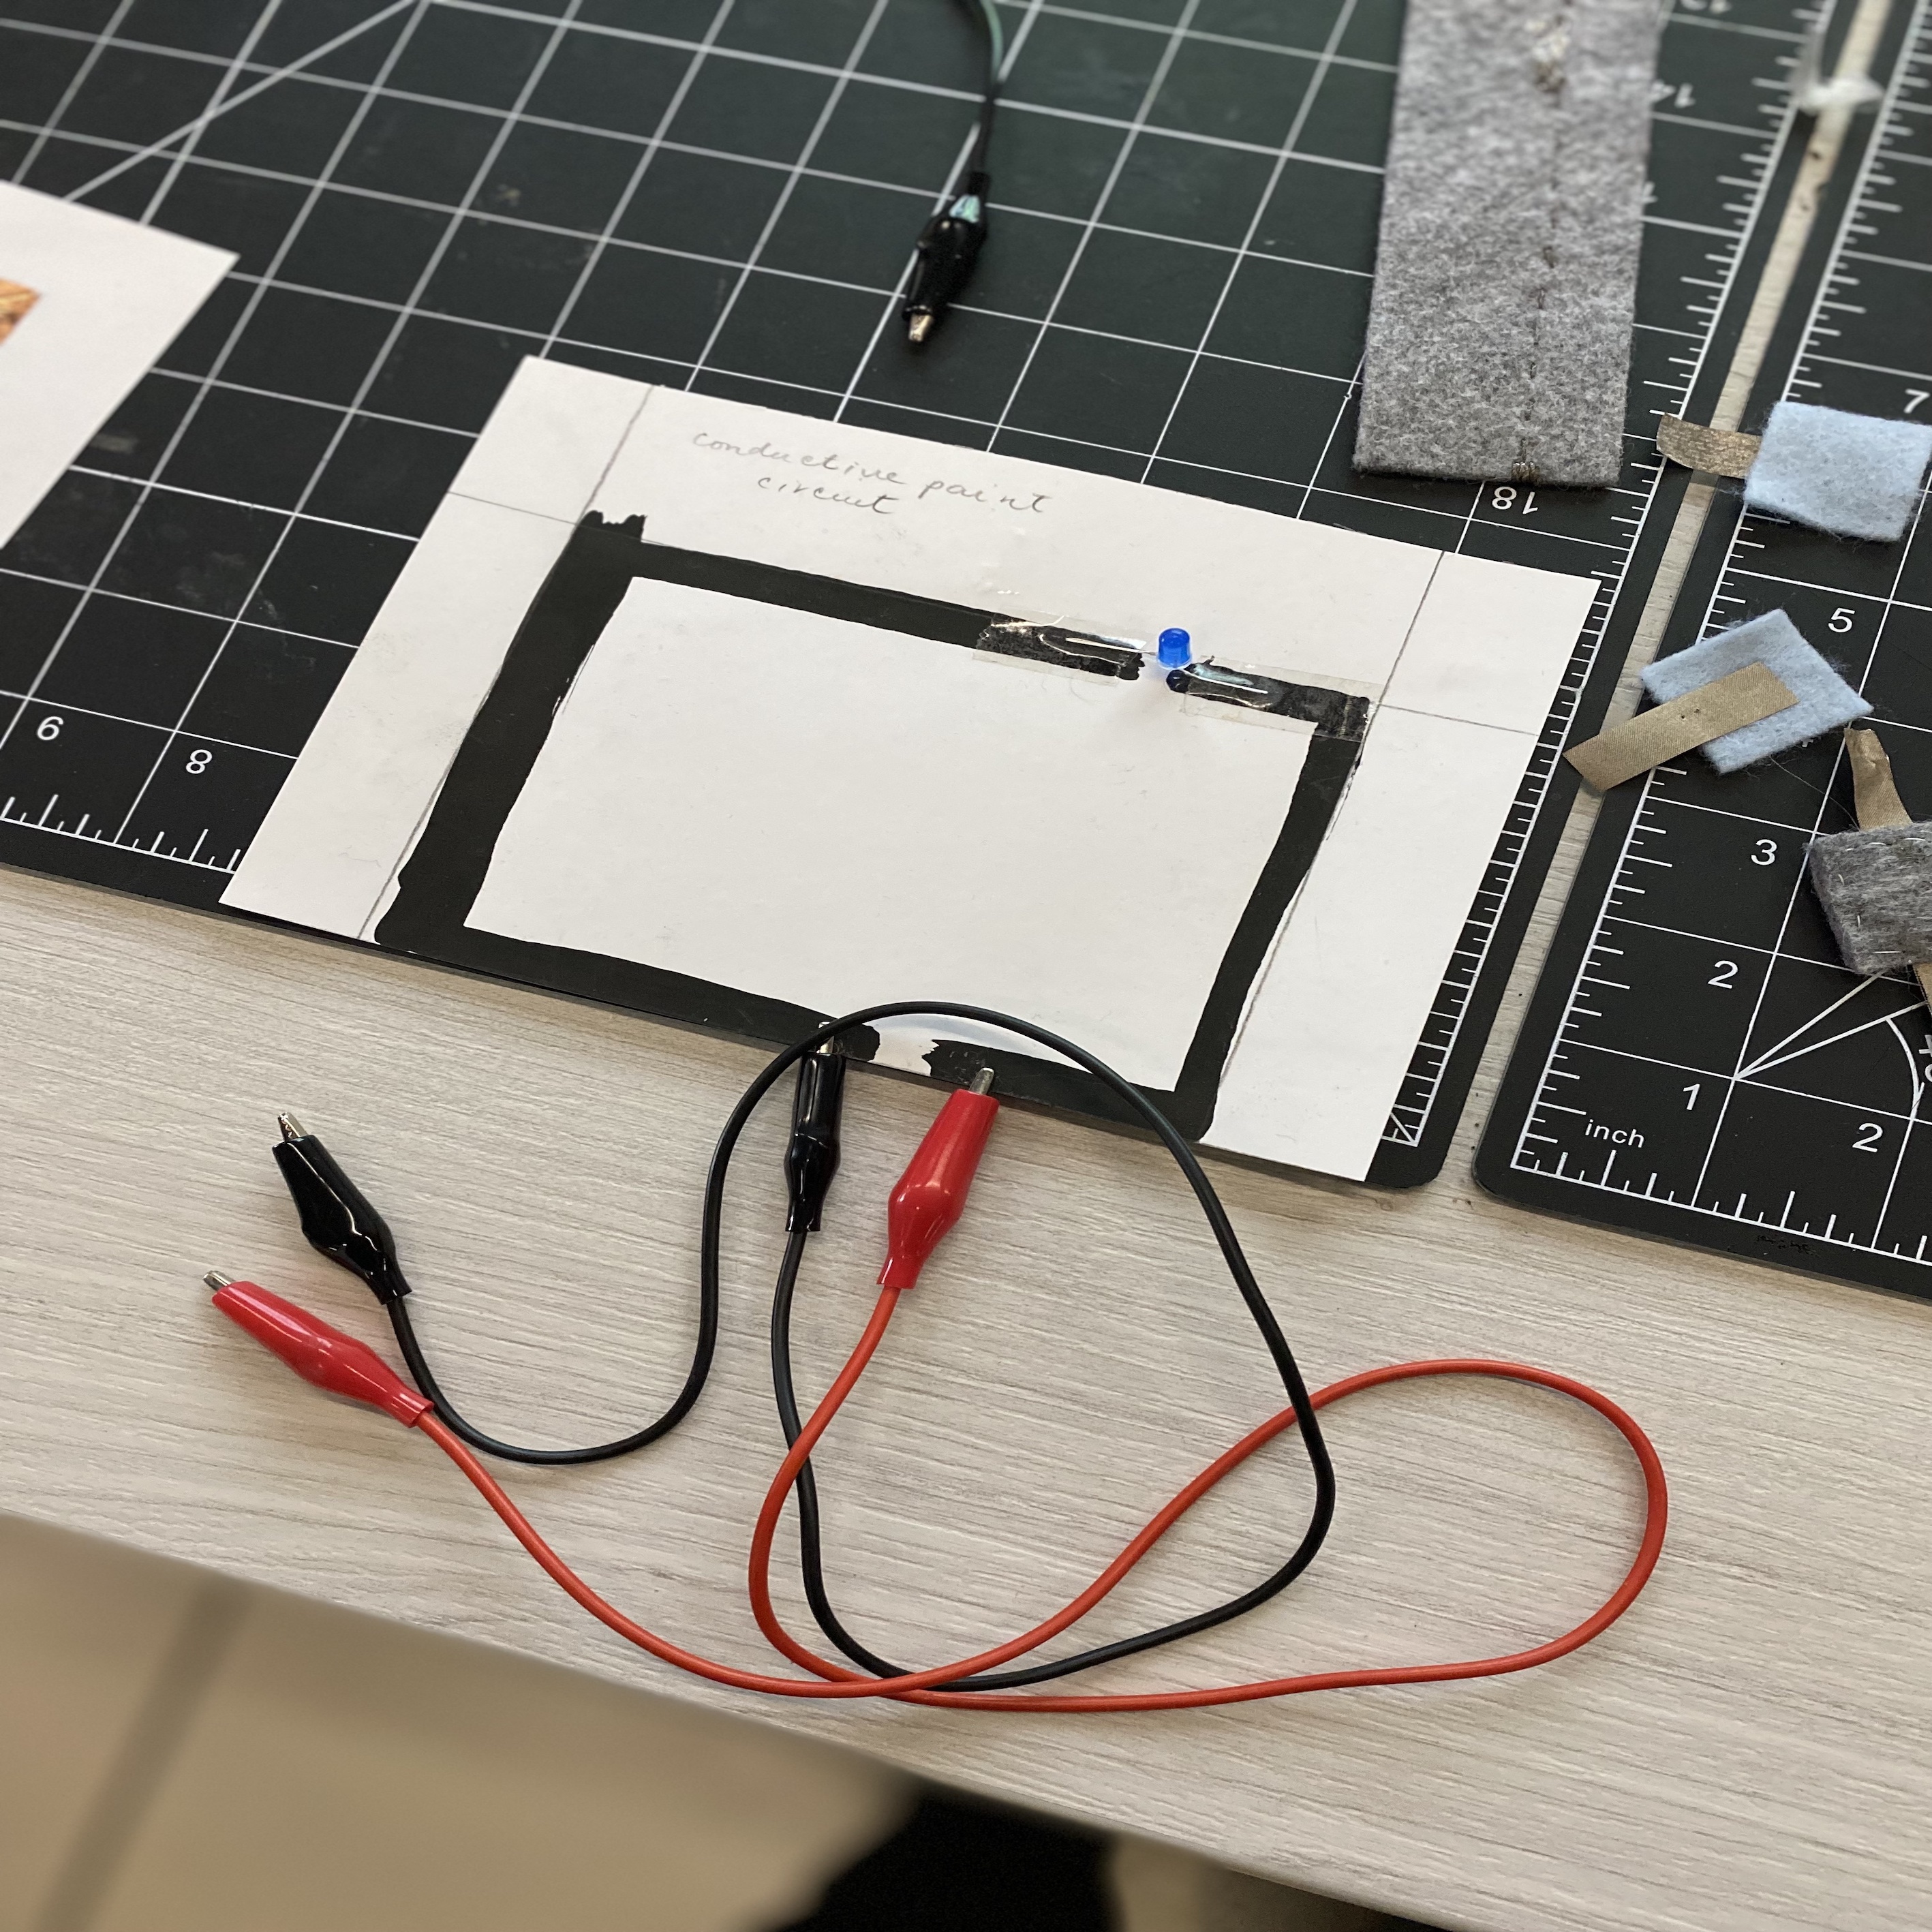
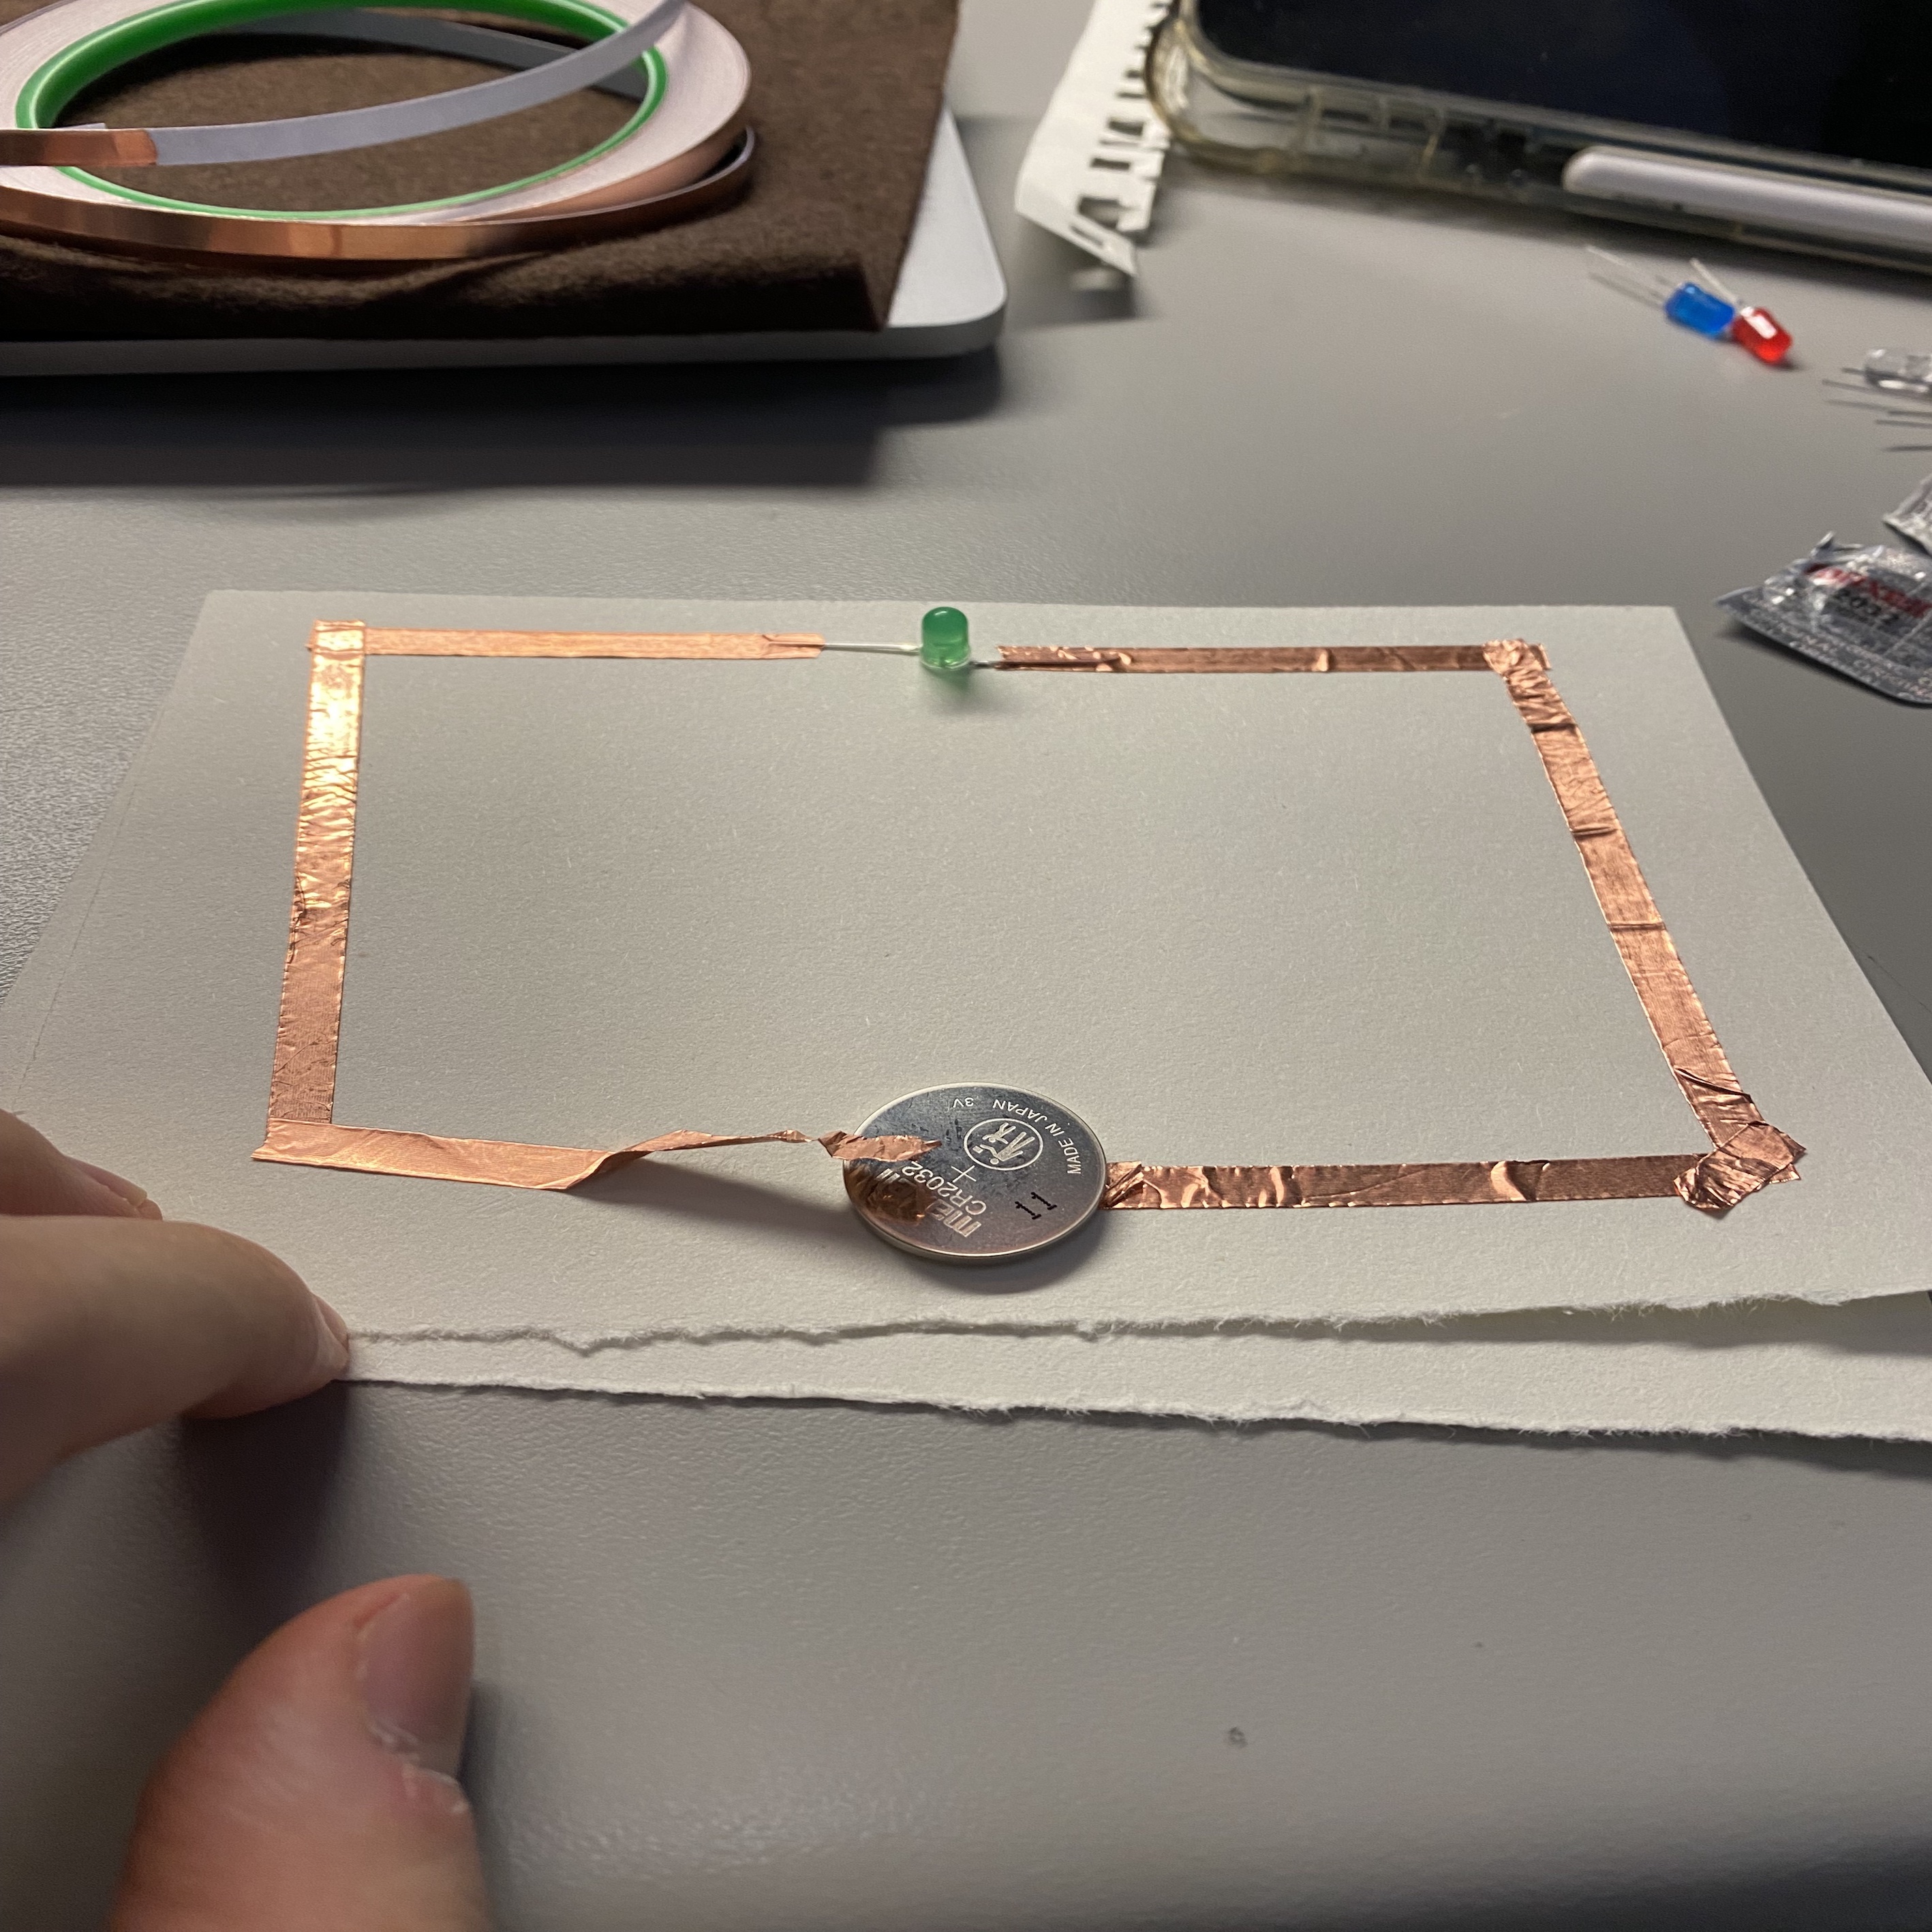
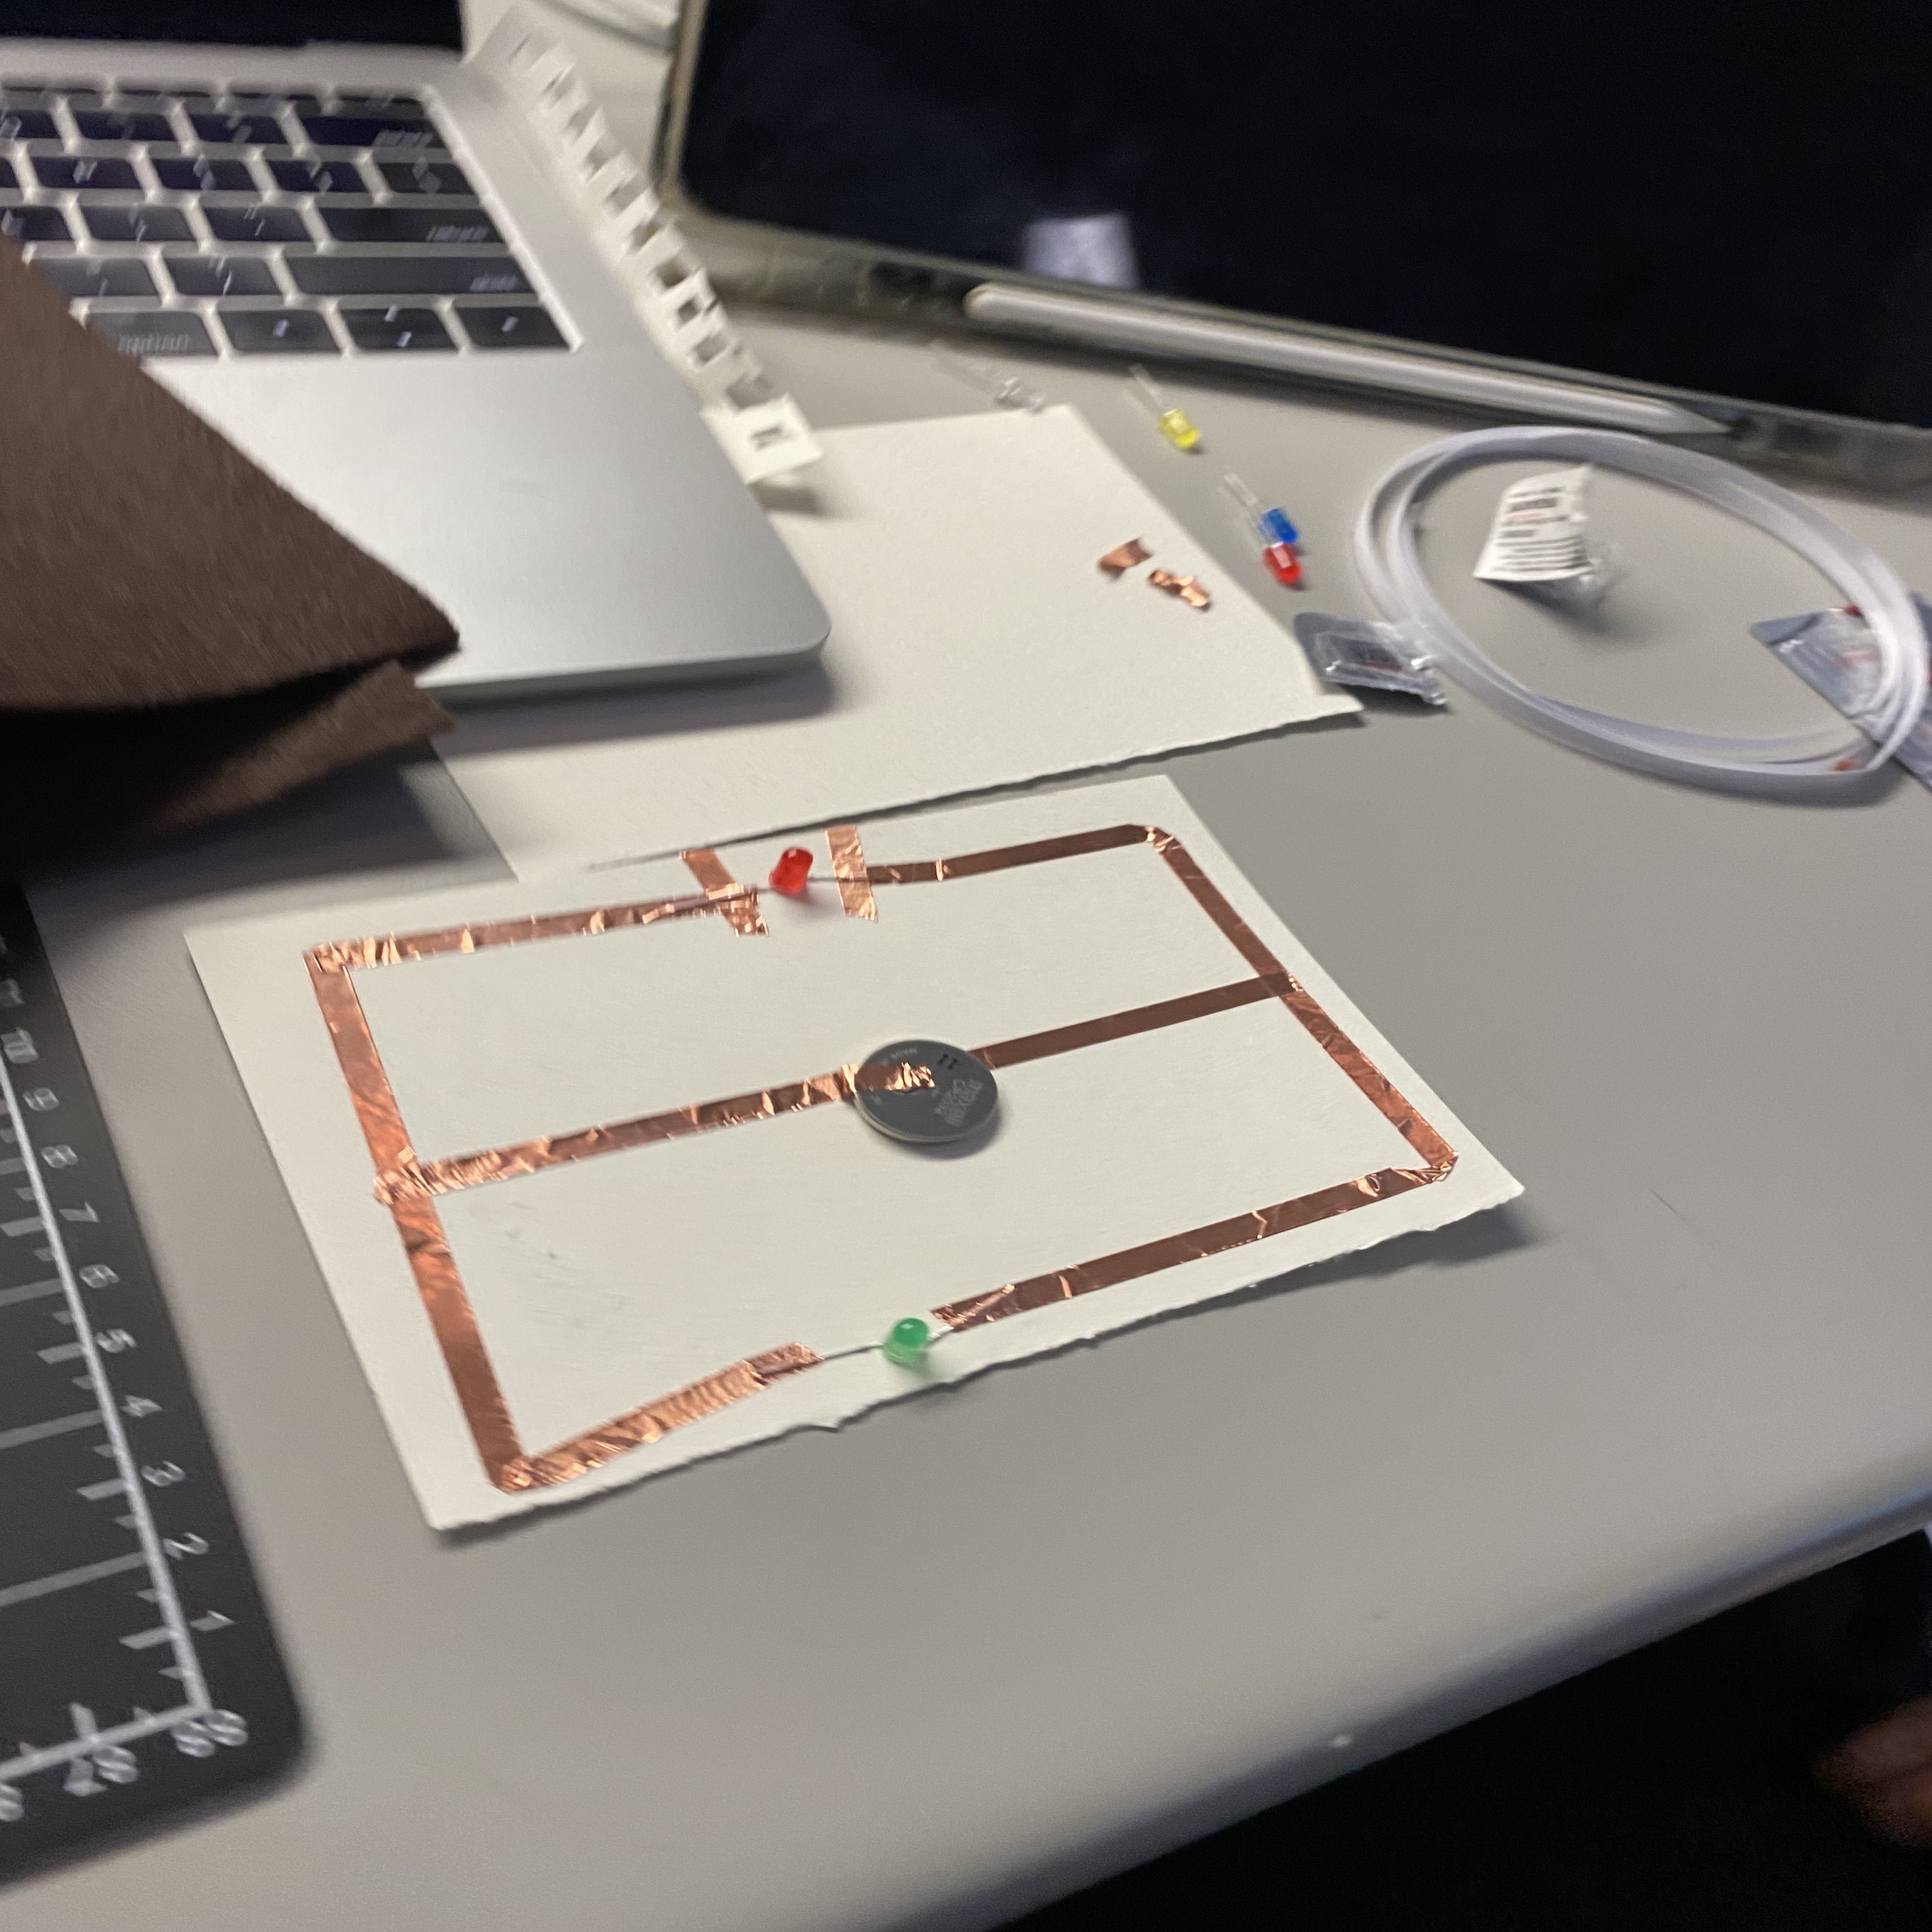
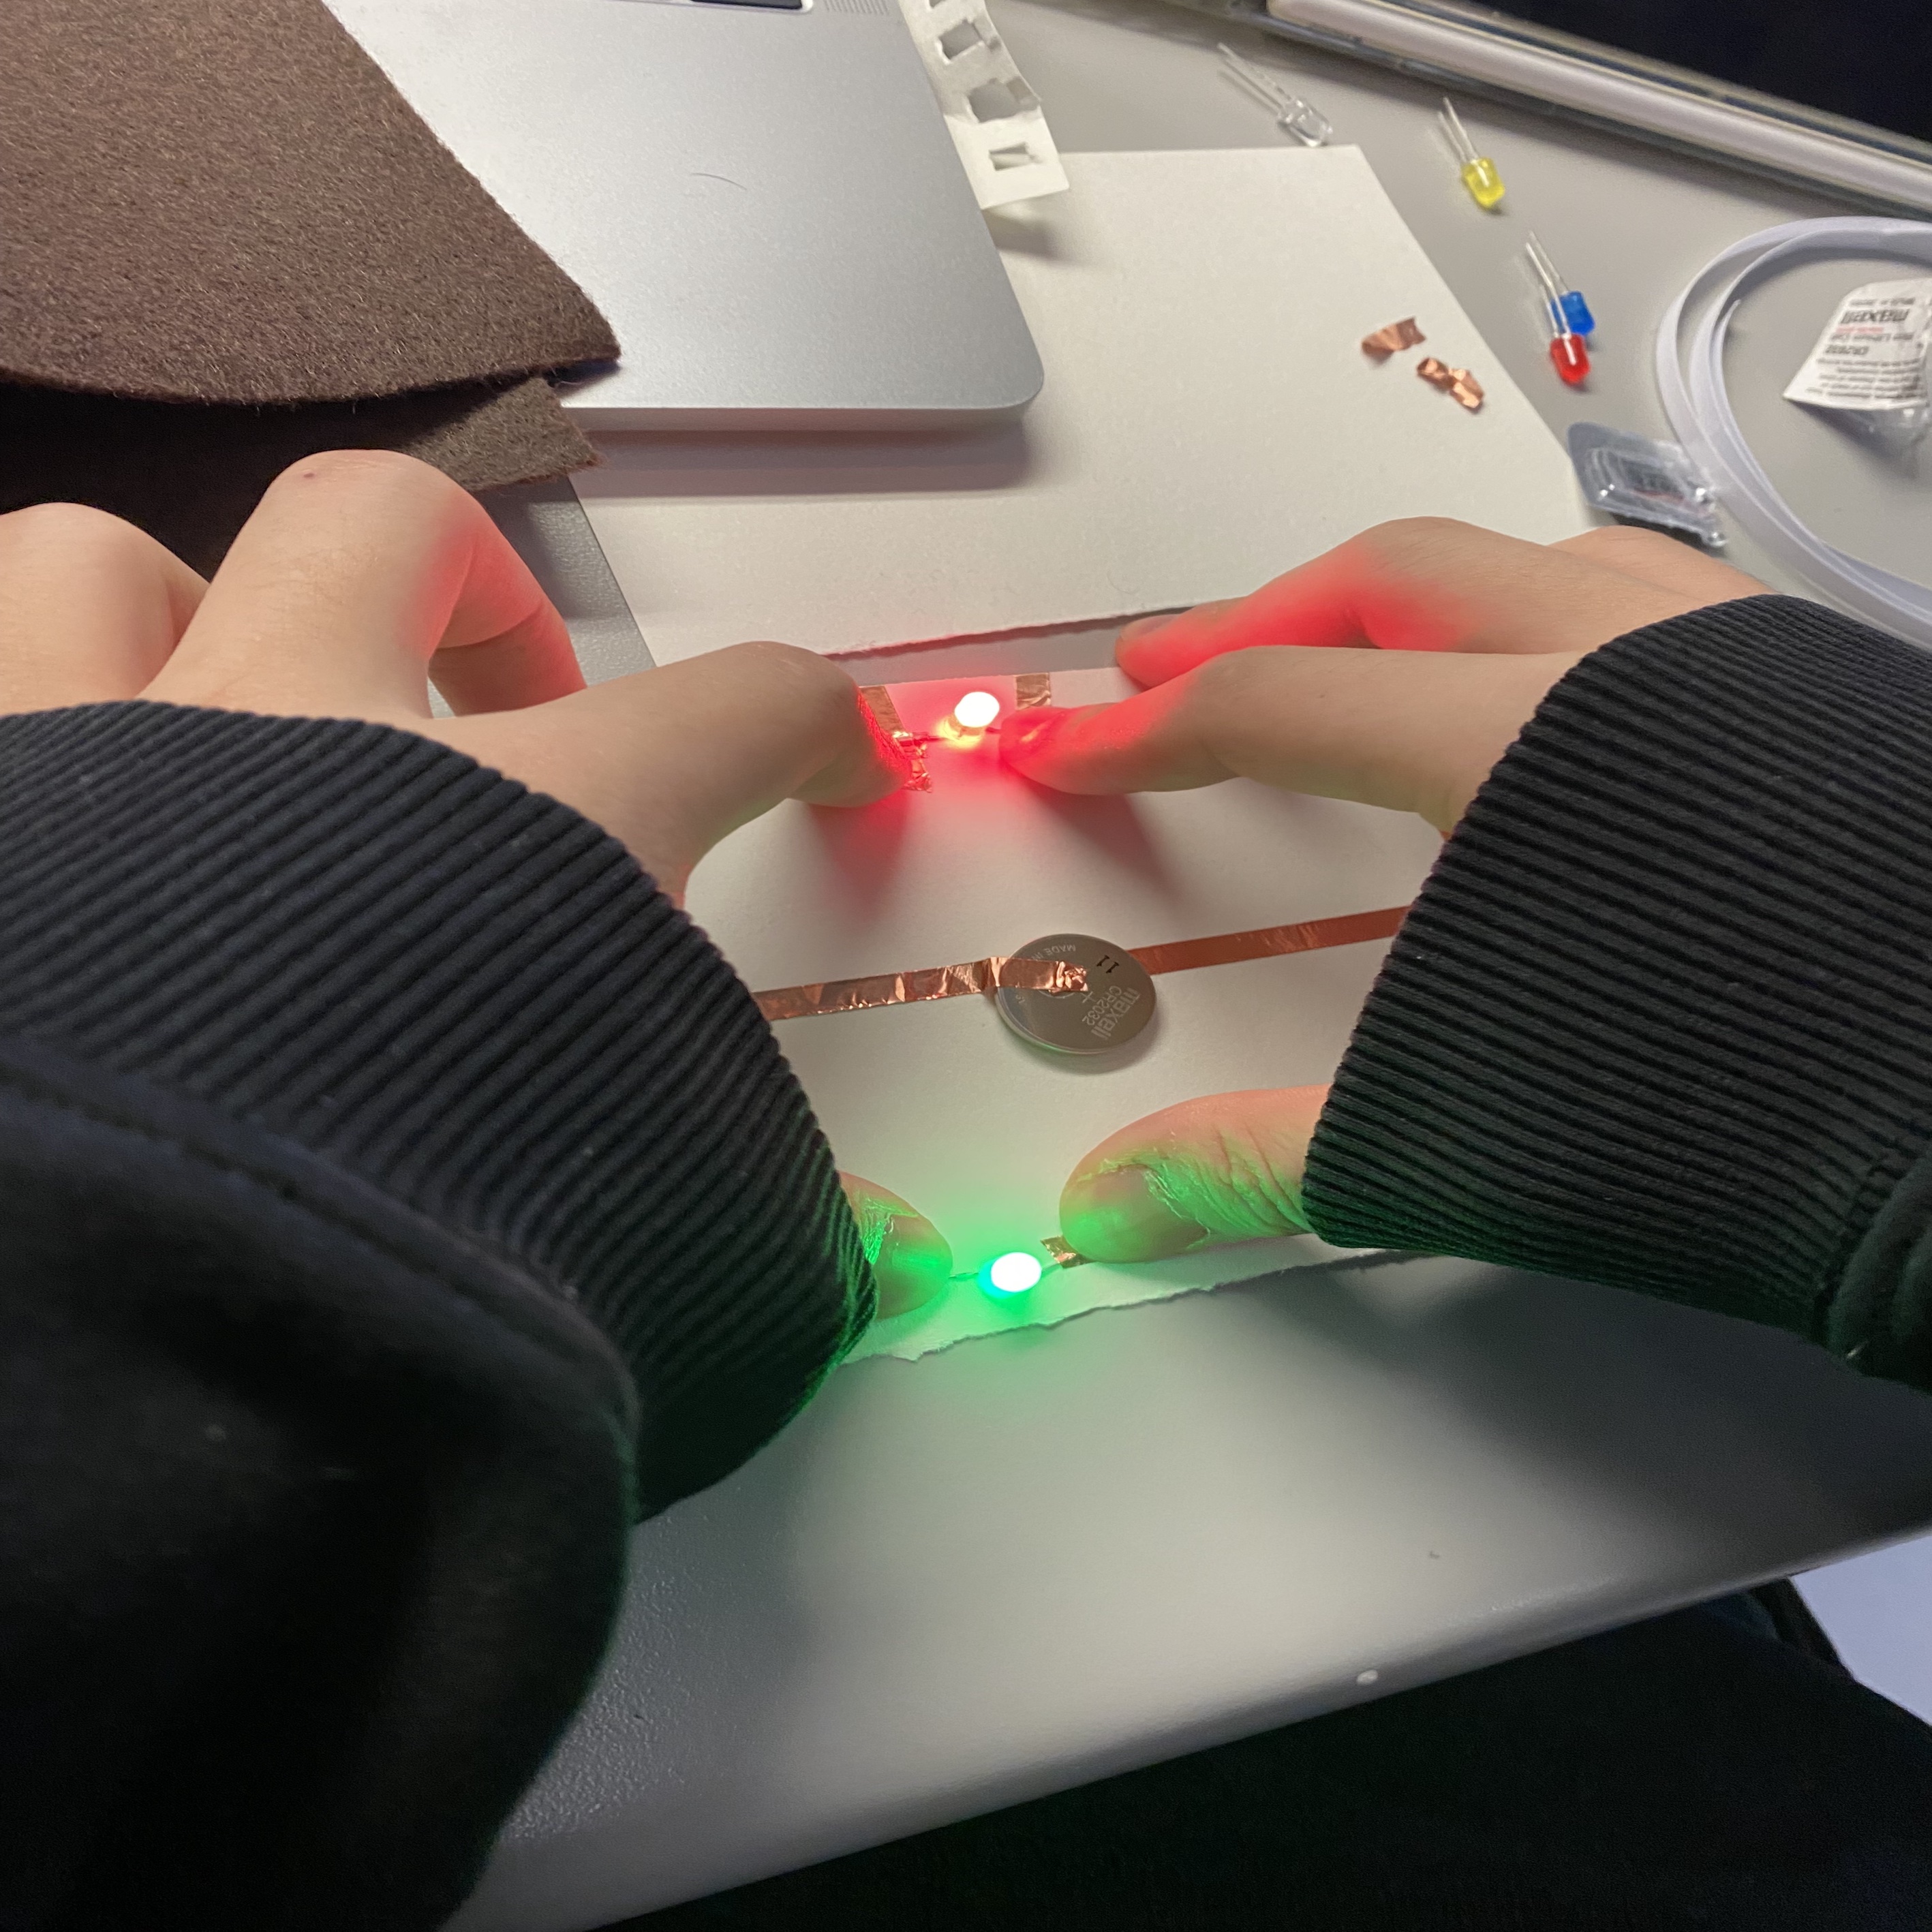
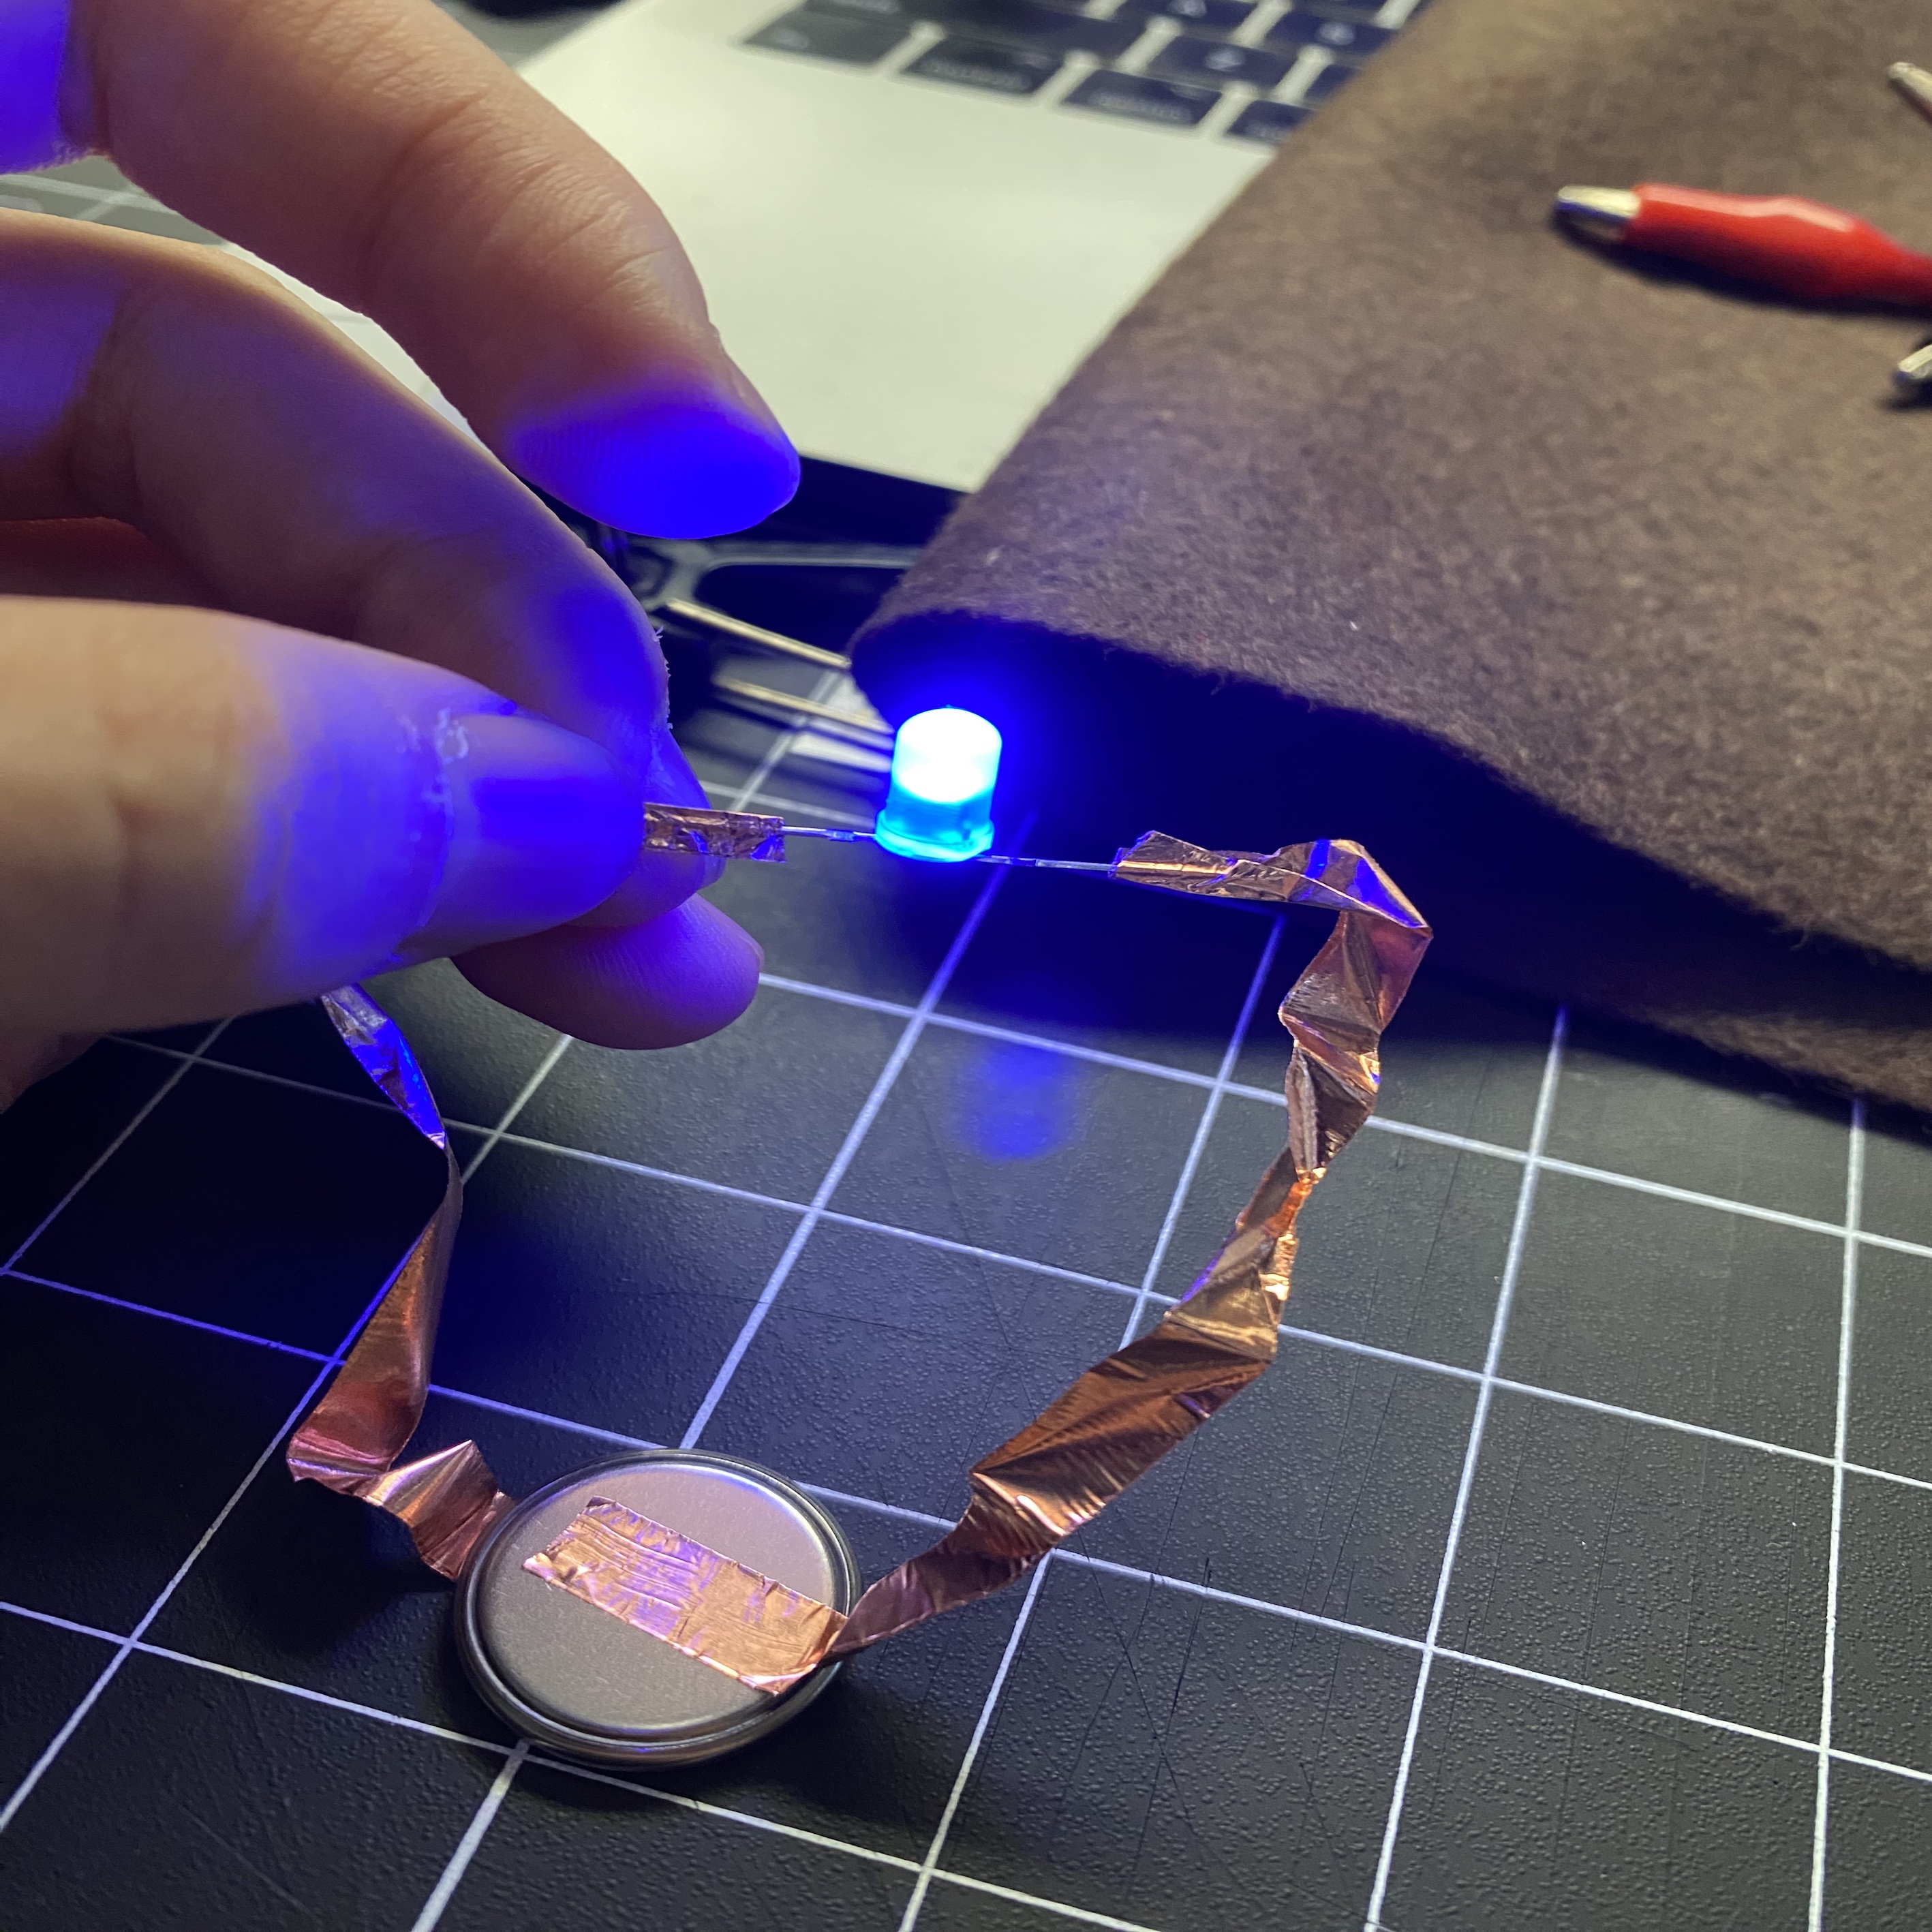
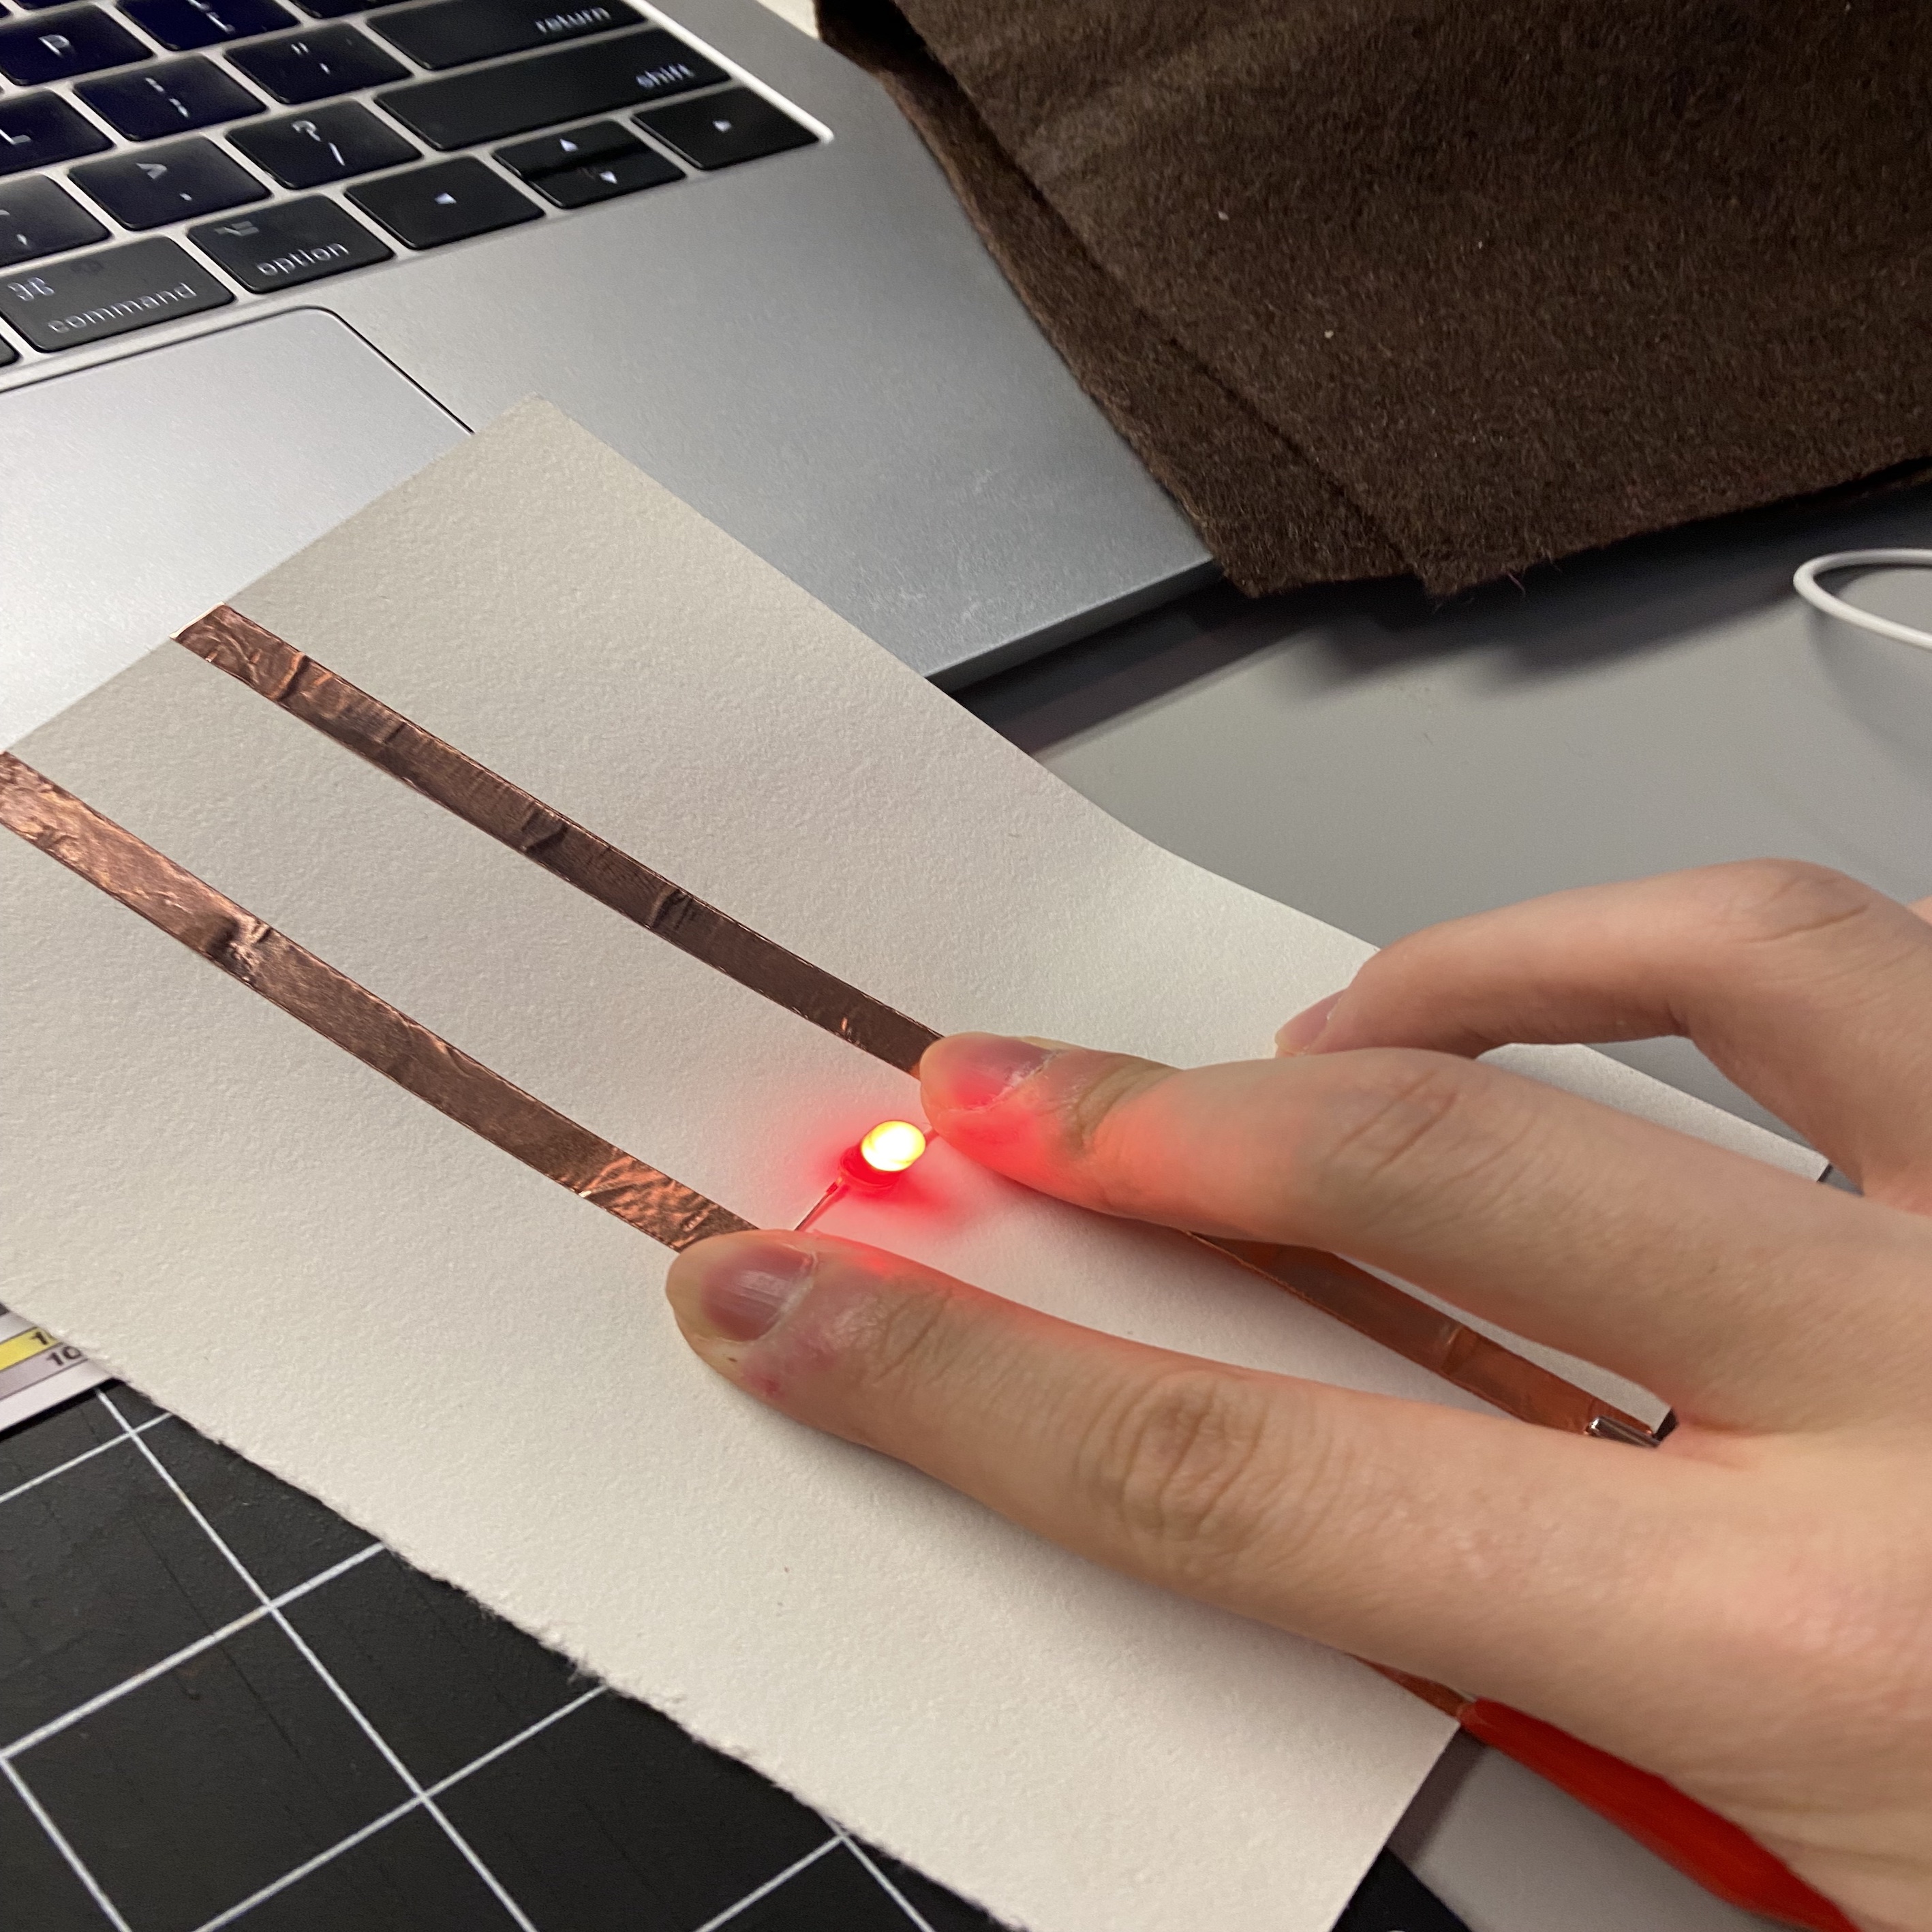
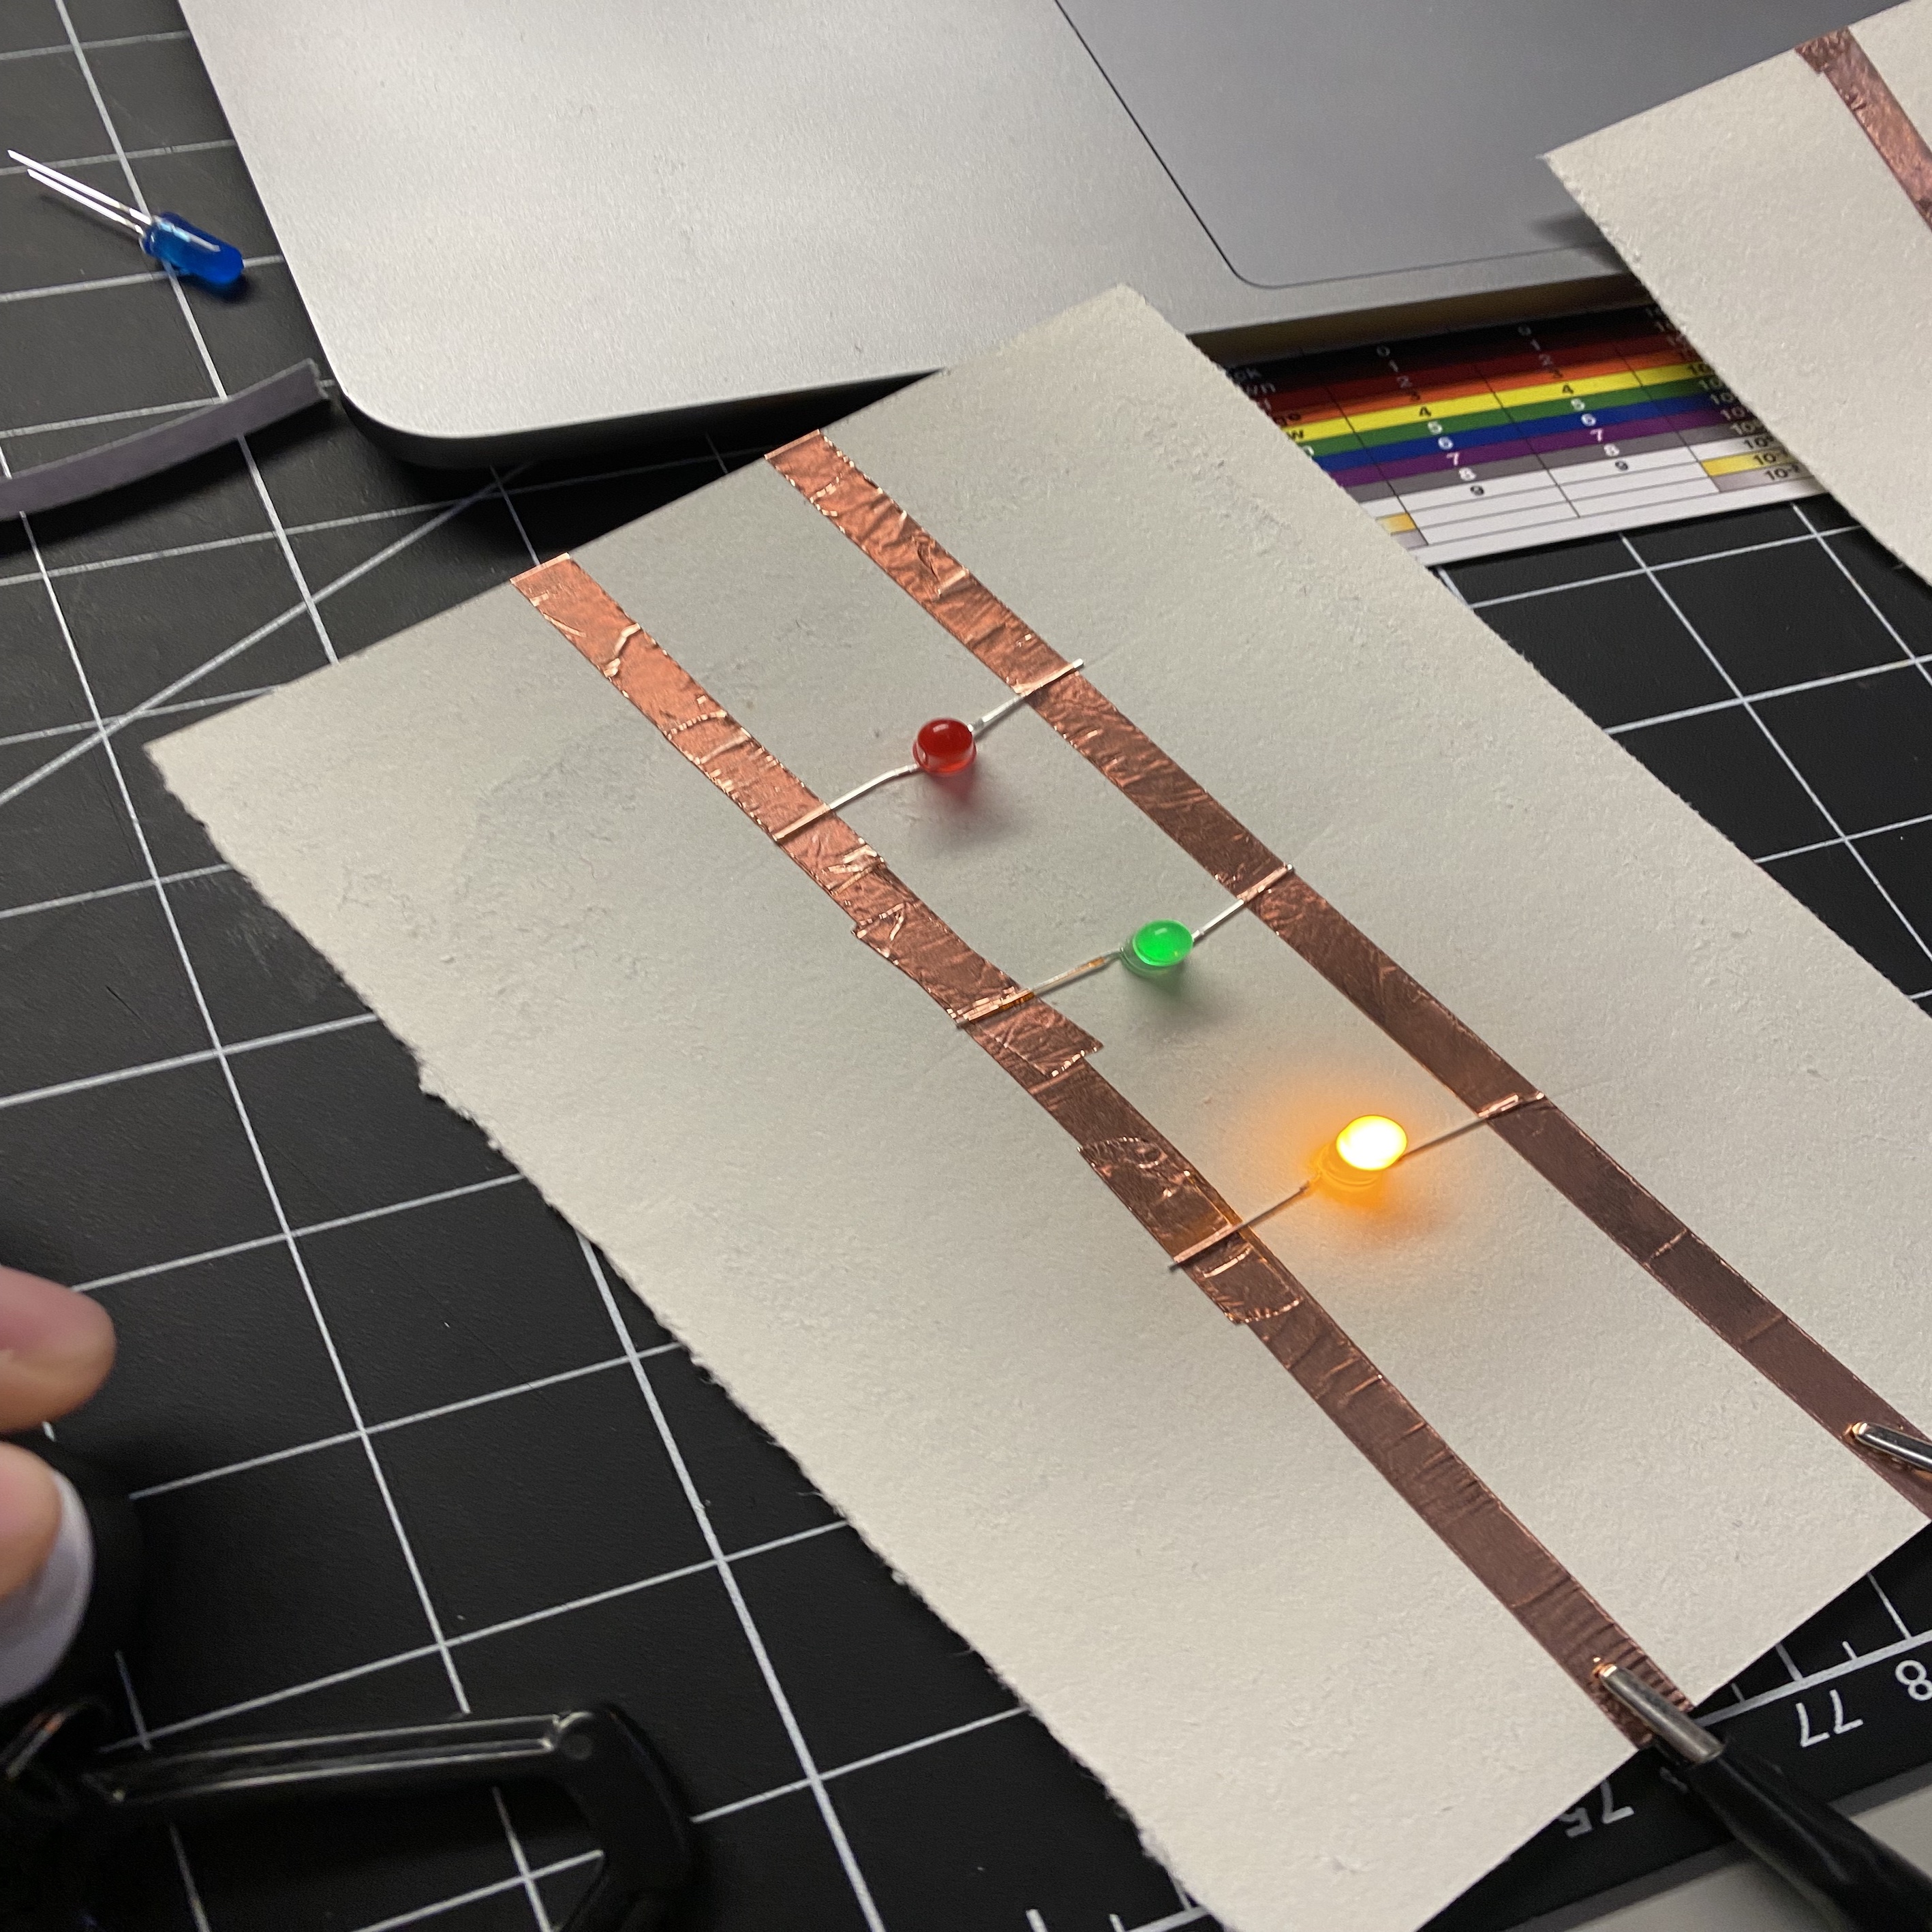
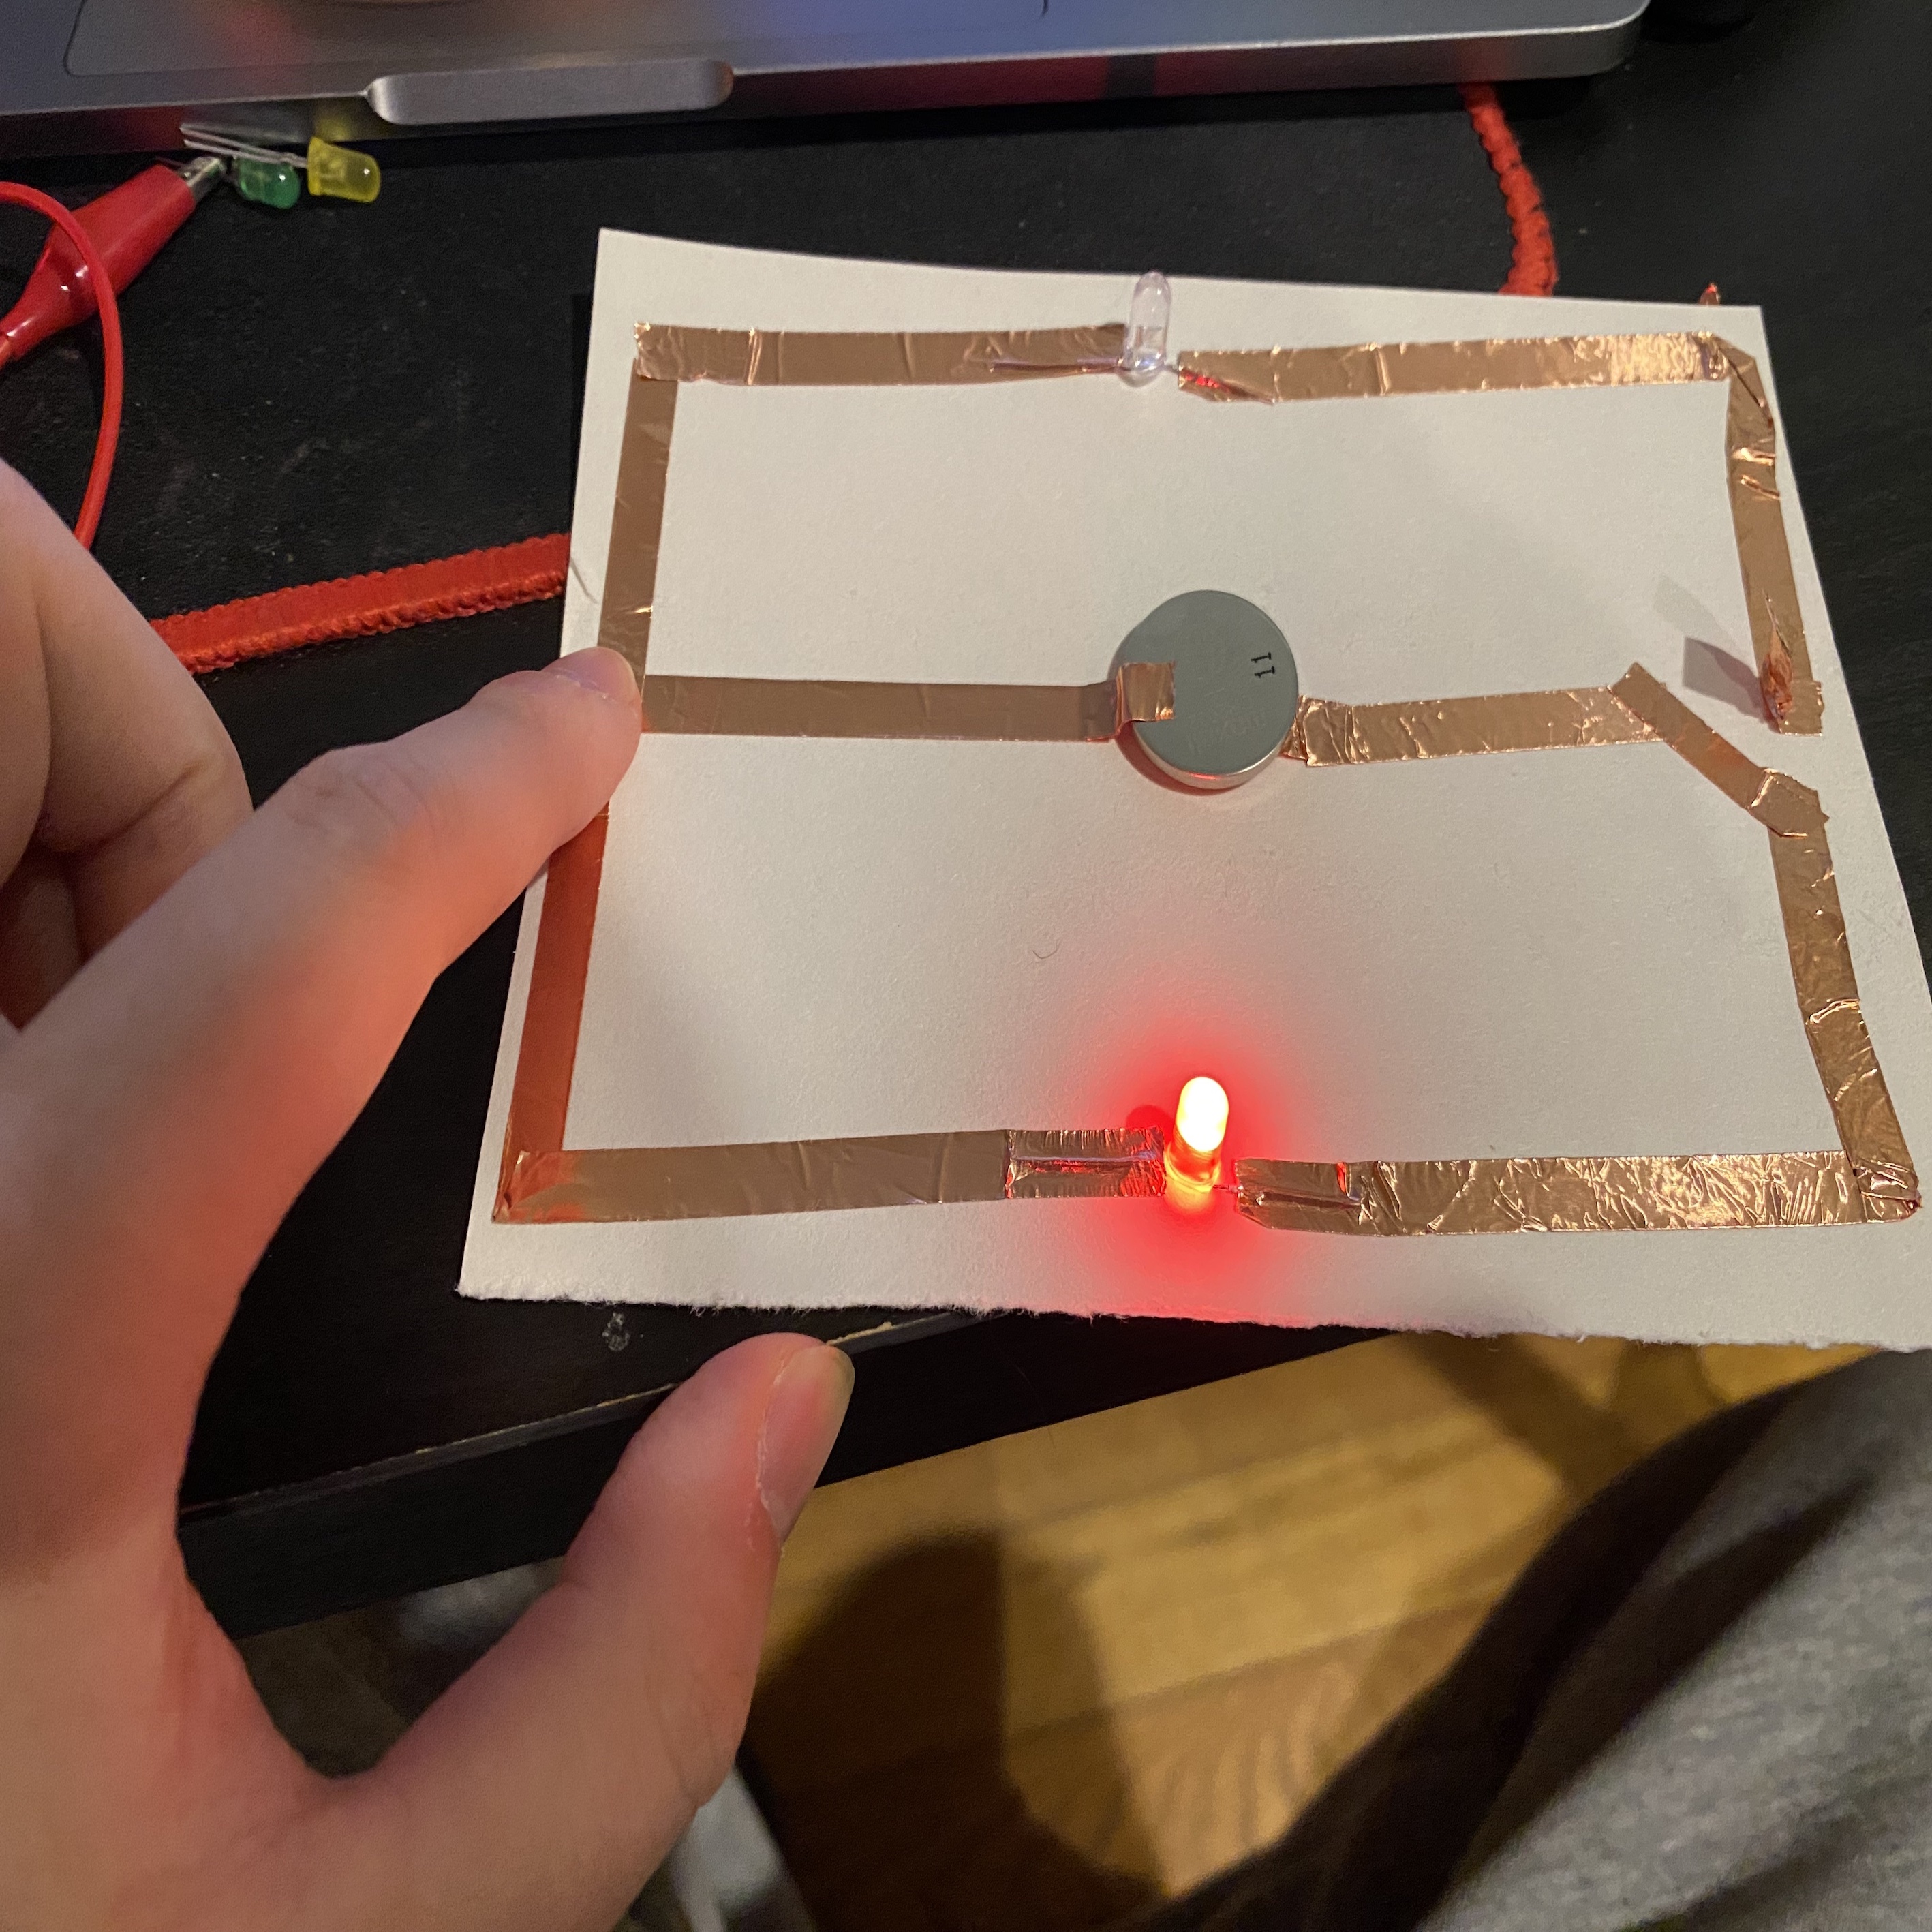
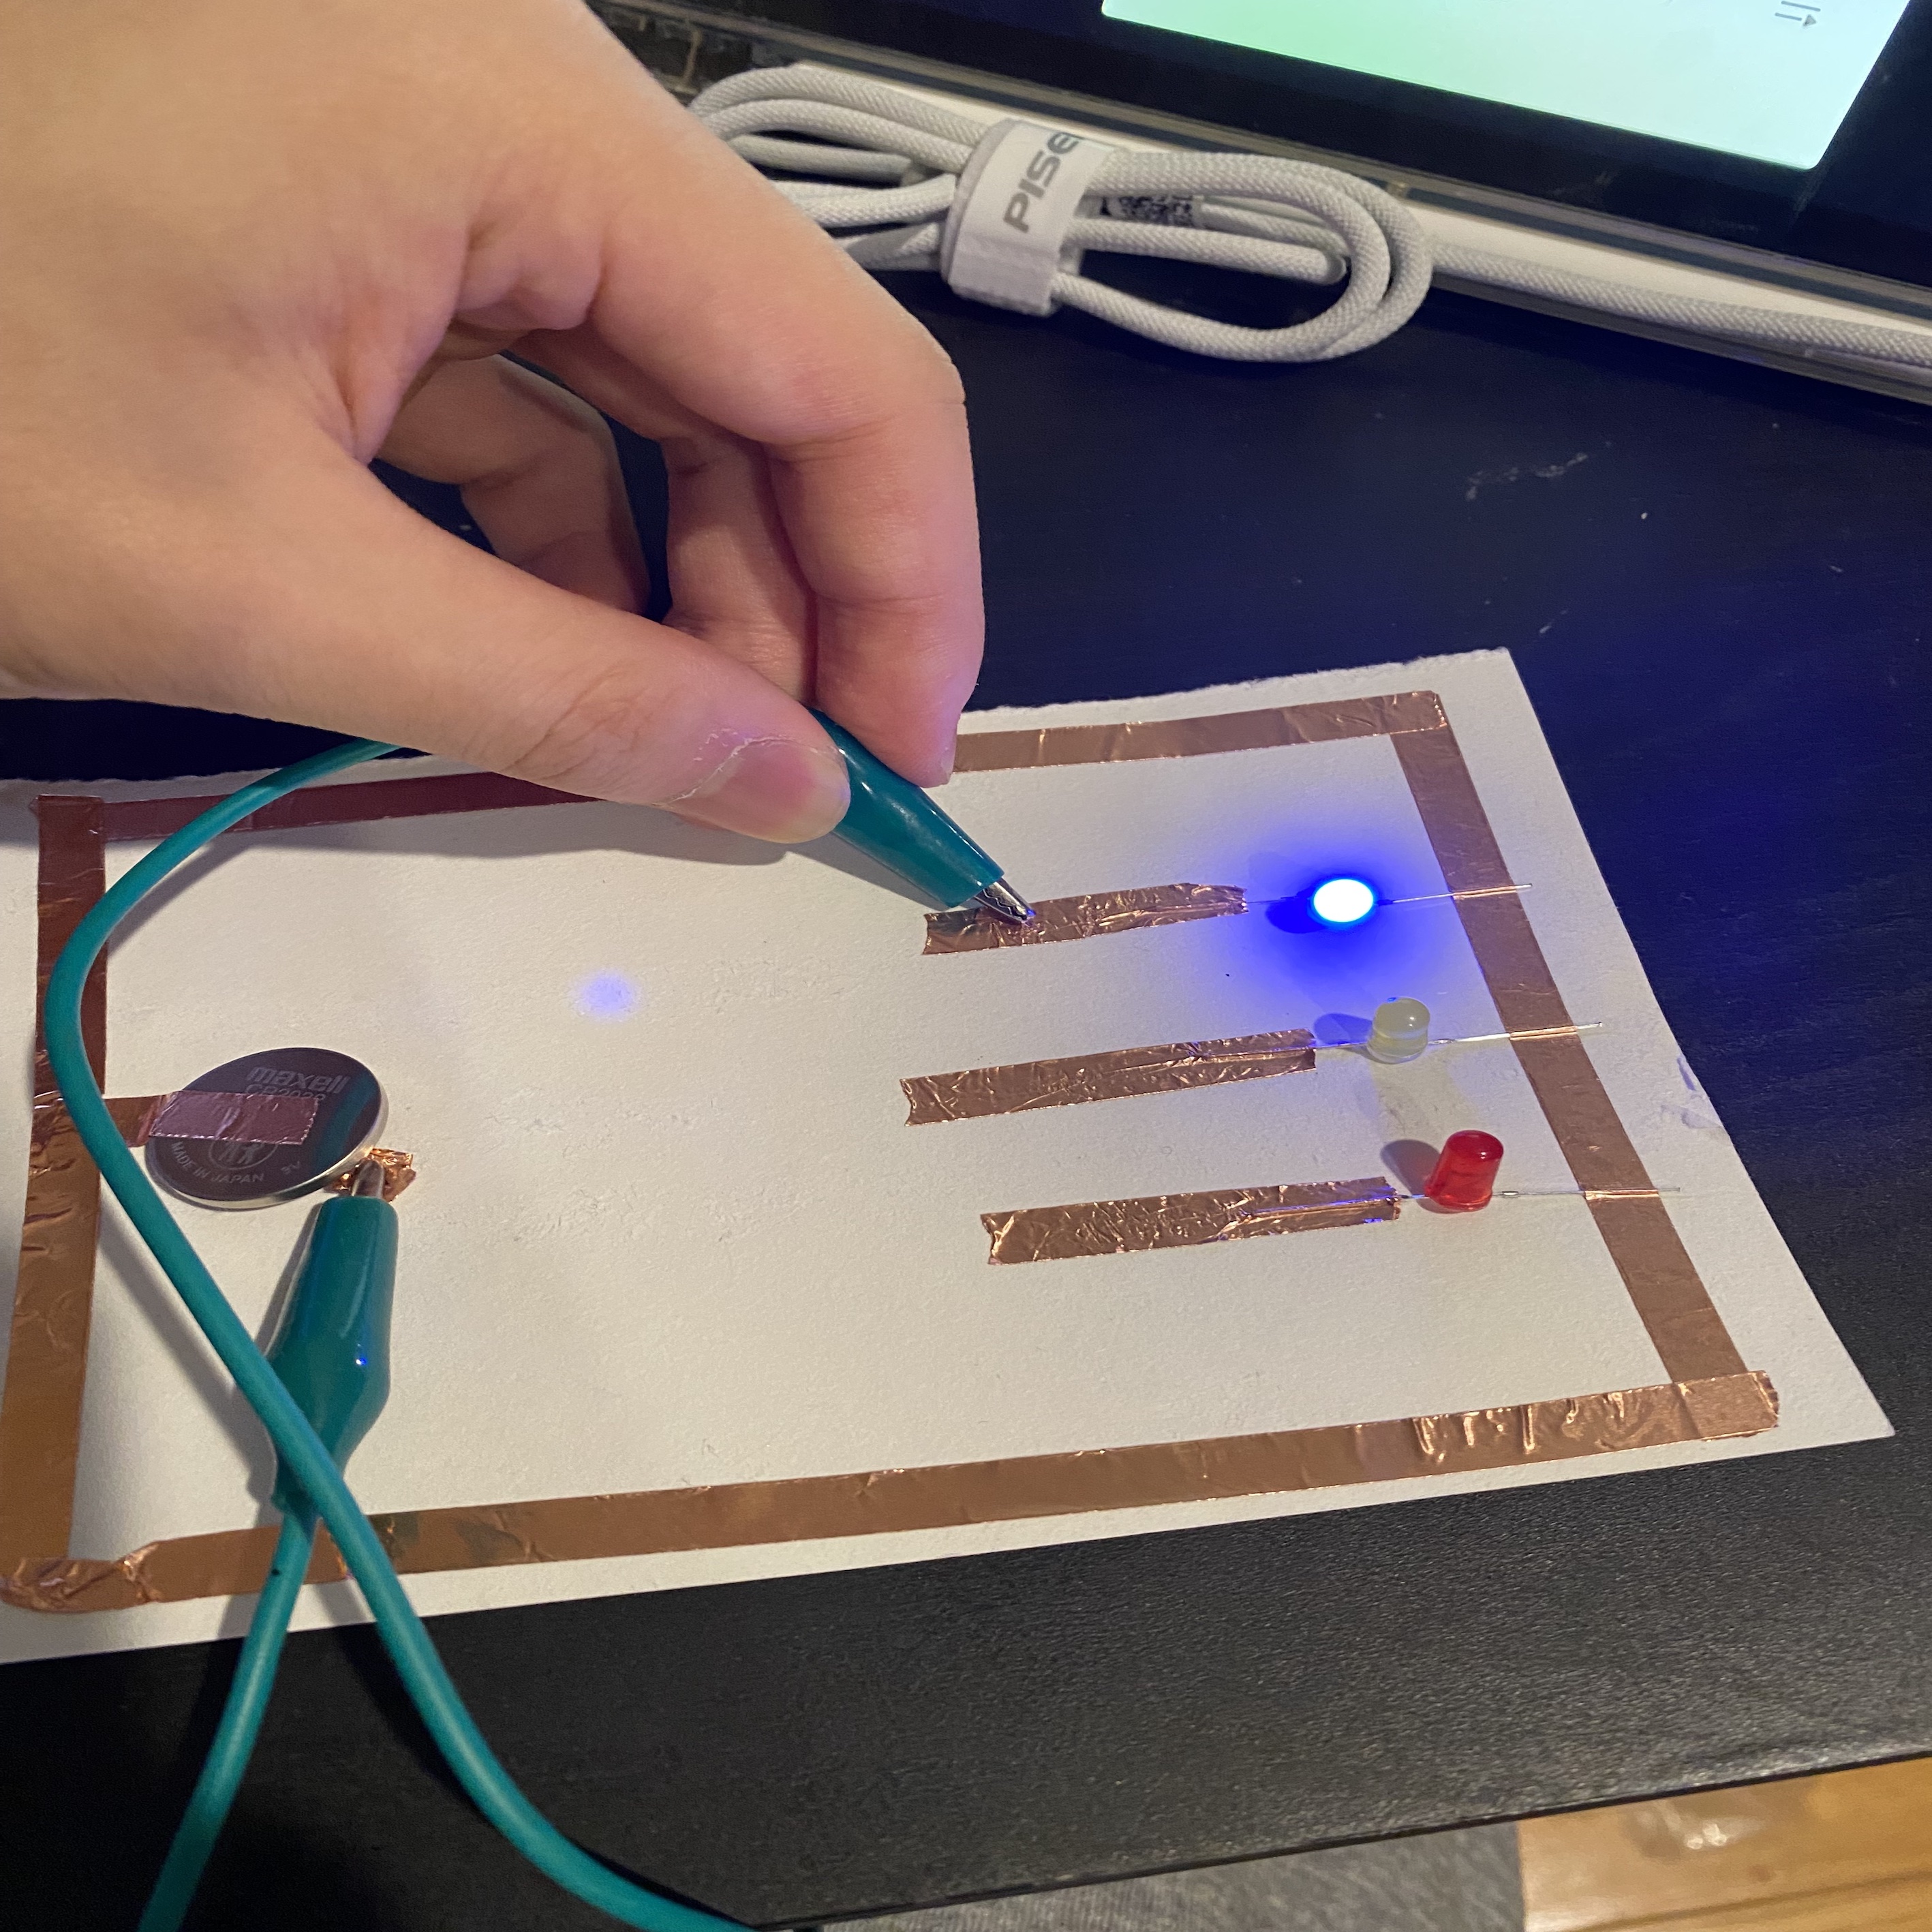
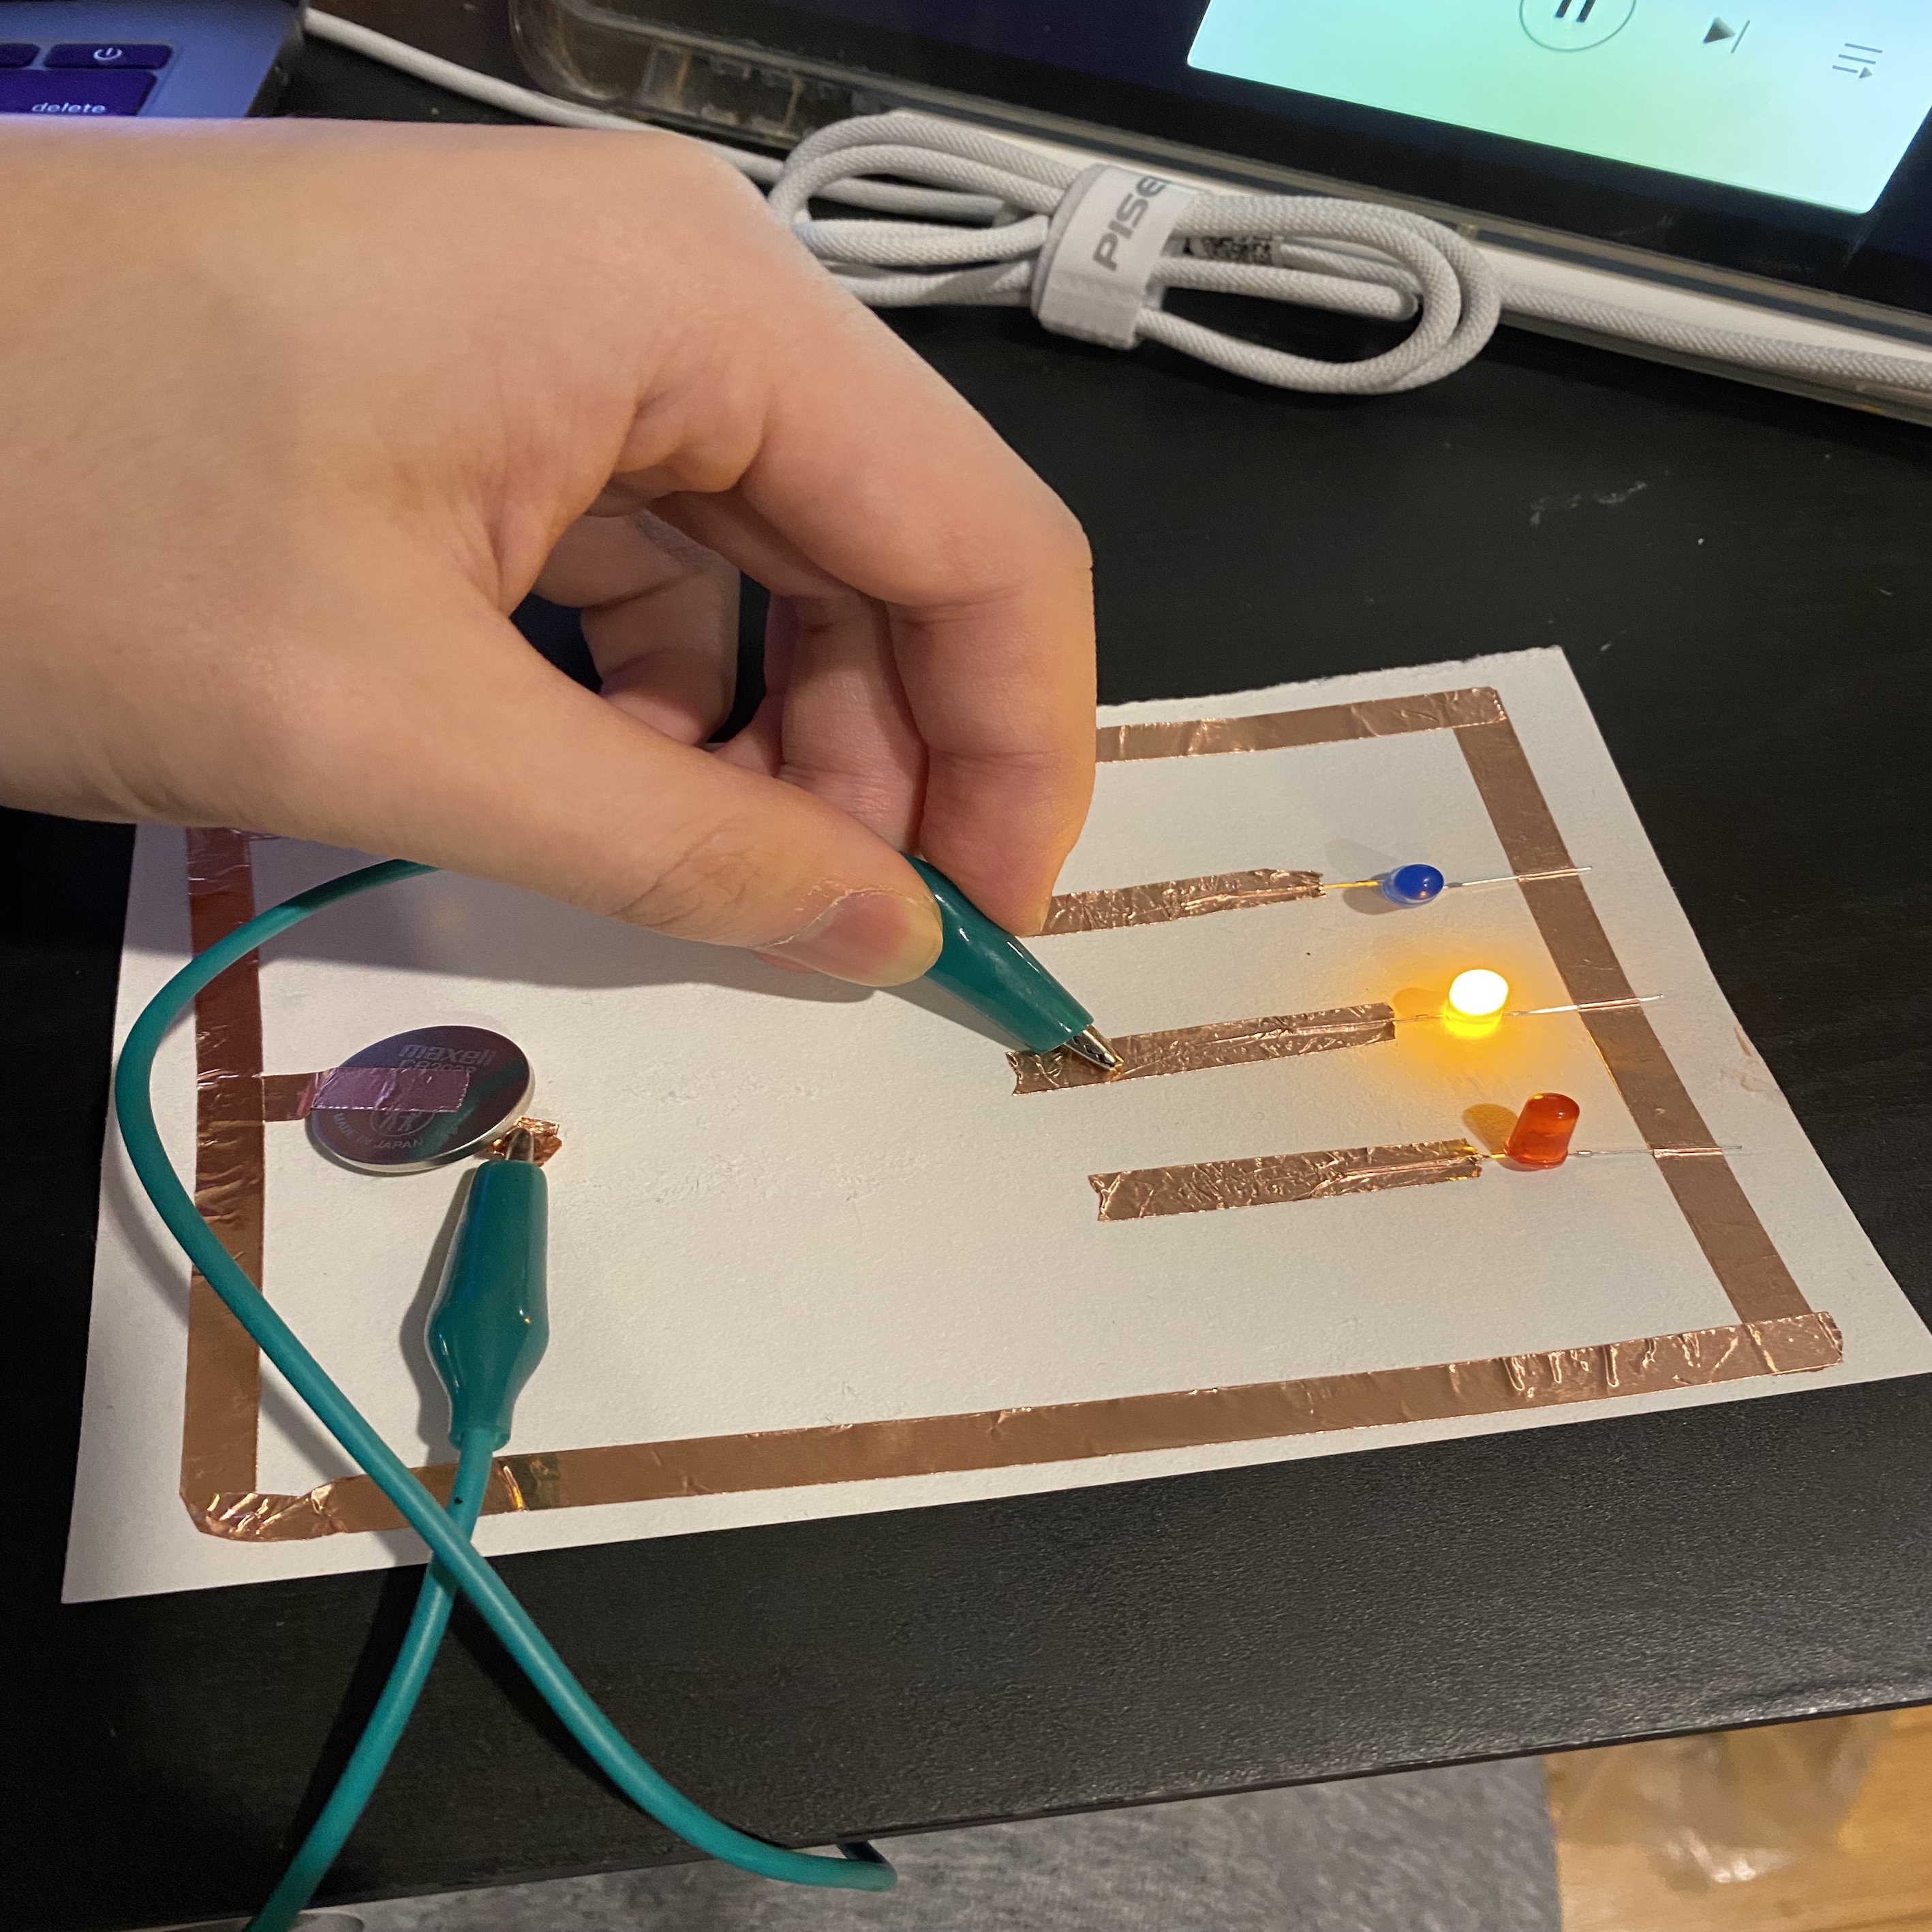
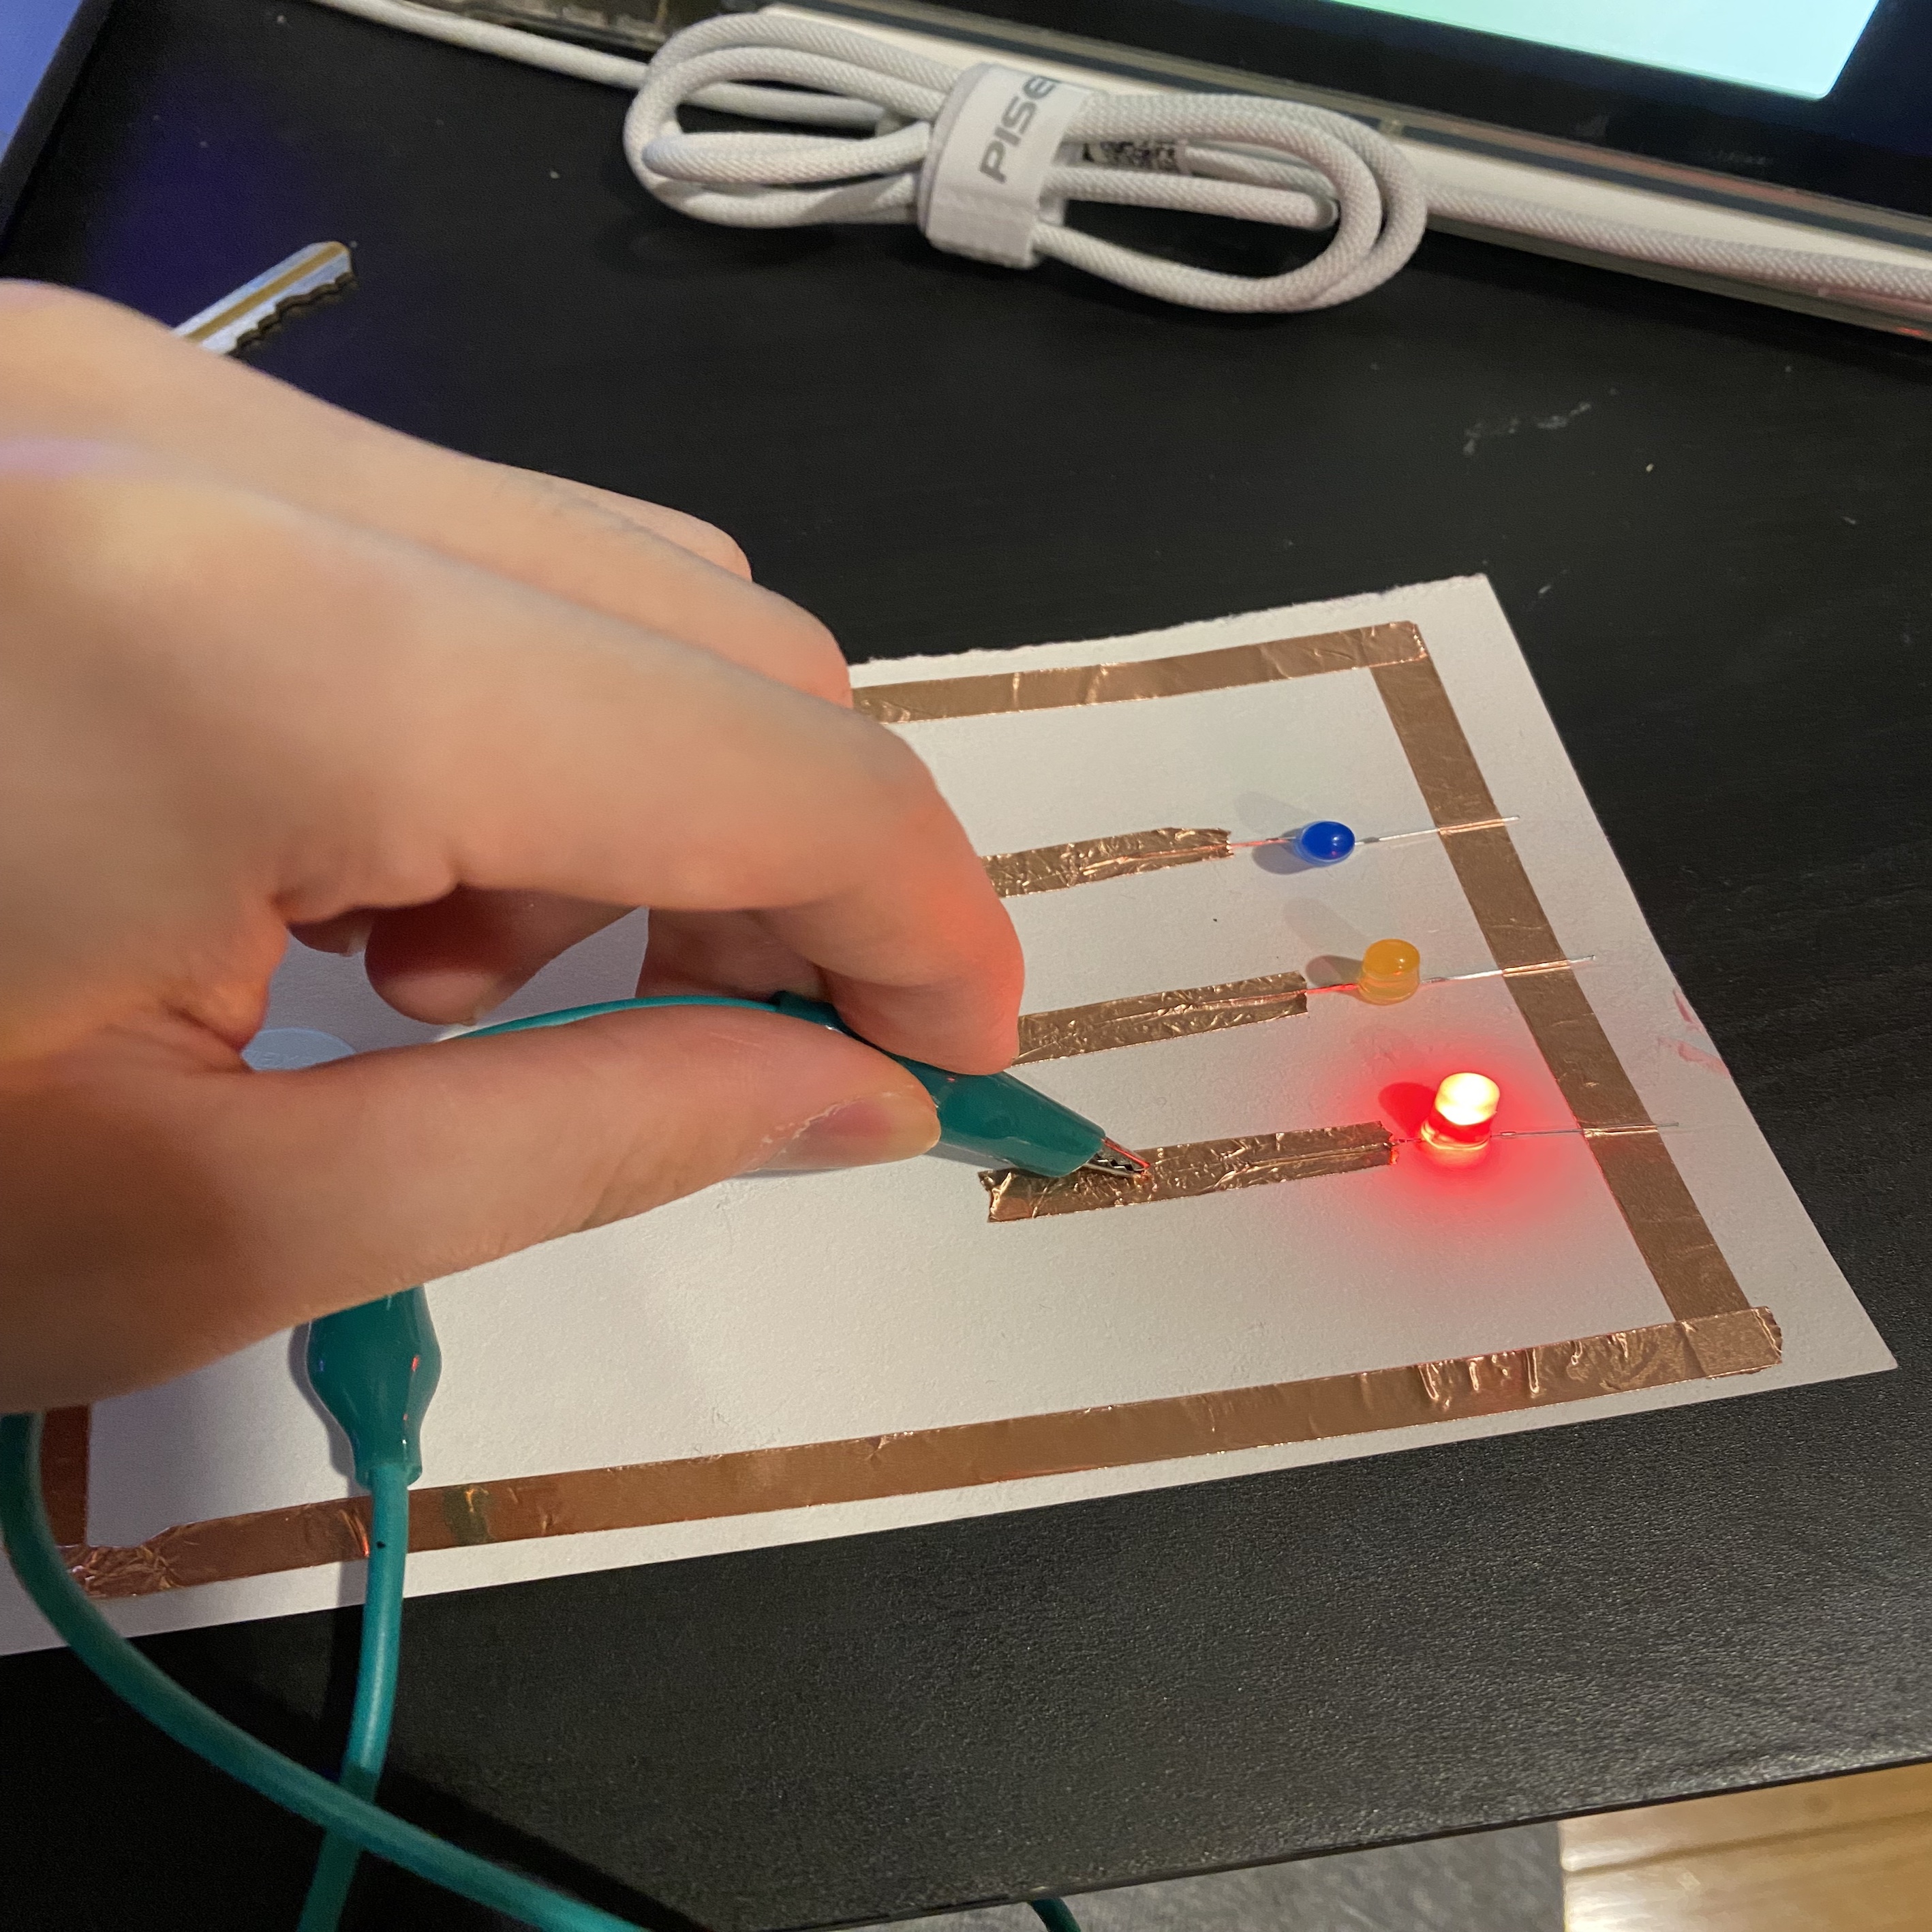
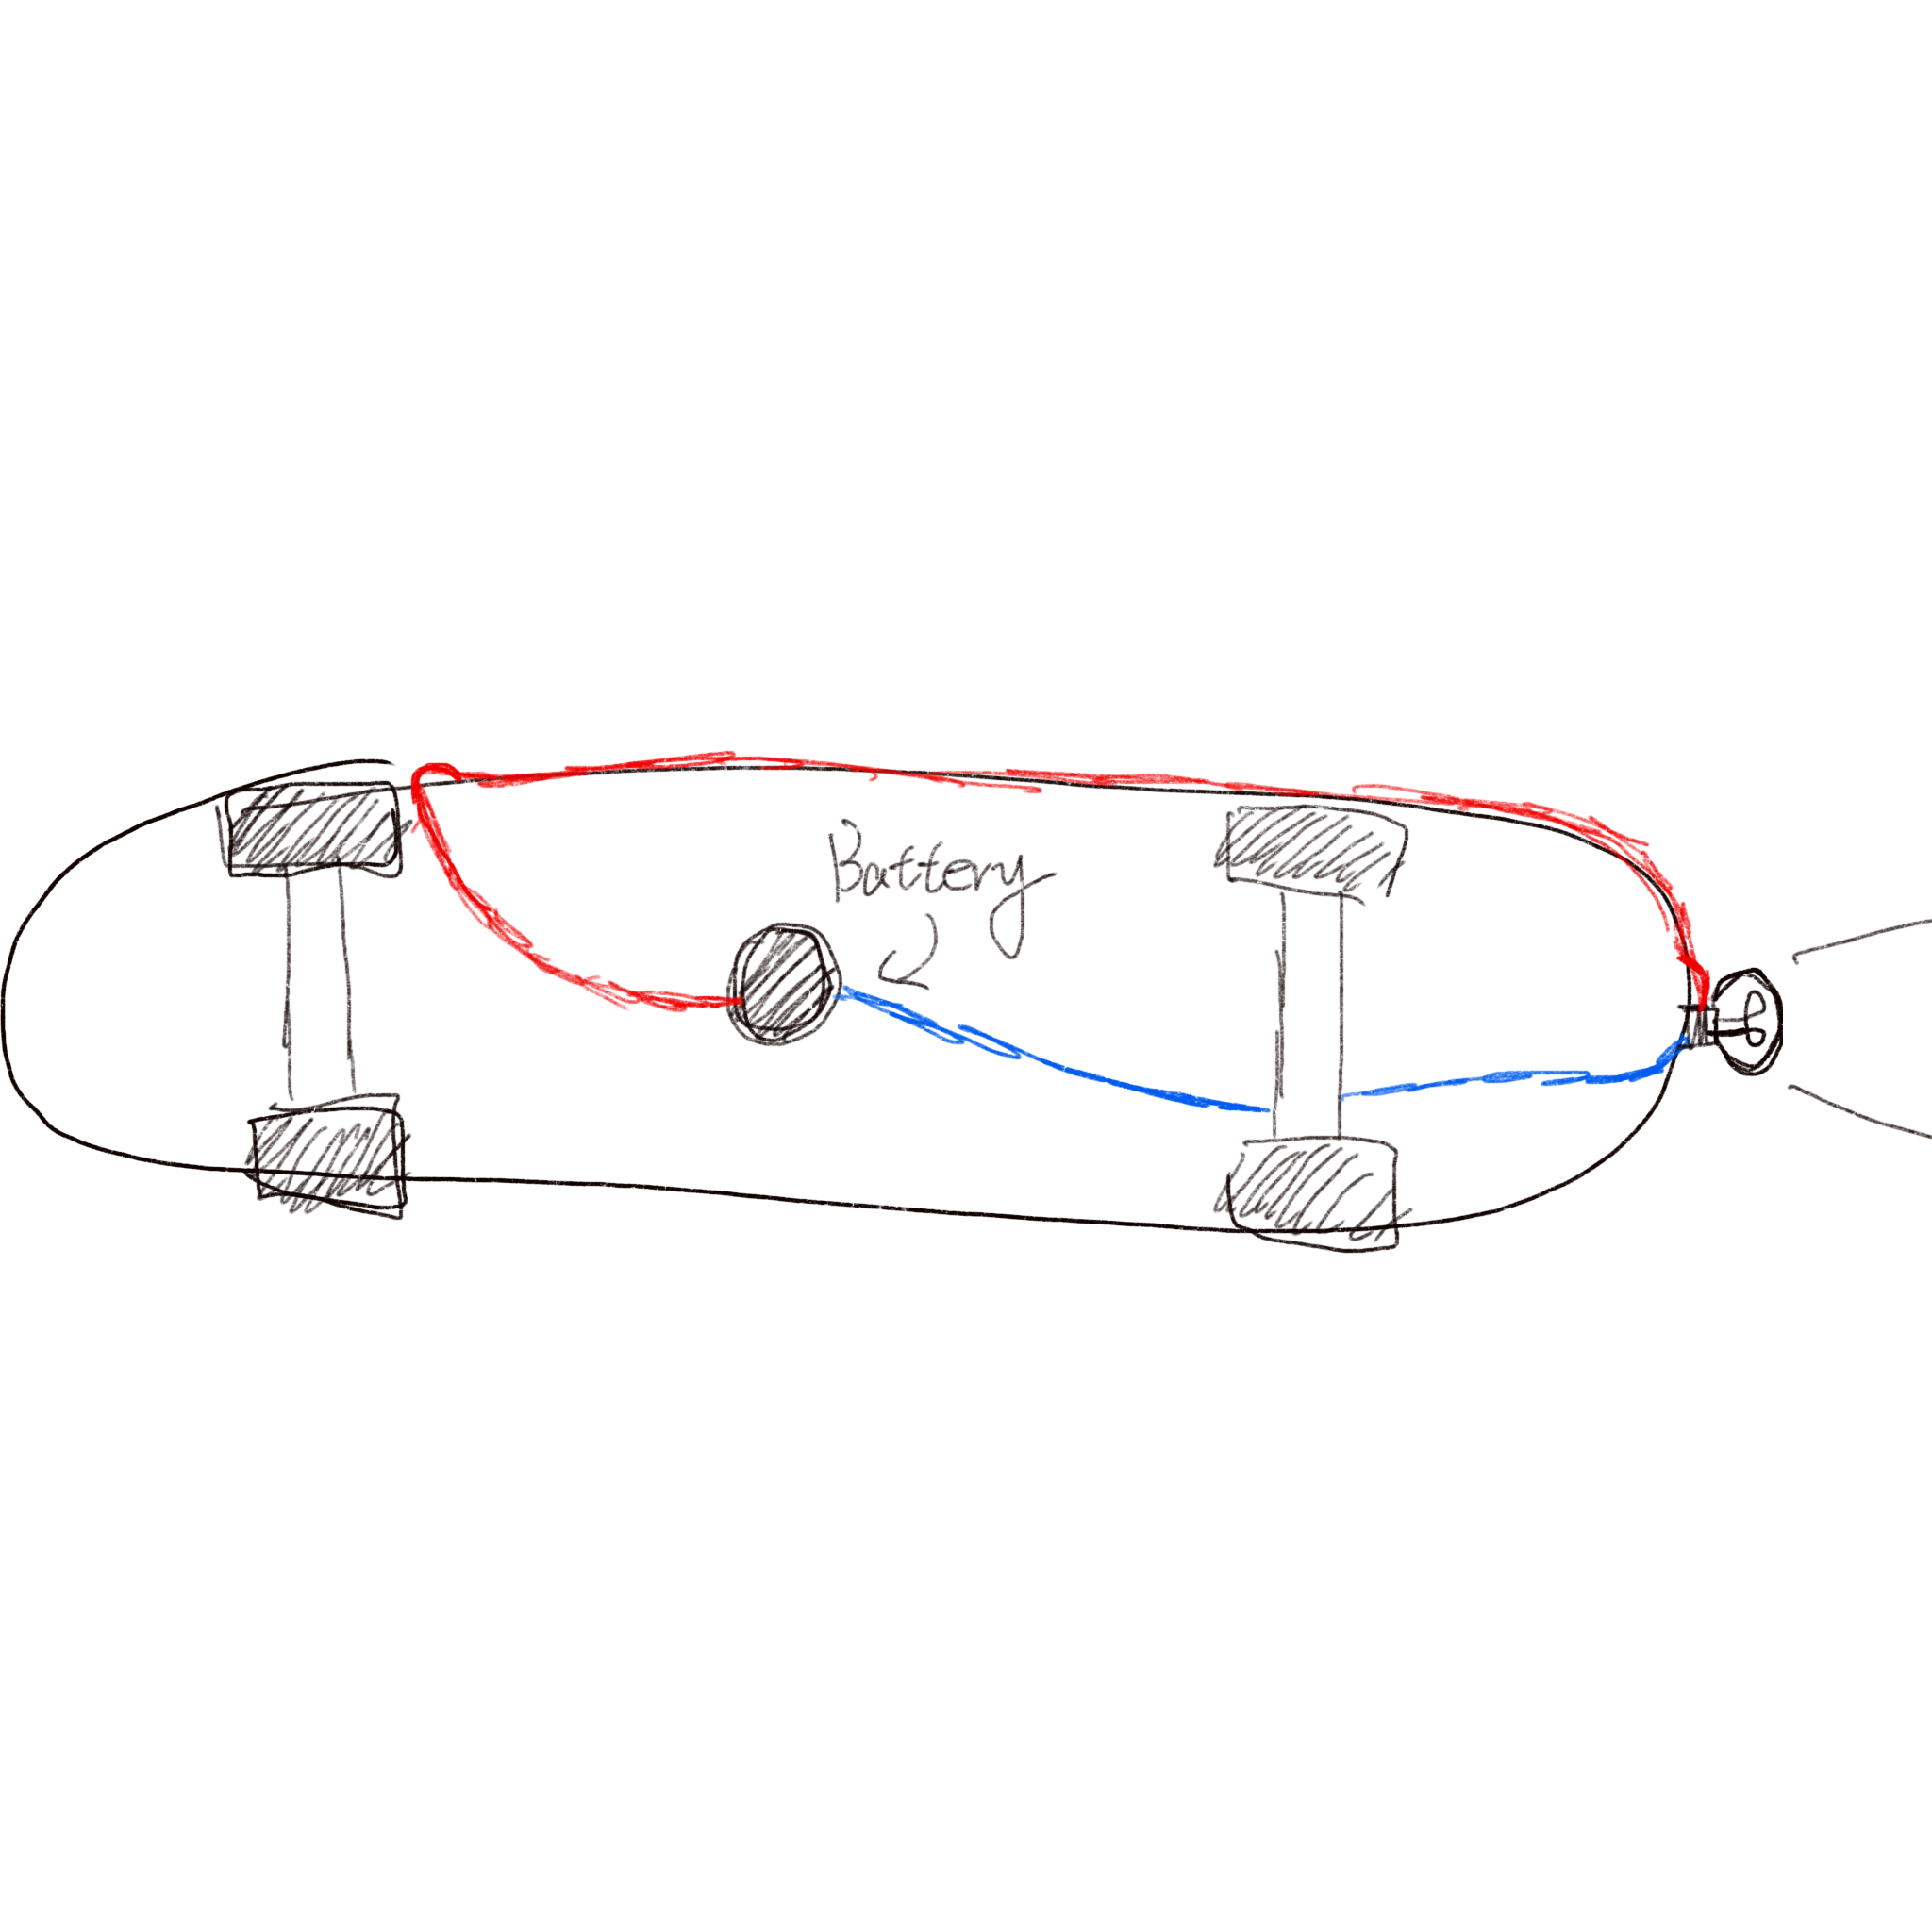
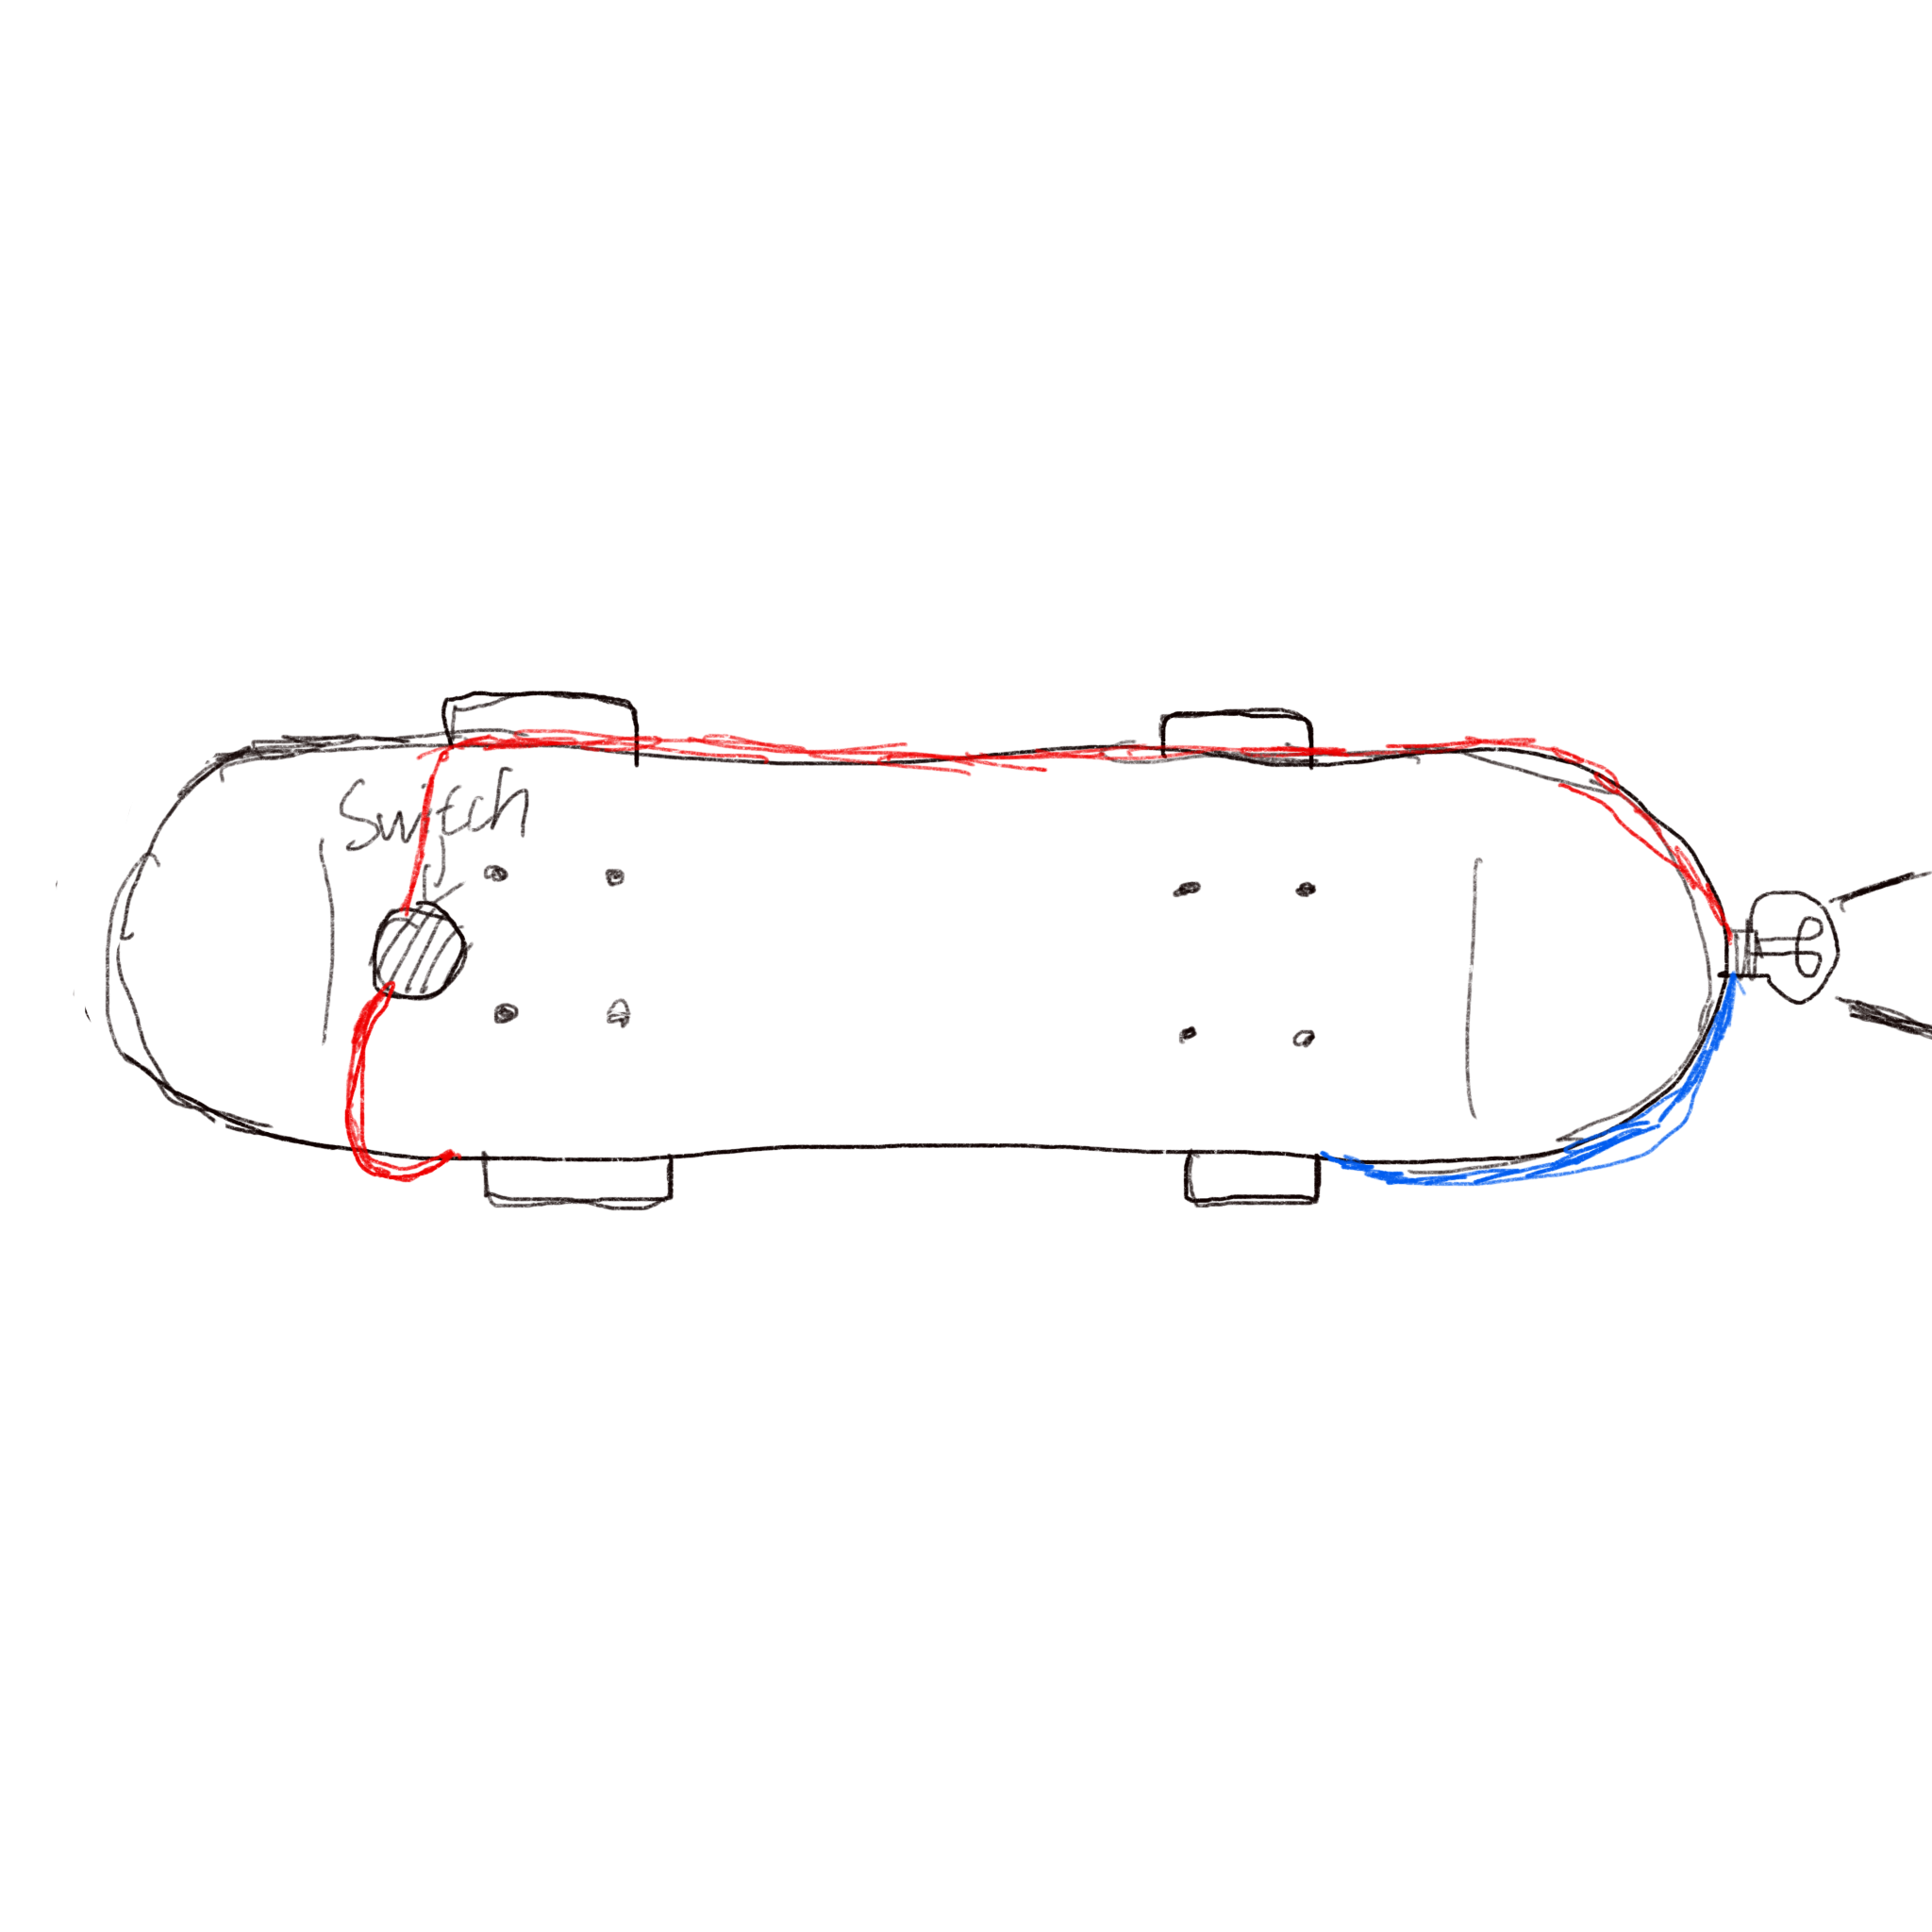
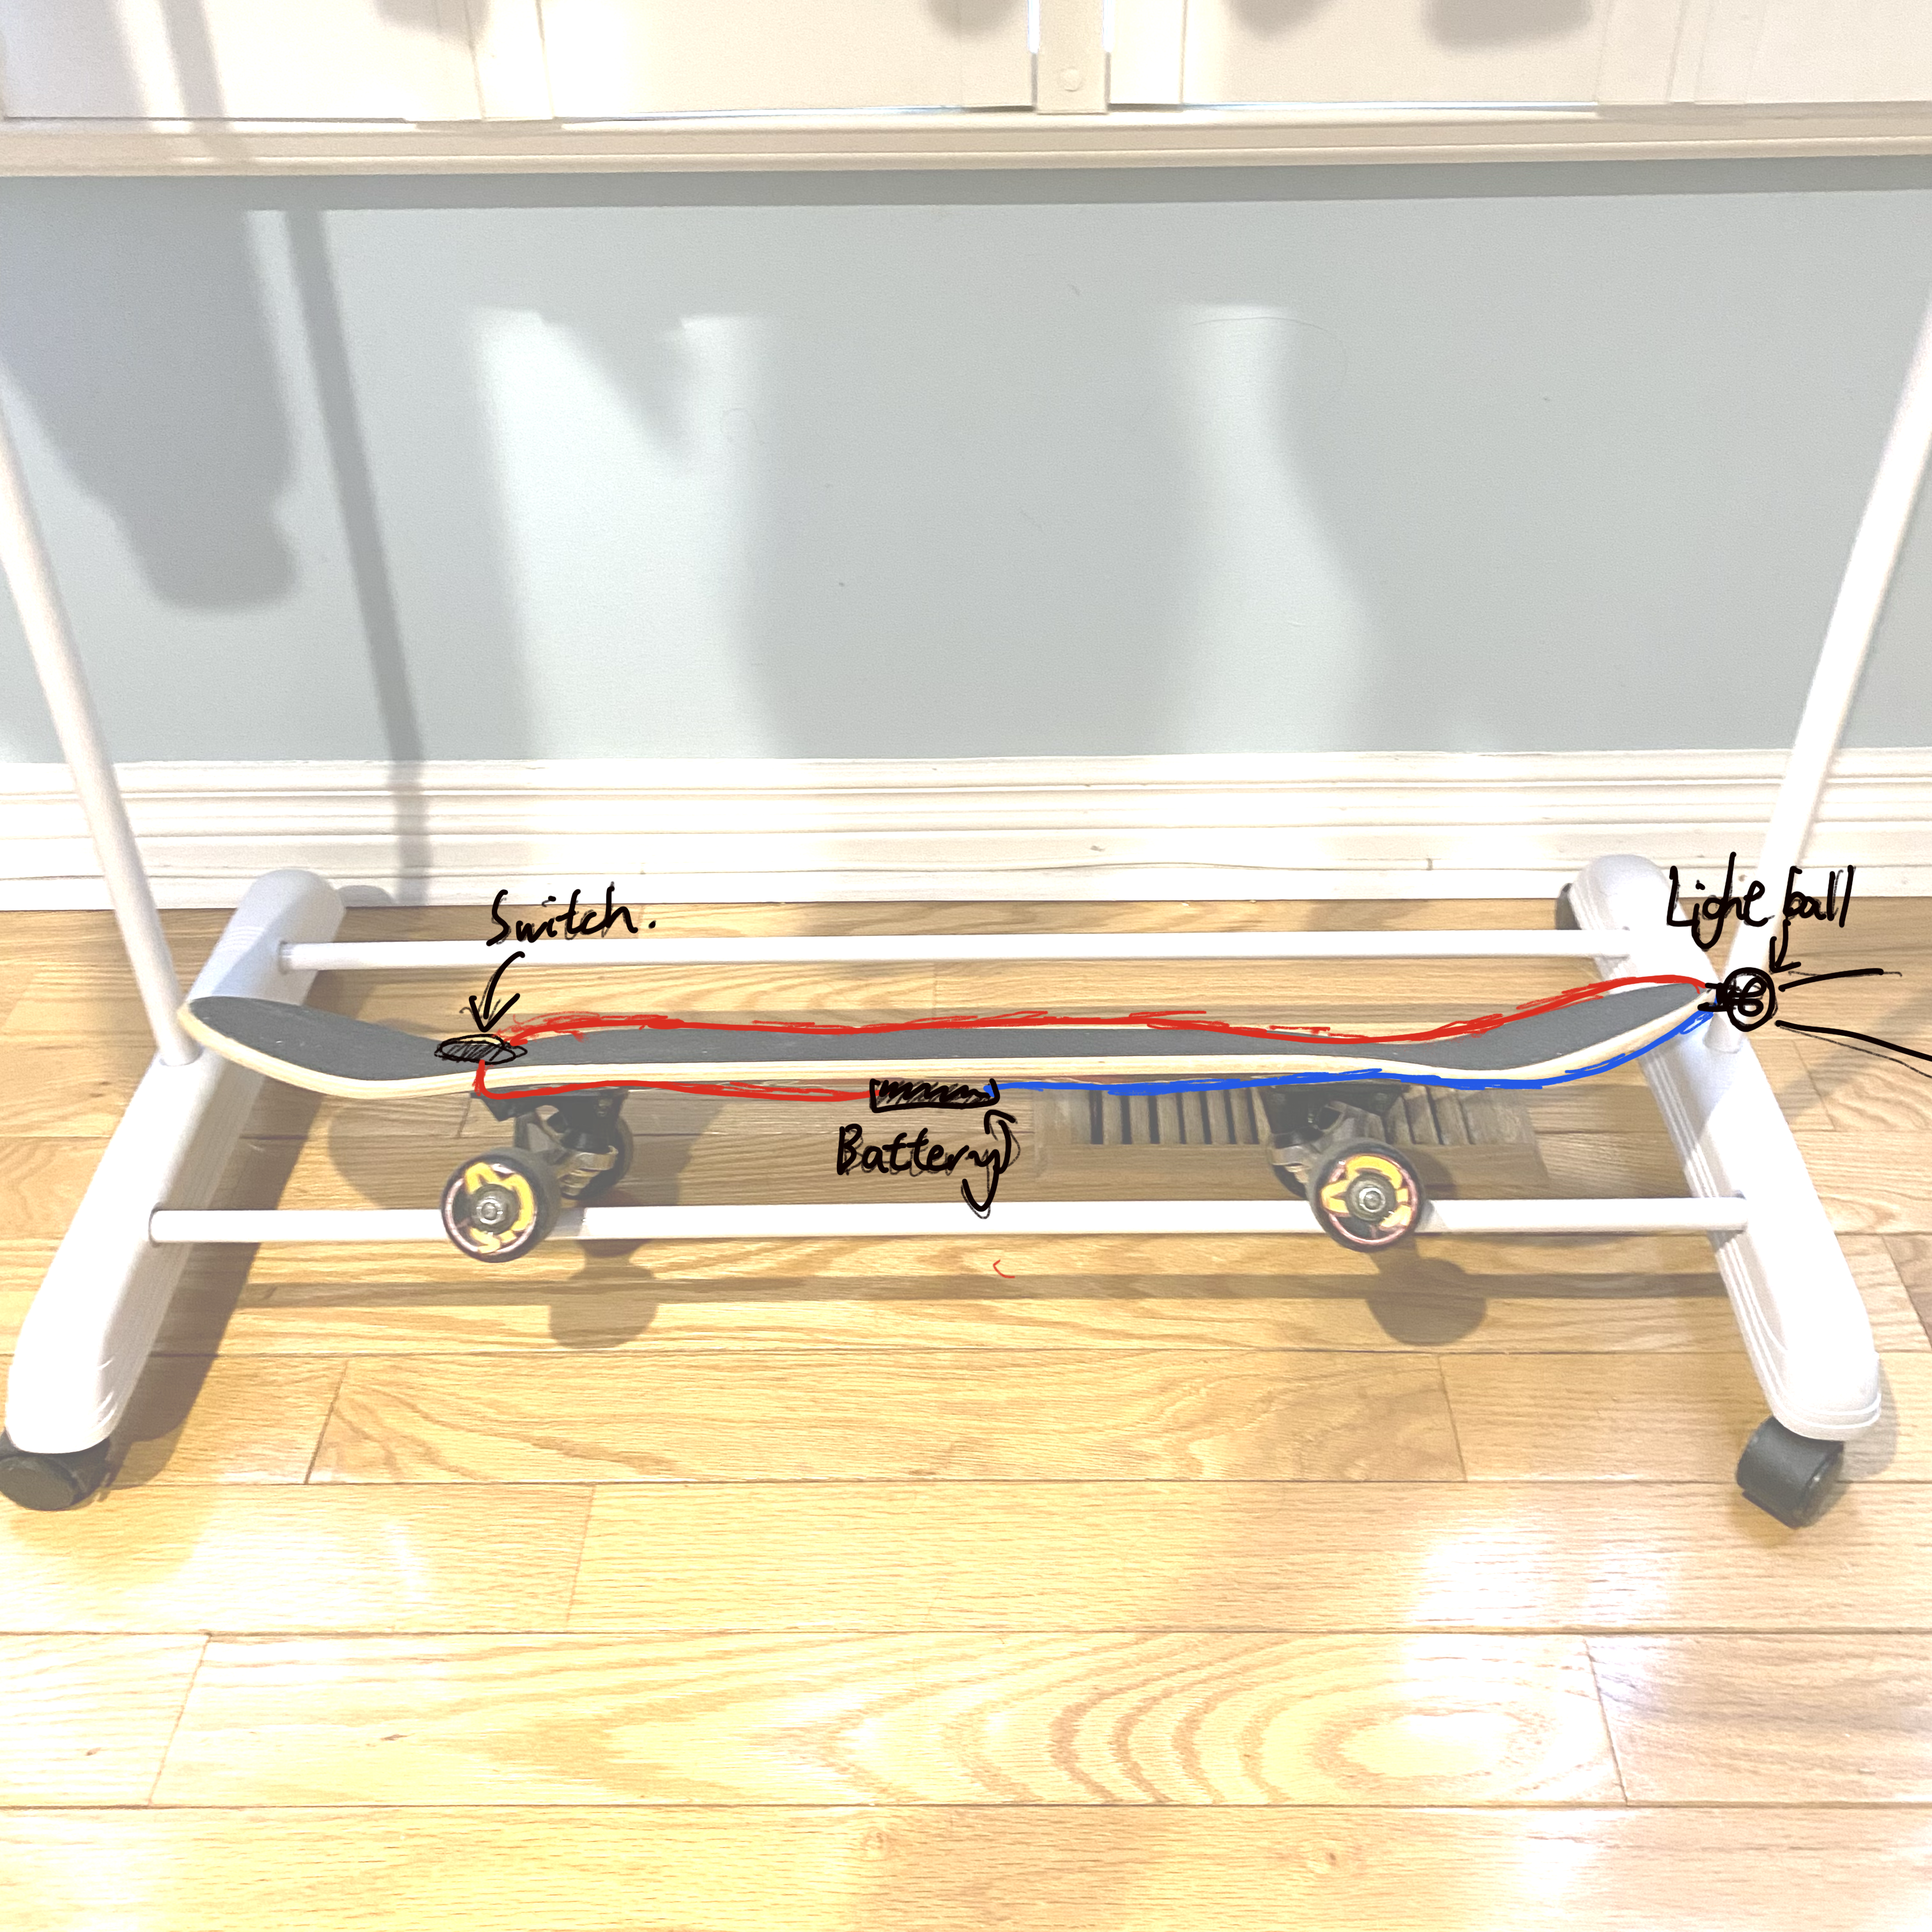
During this activity, I employed various methods and materials to attempt creating different circuits, and documented and studied them.
Activity 1
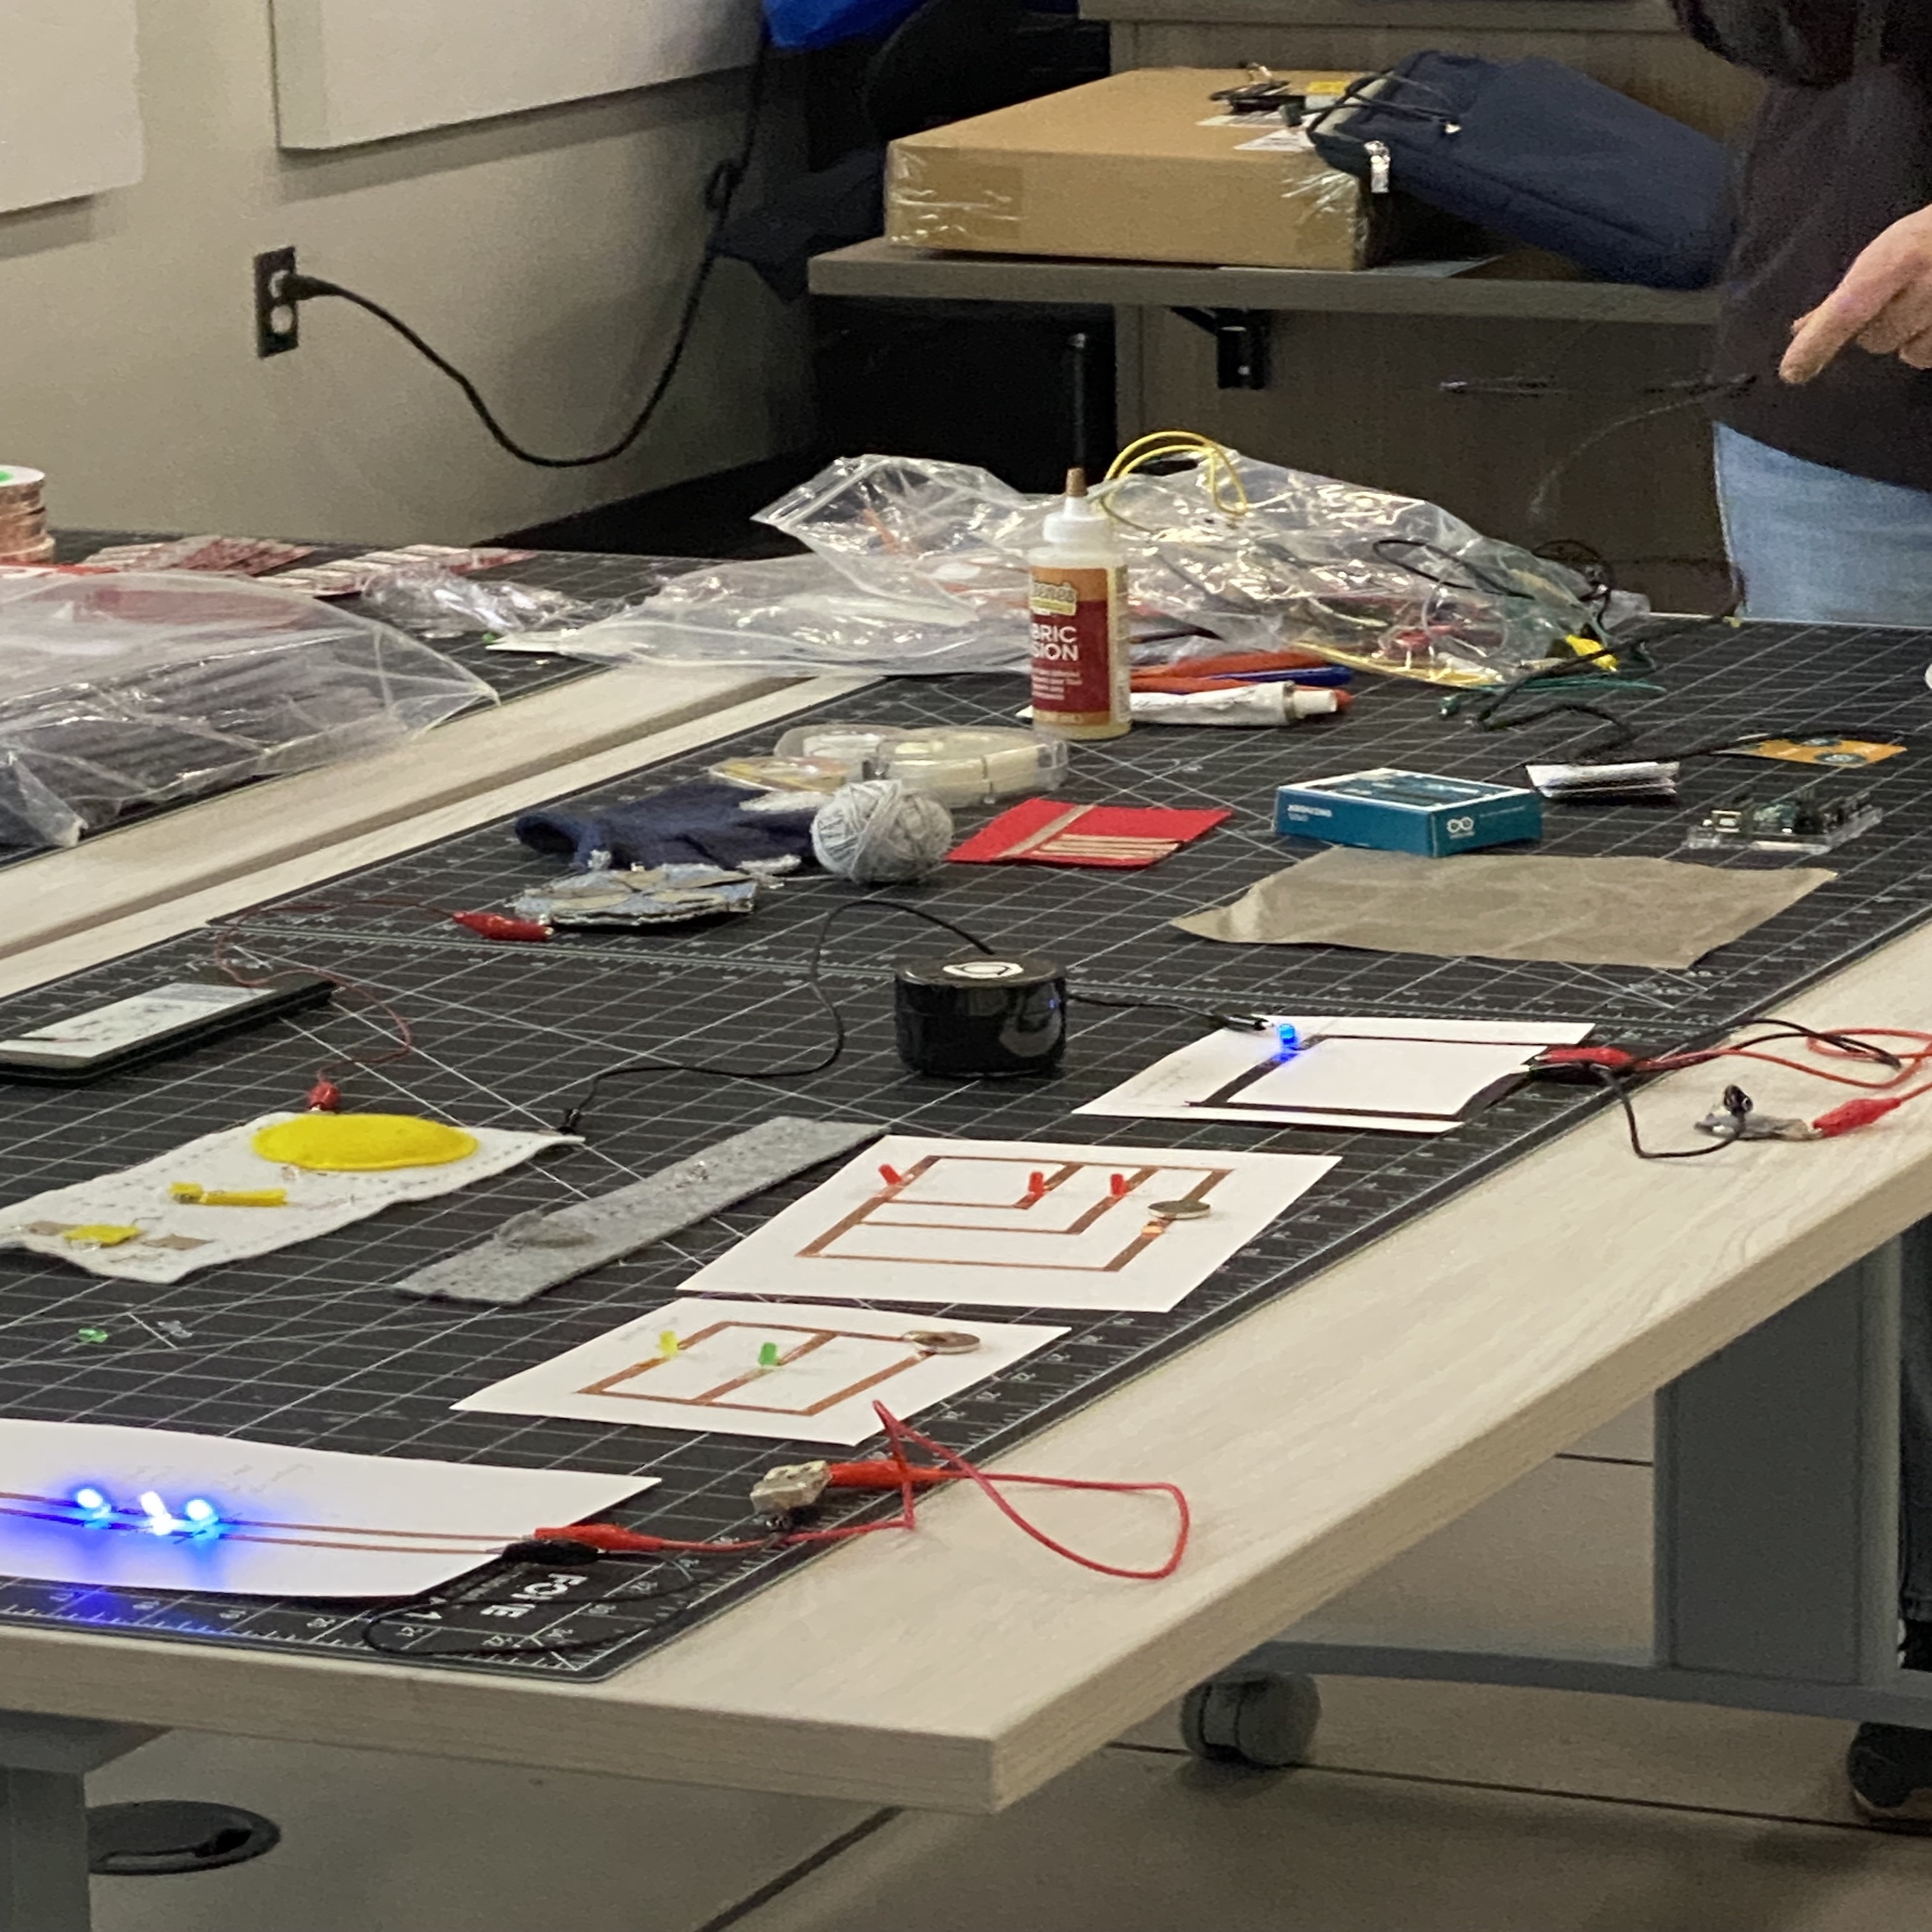
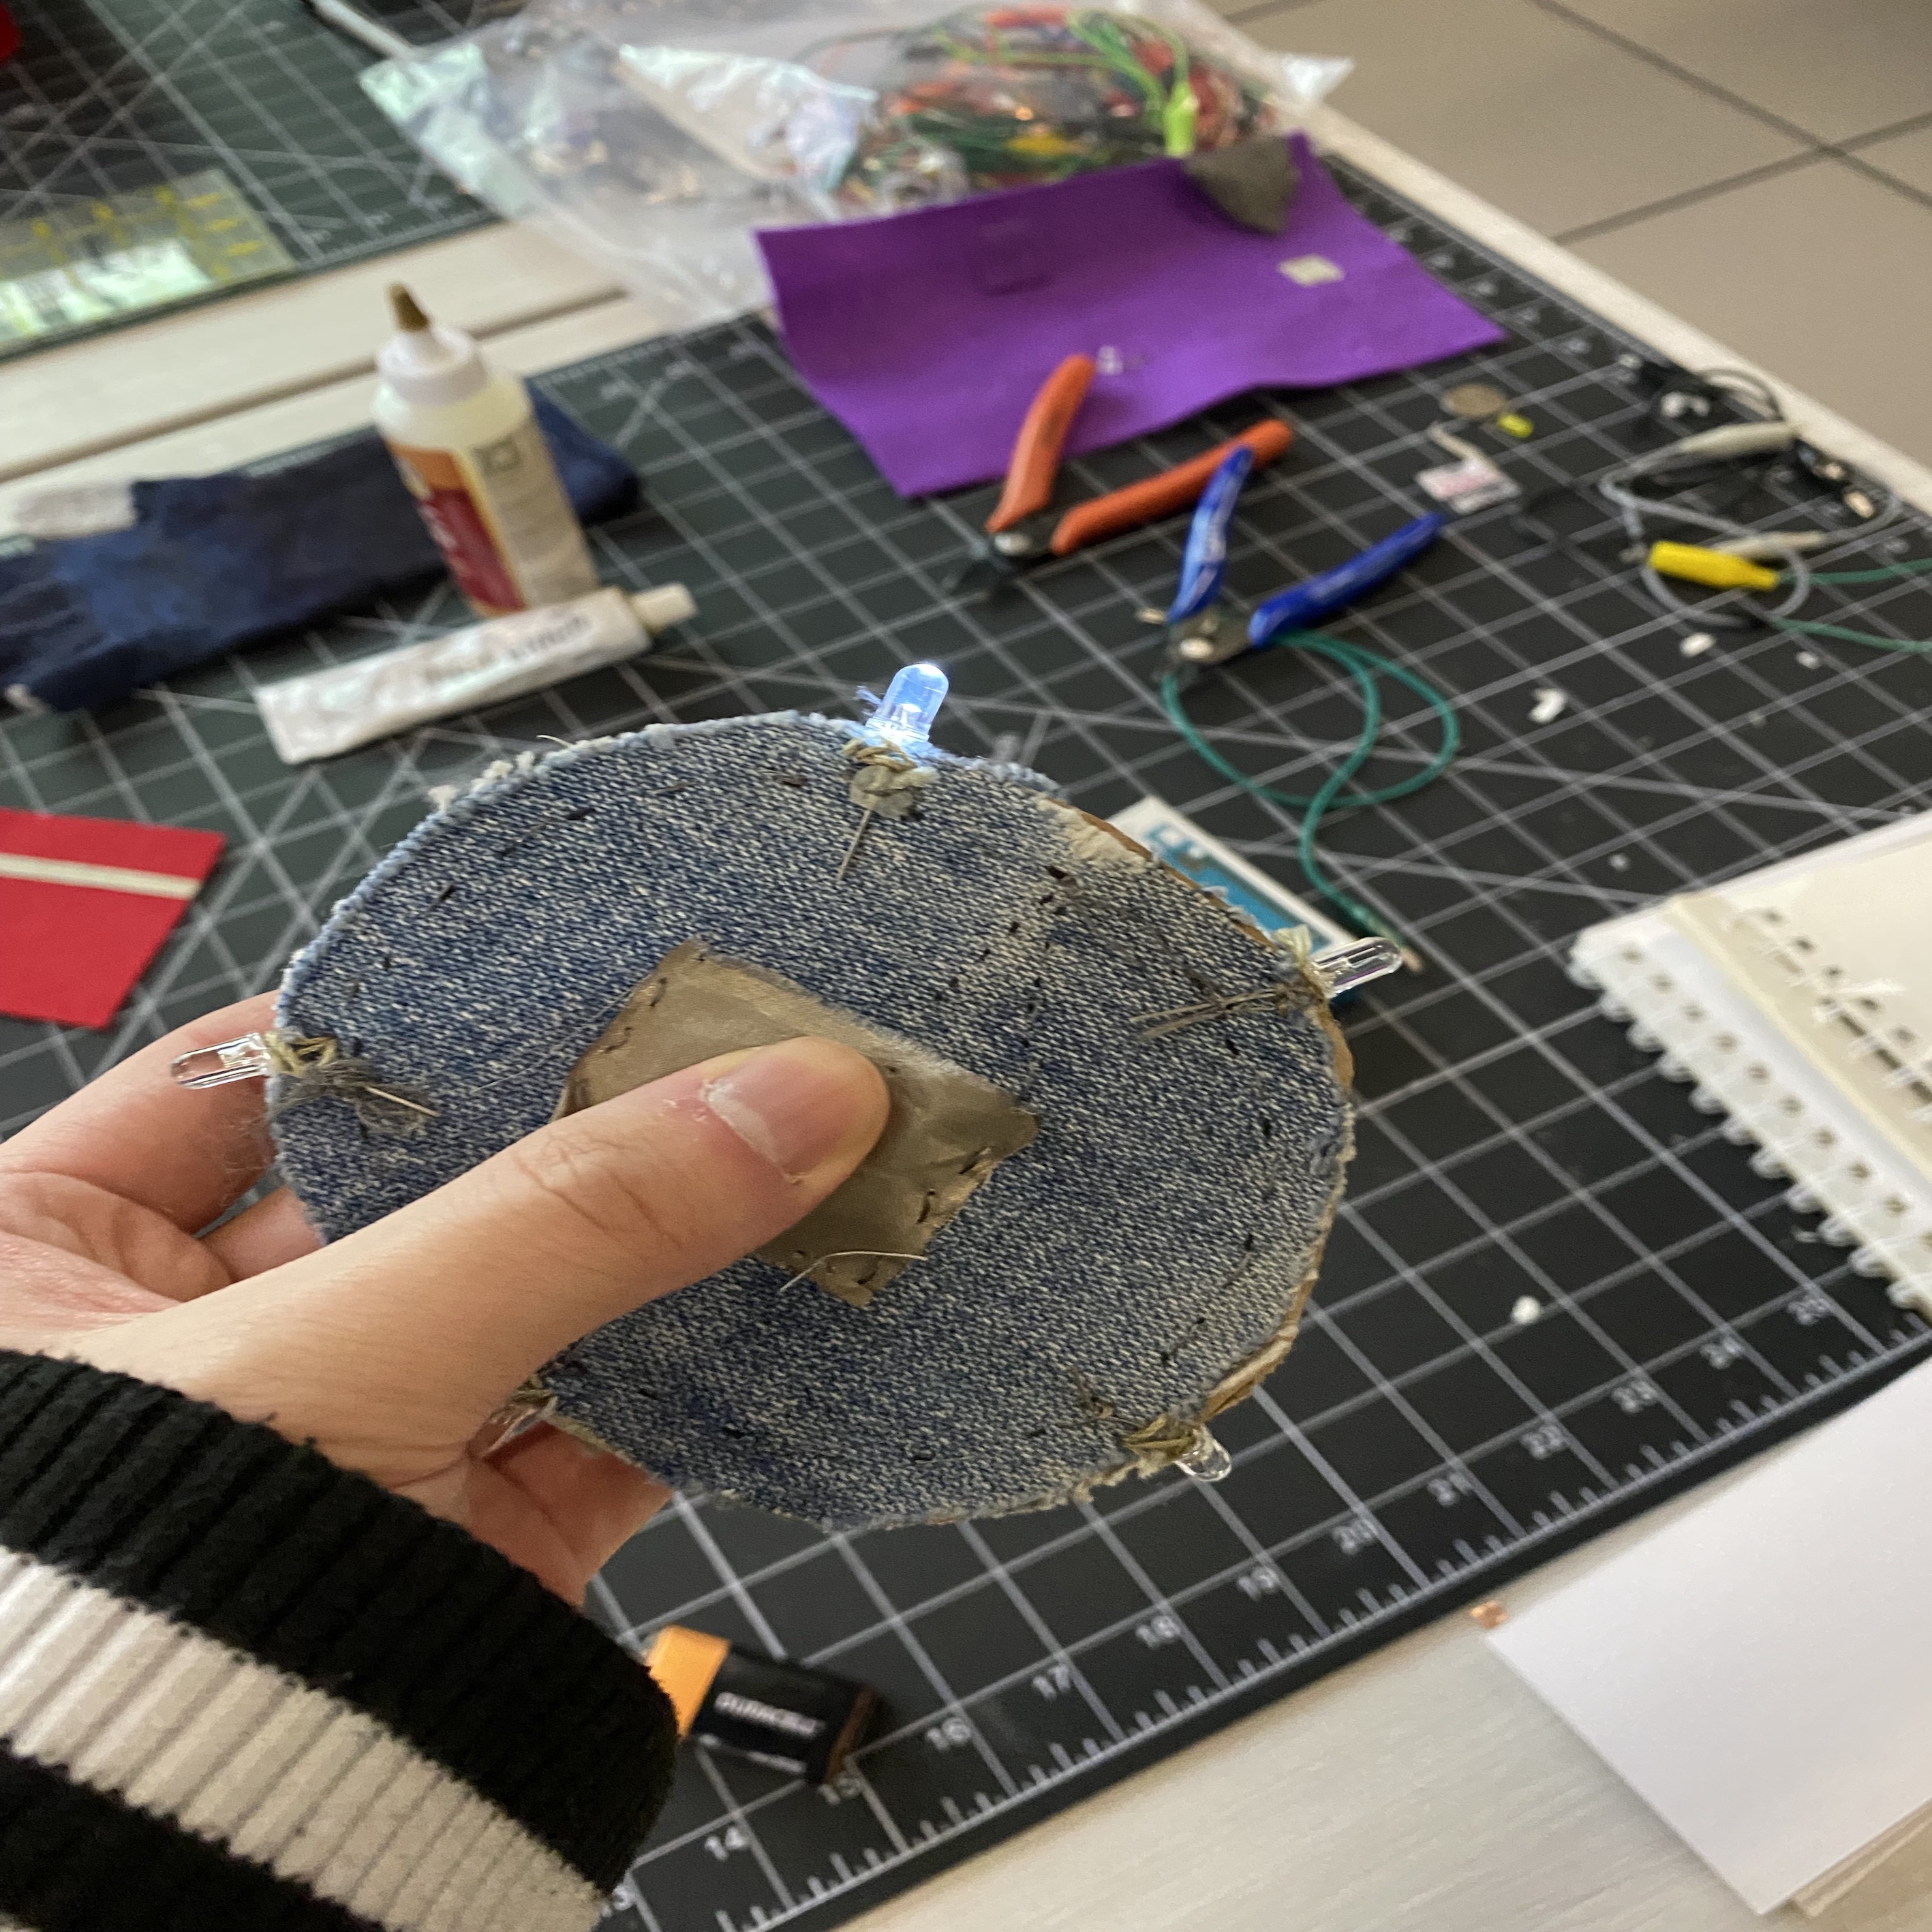
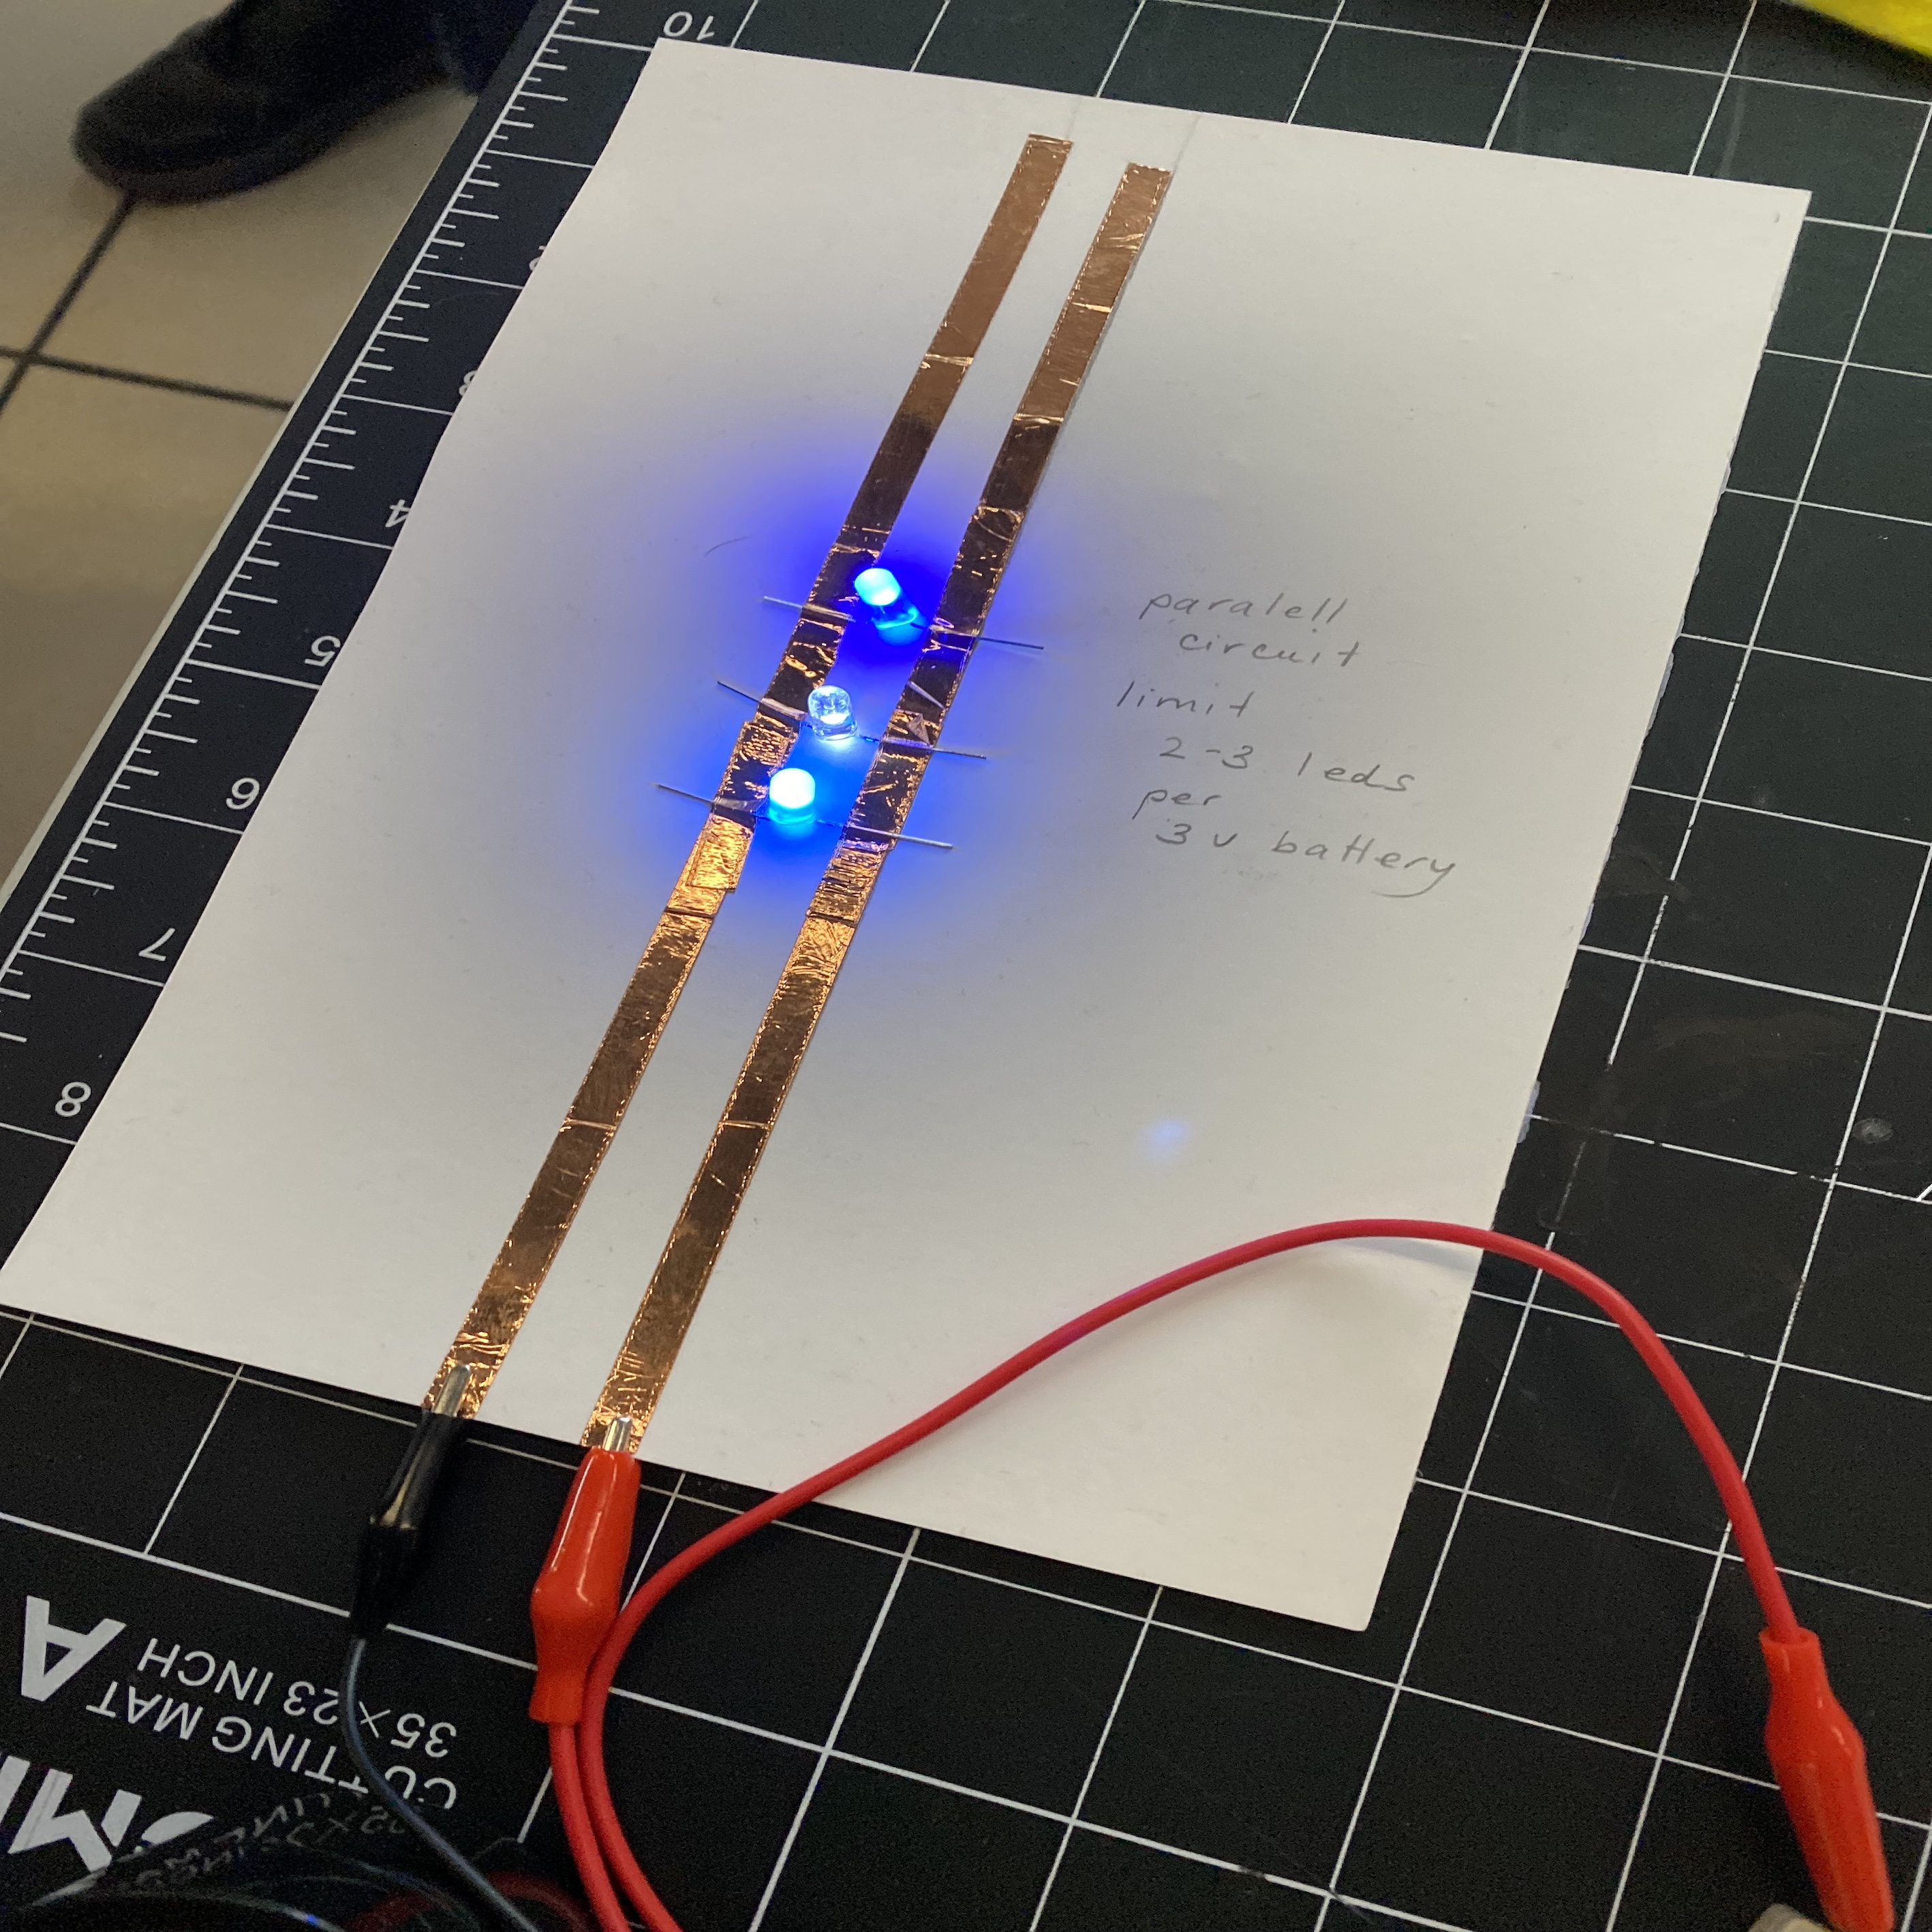

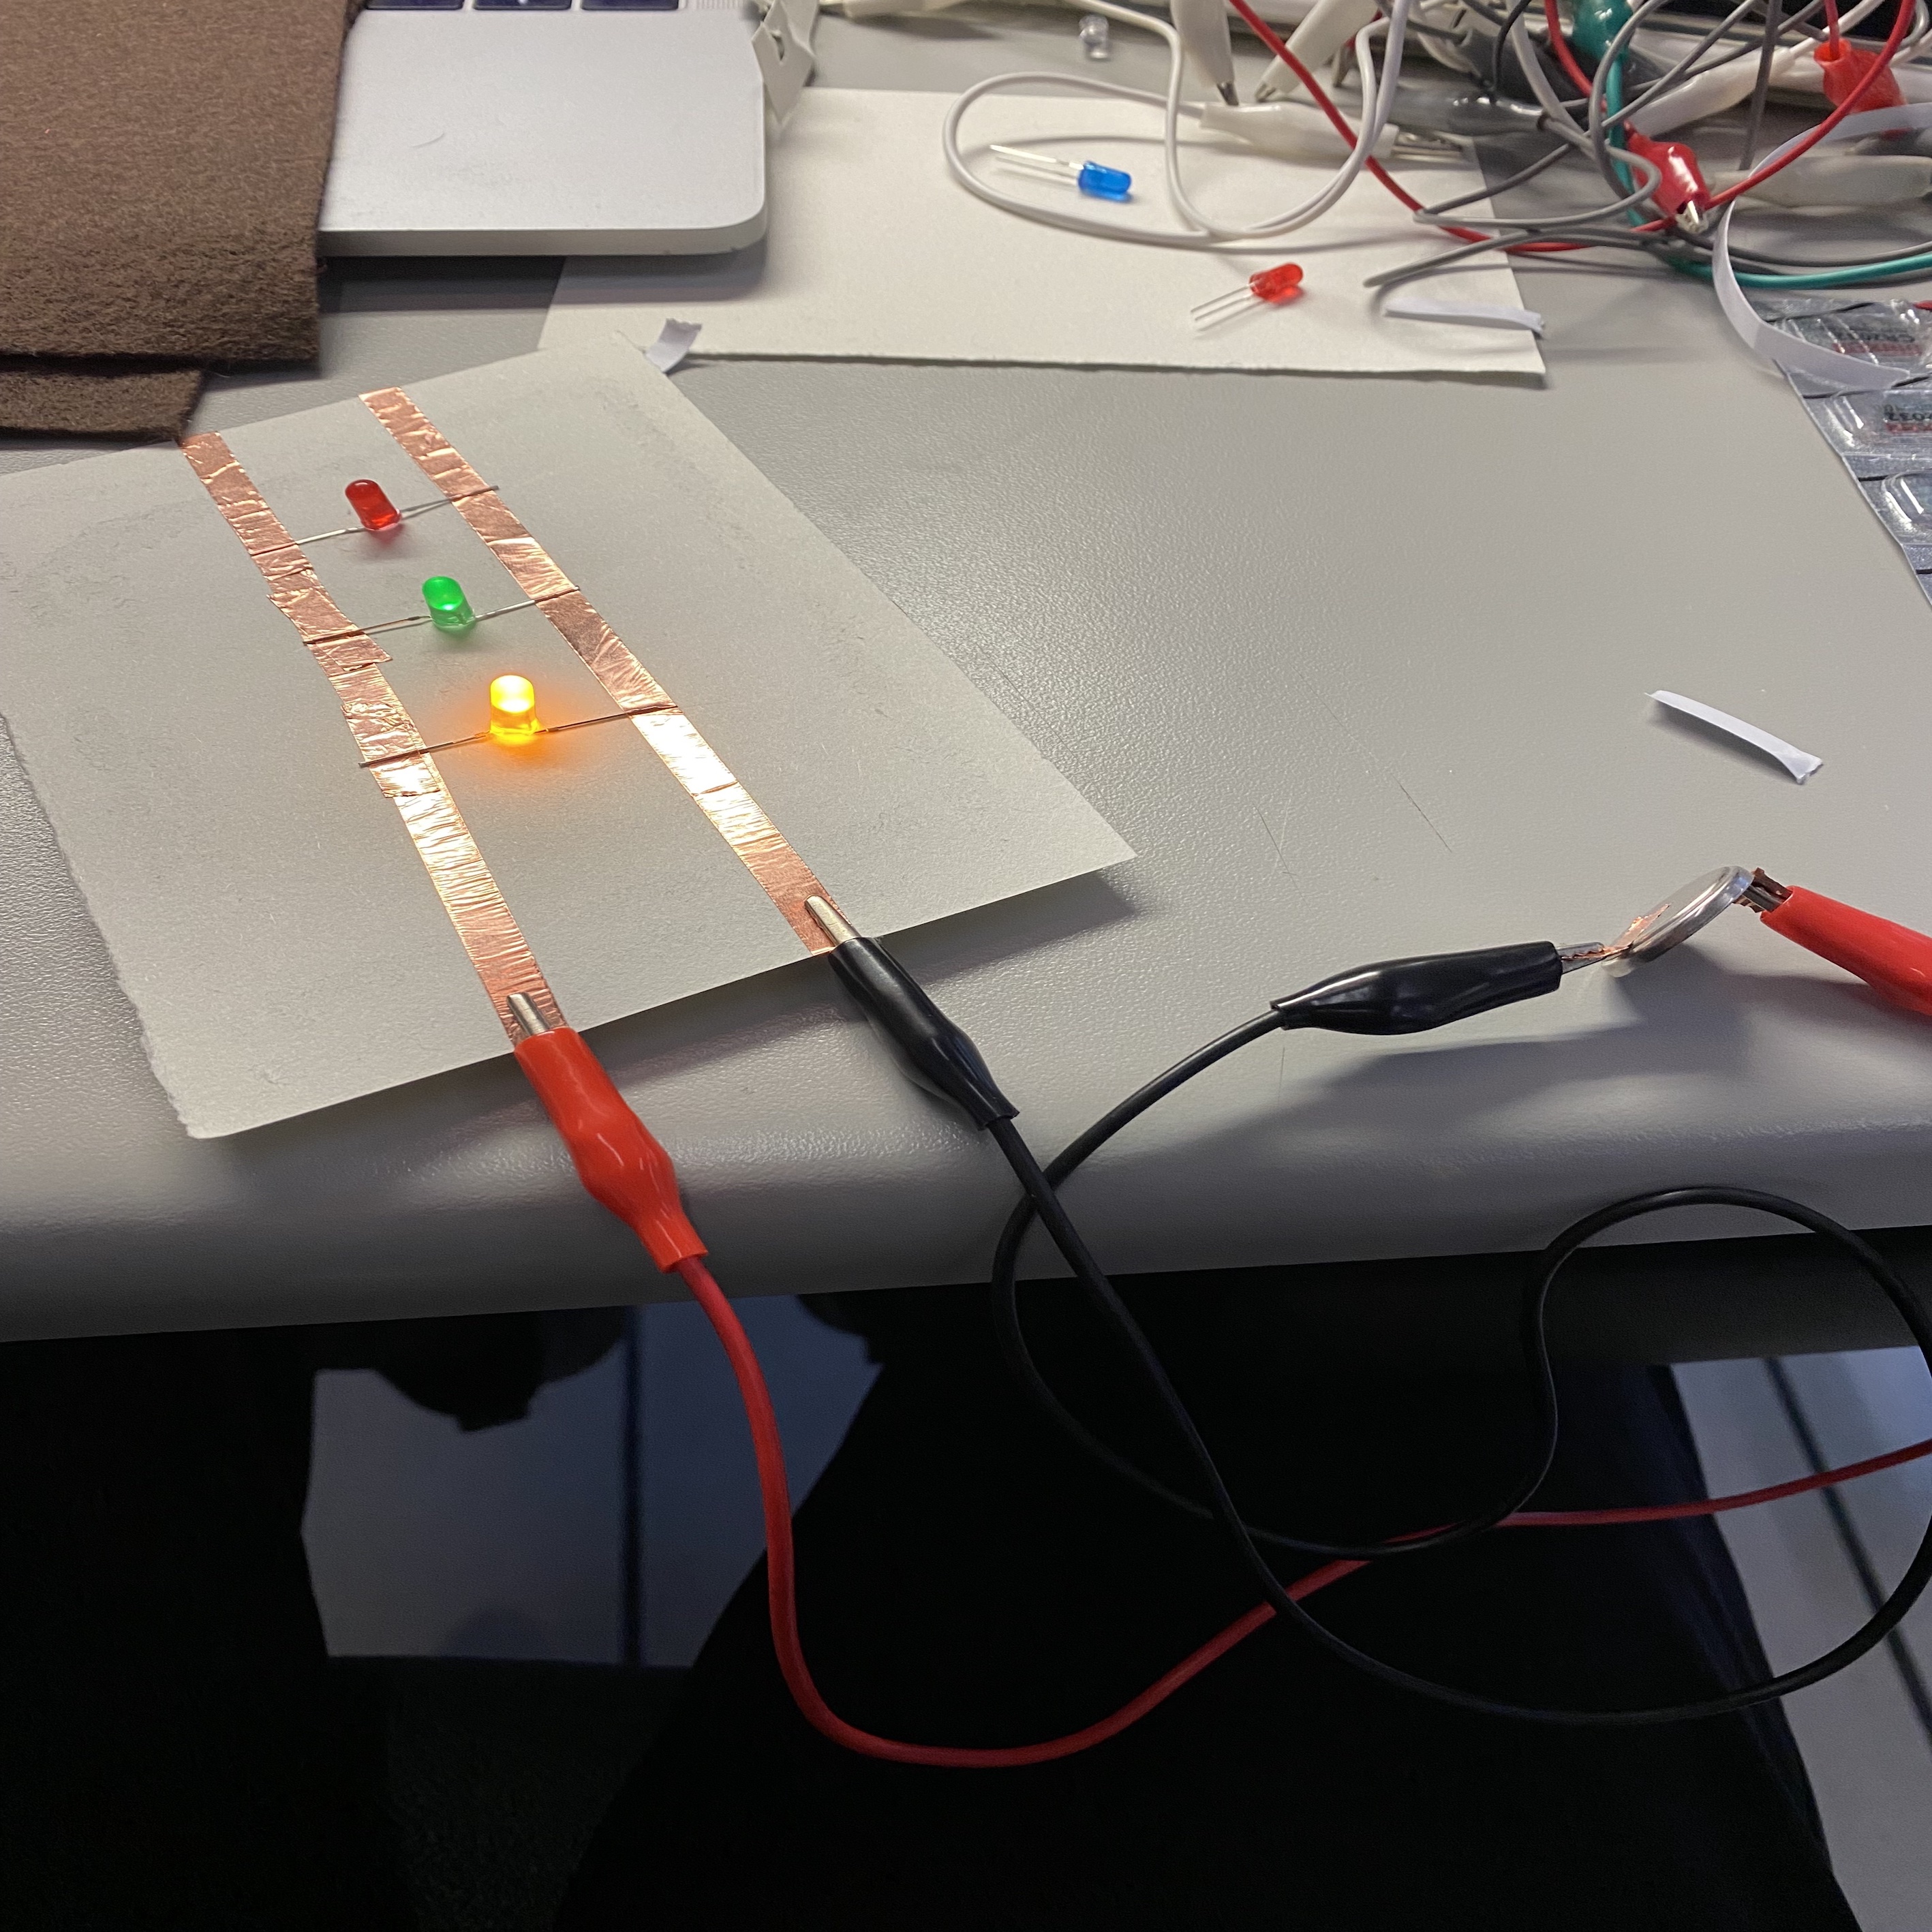
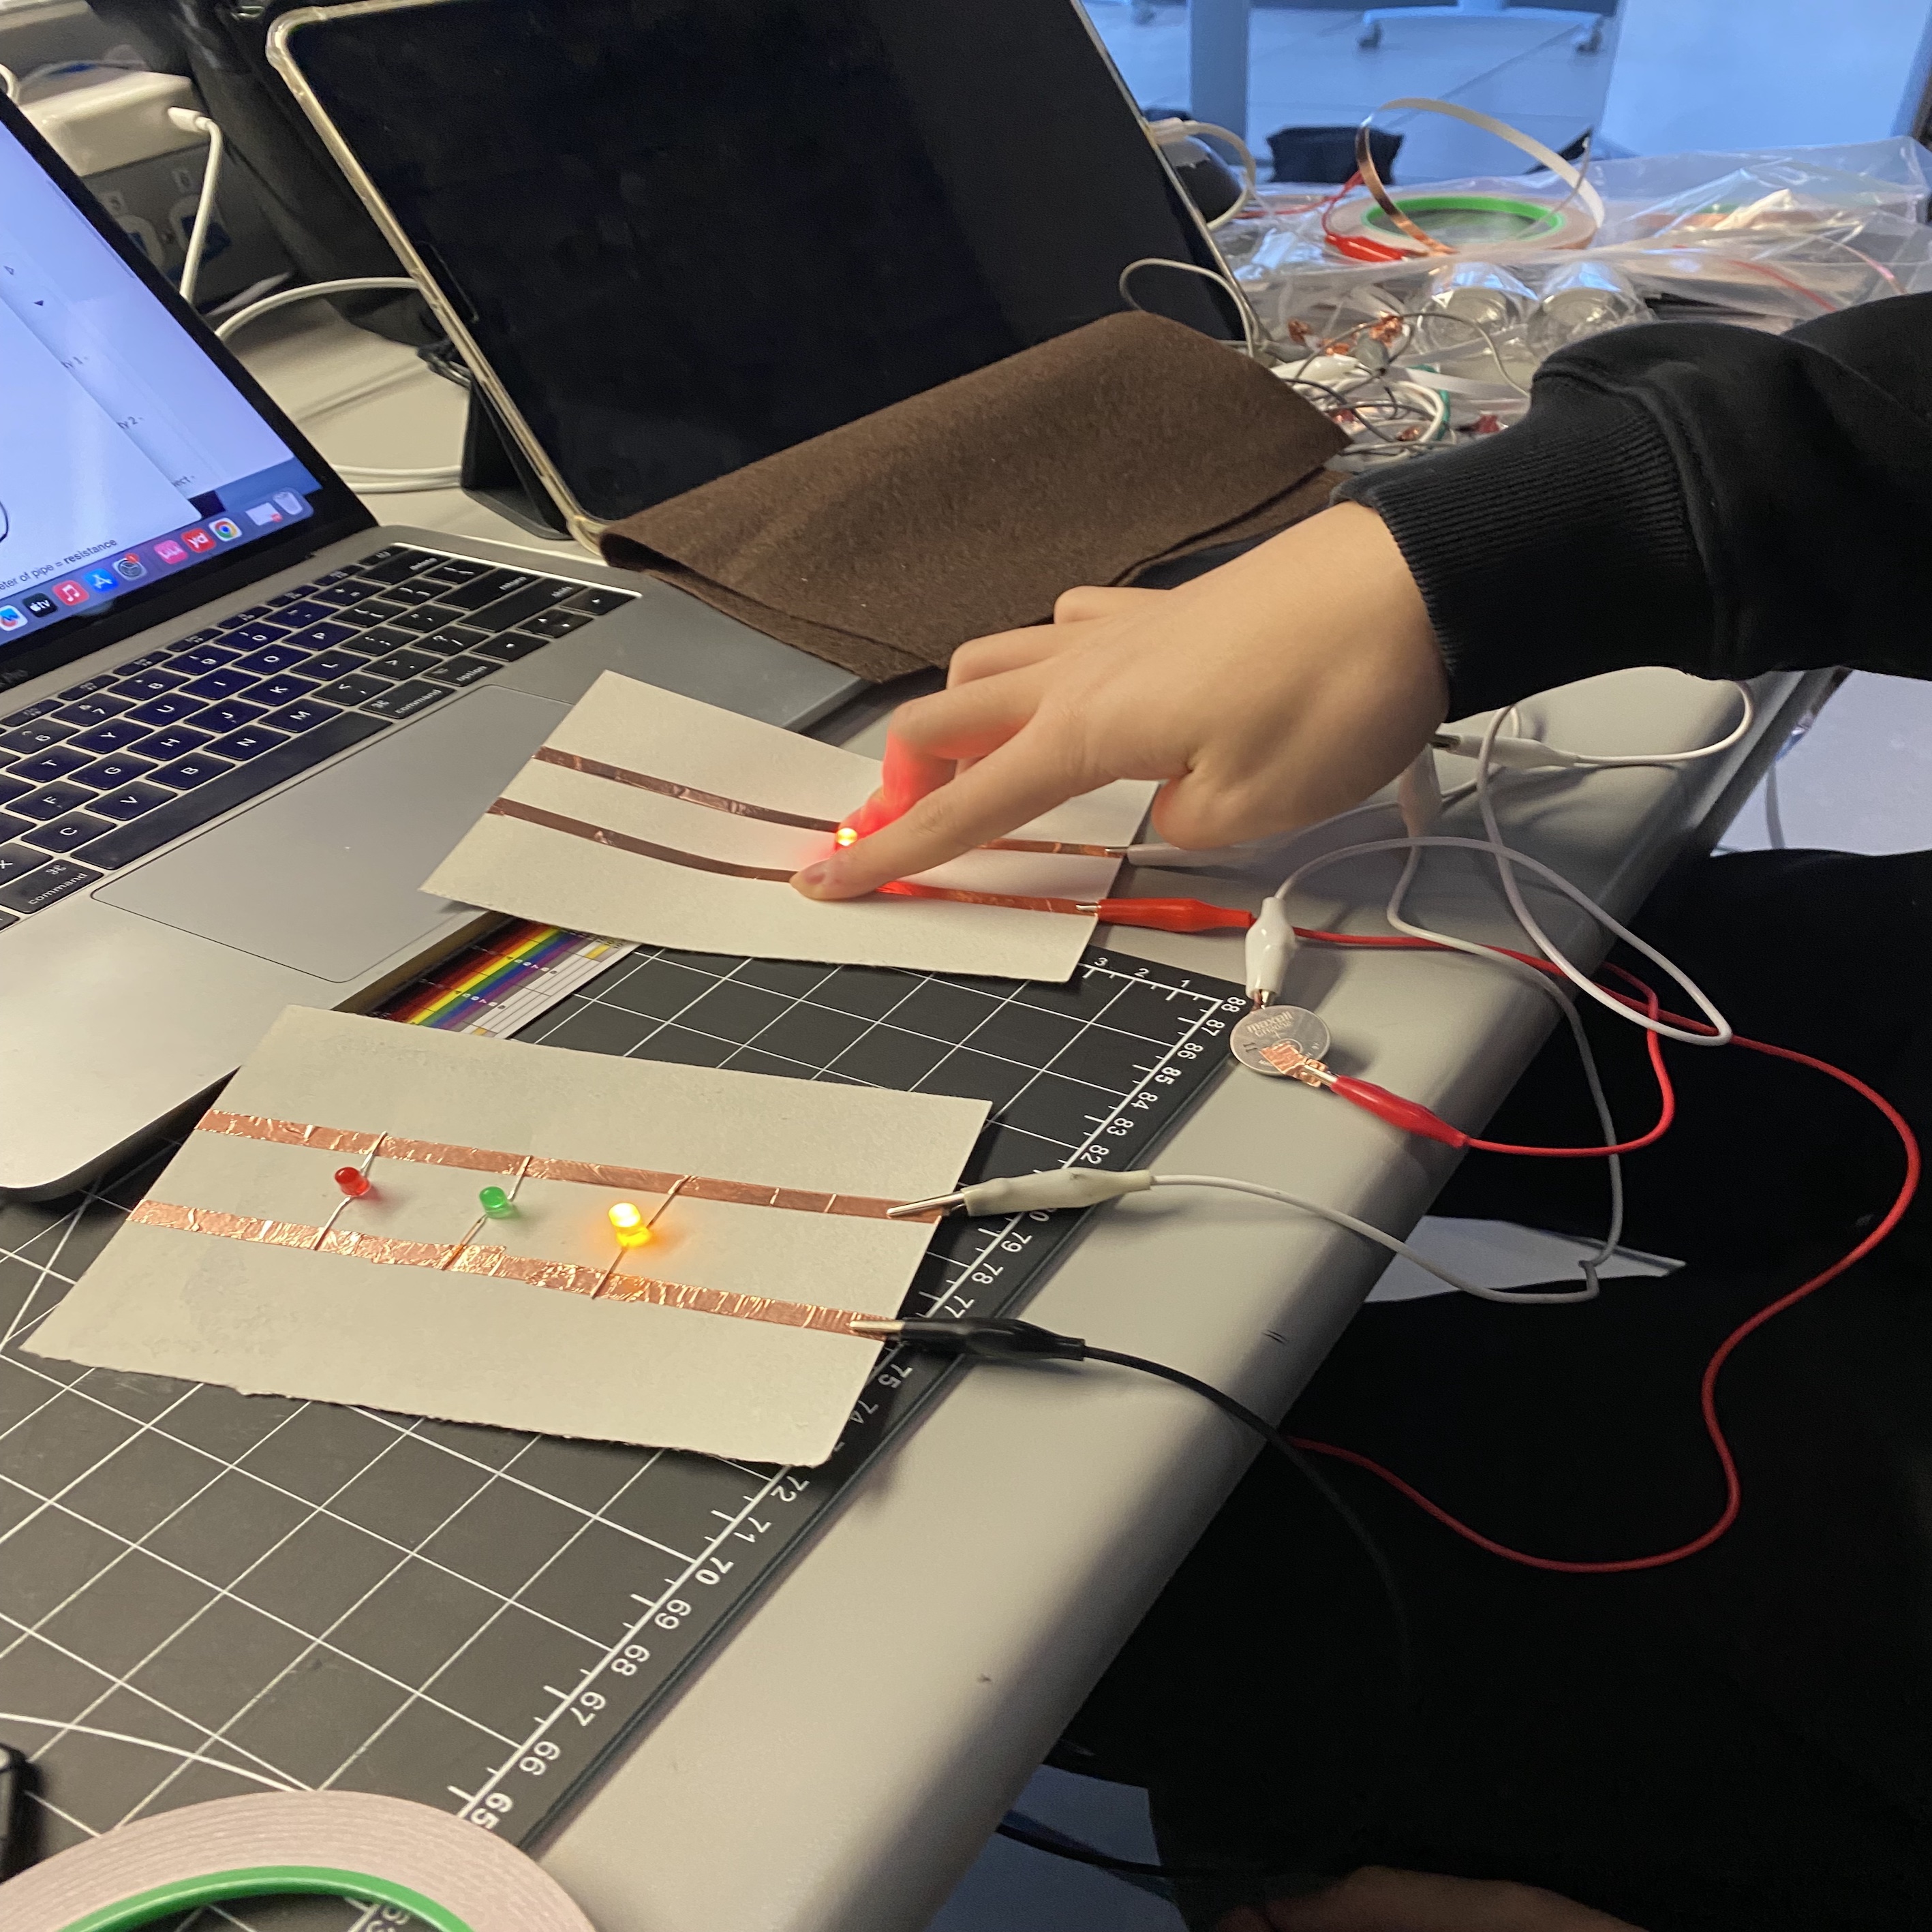
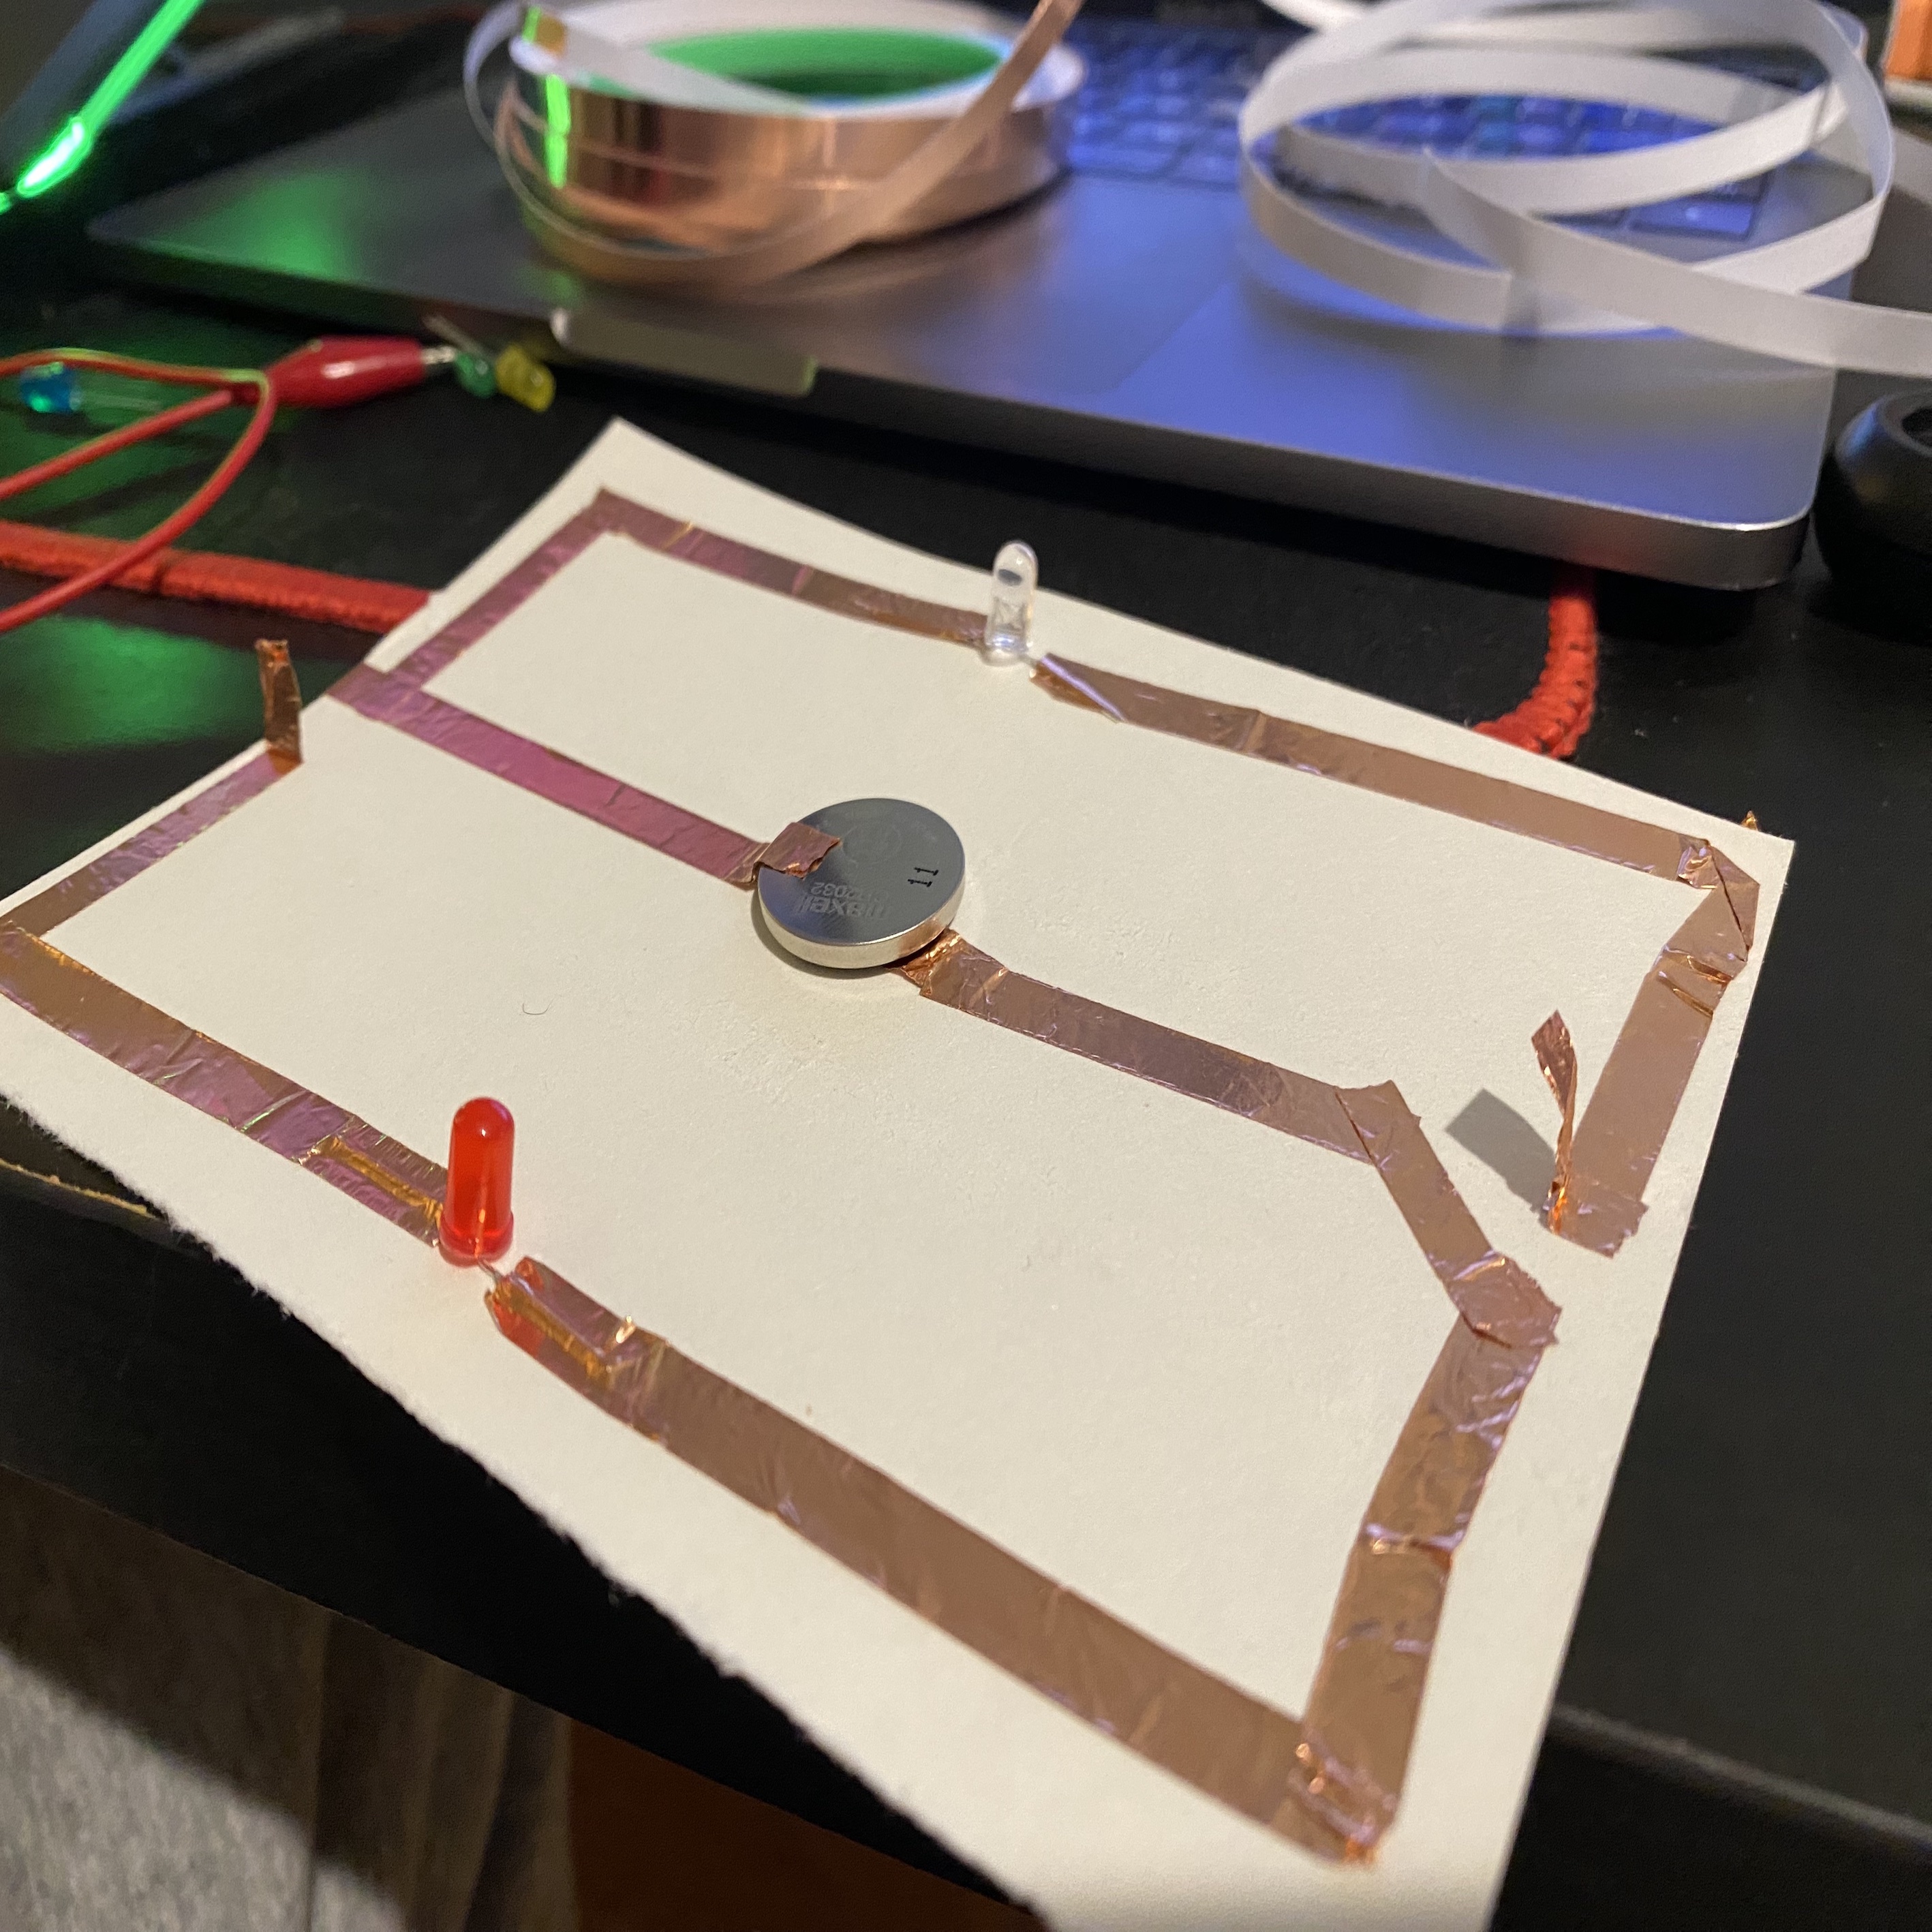
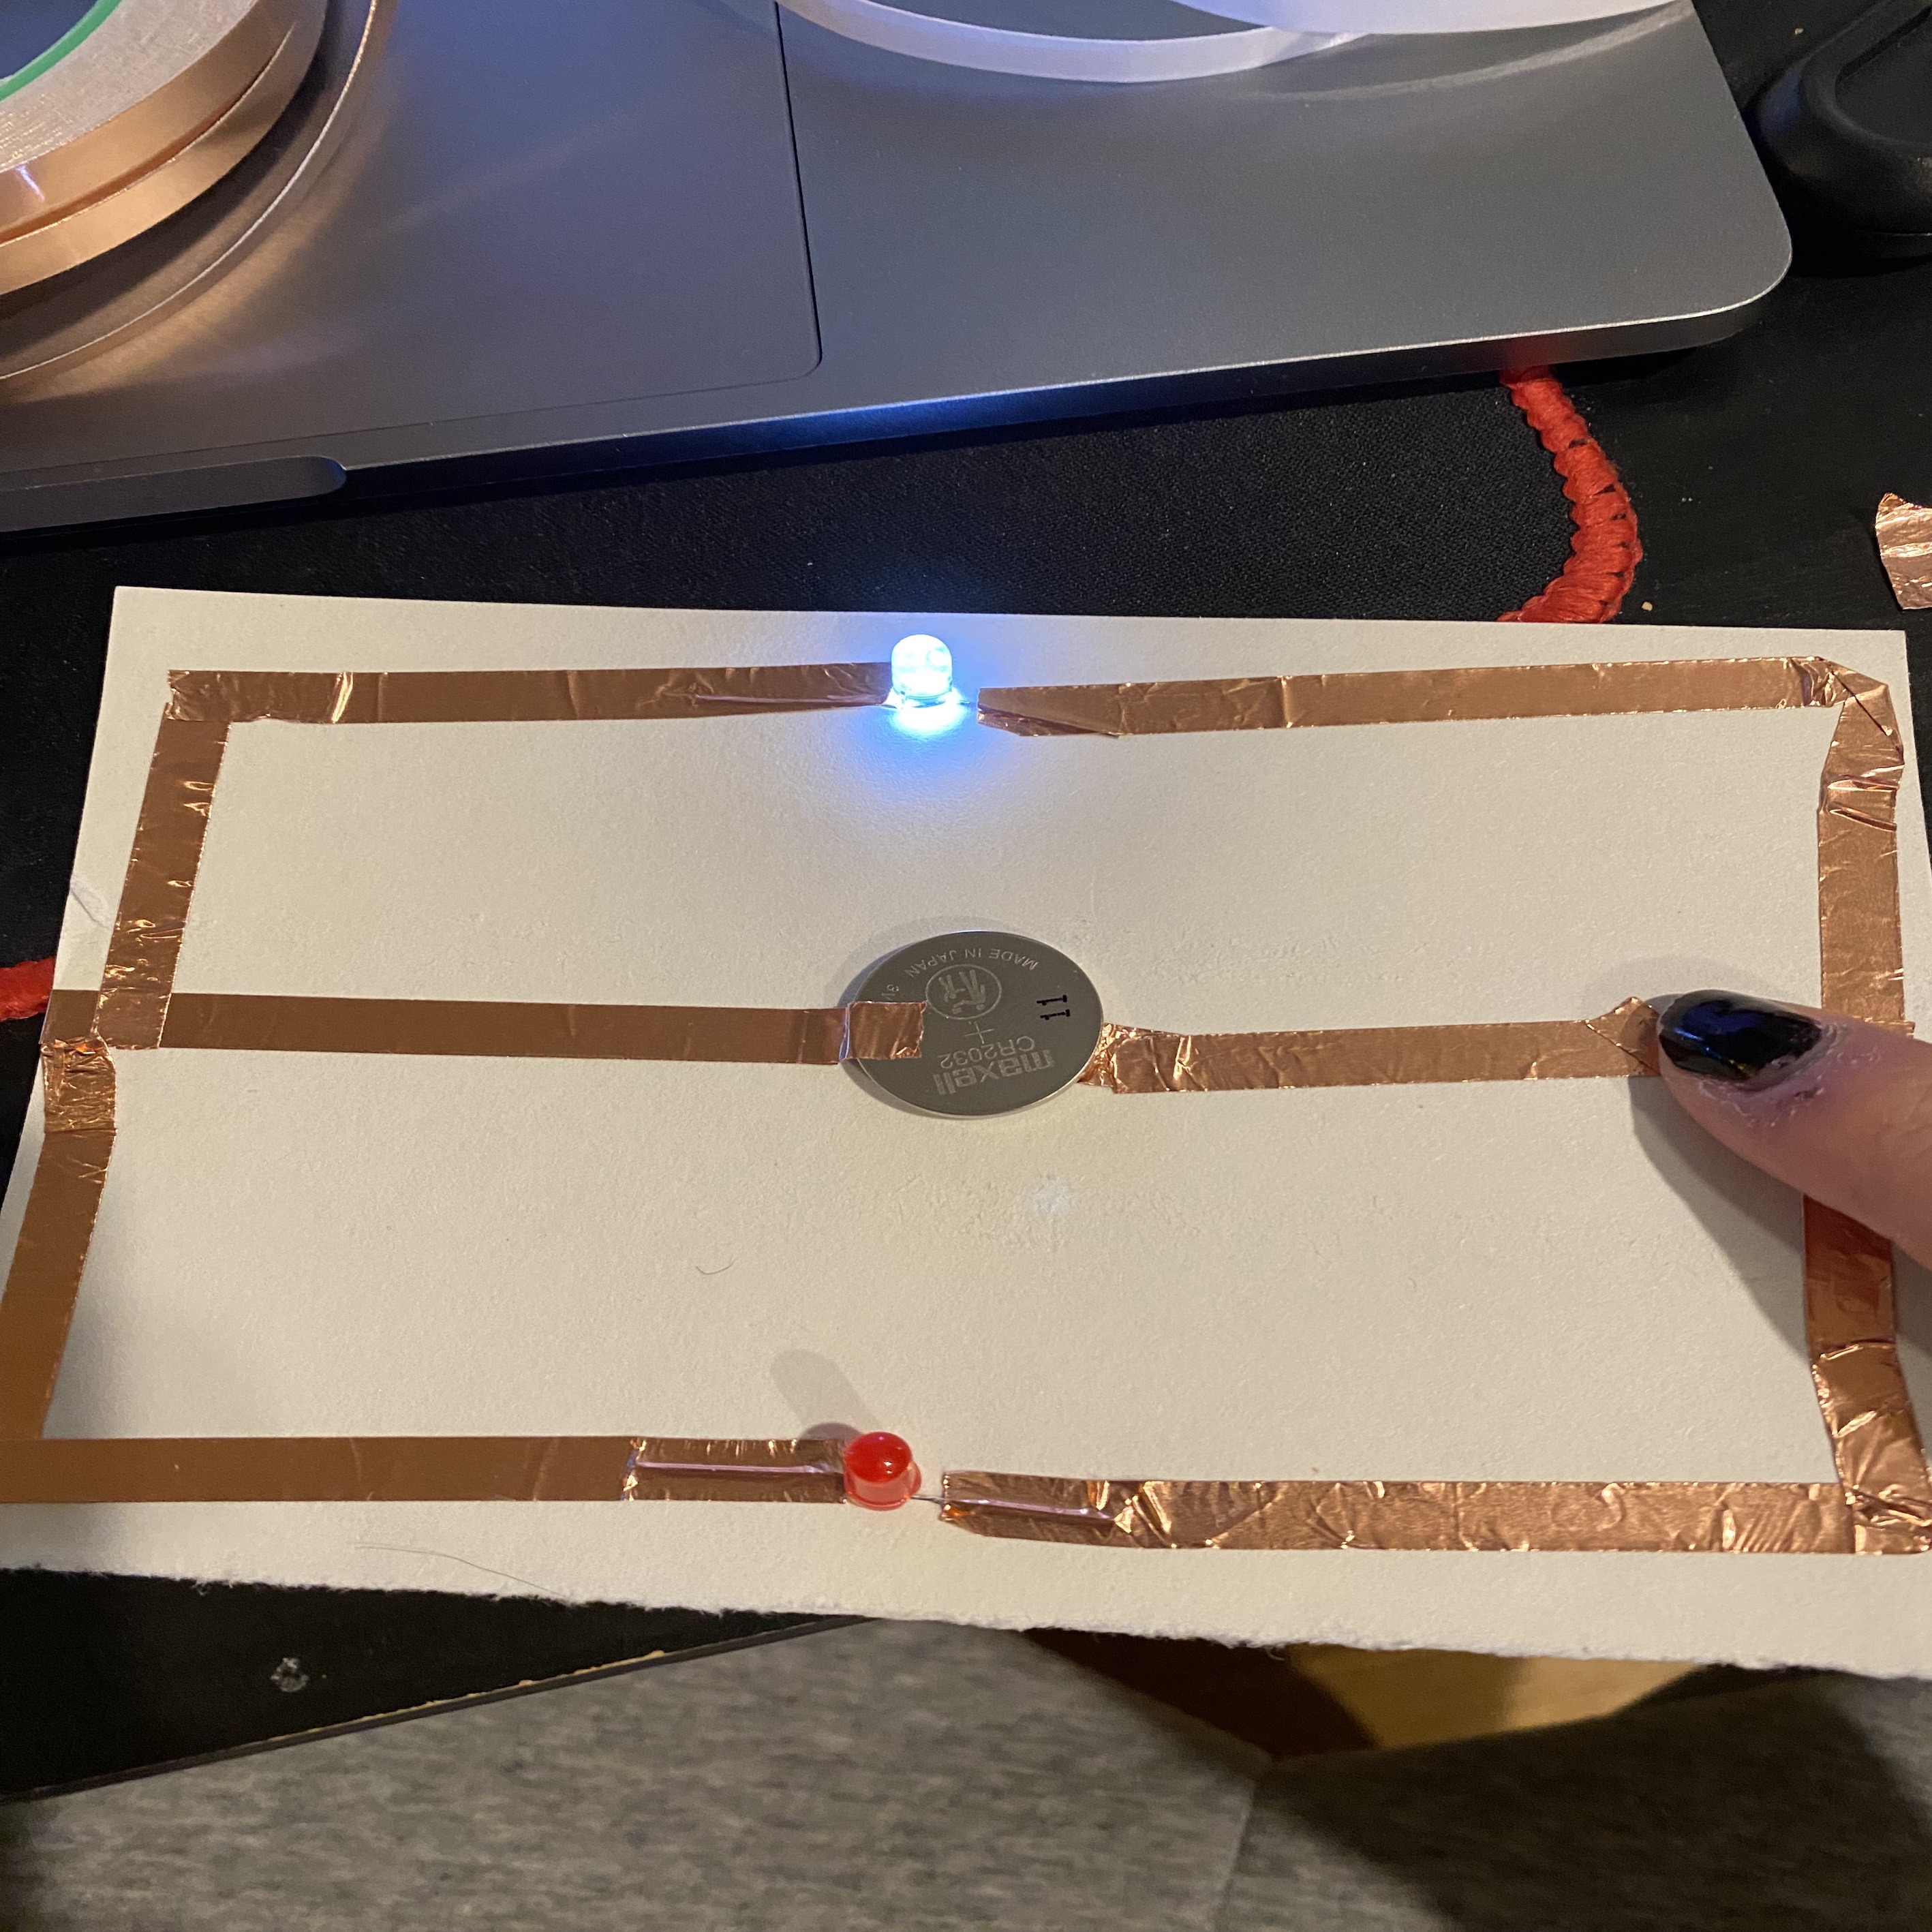
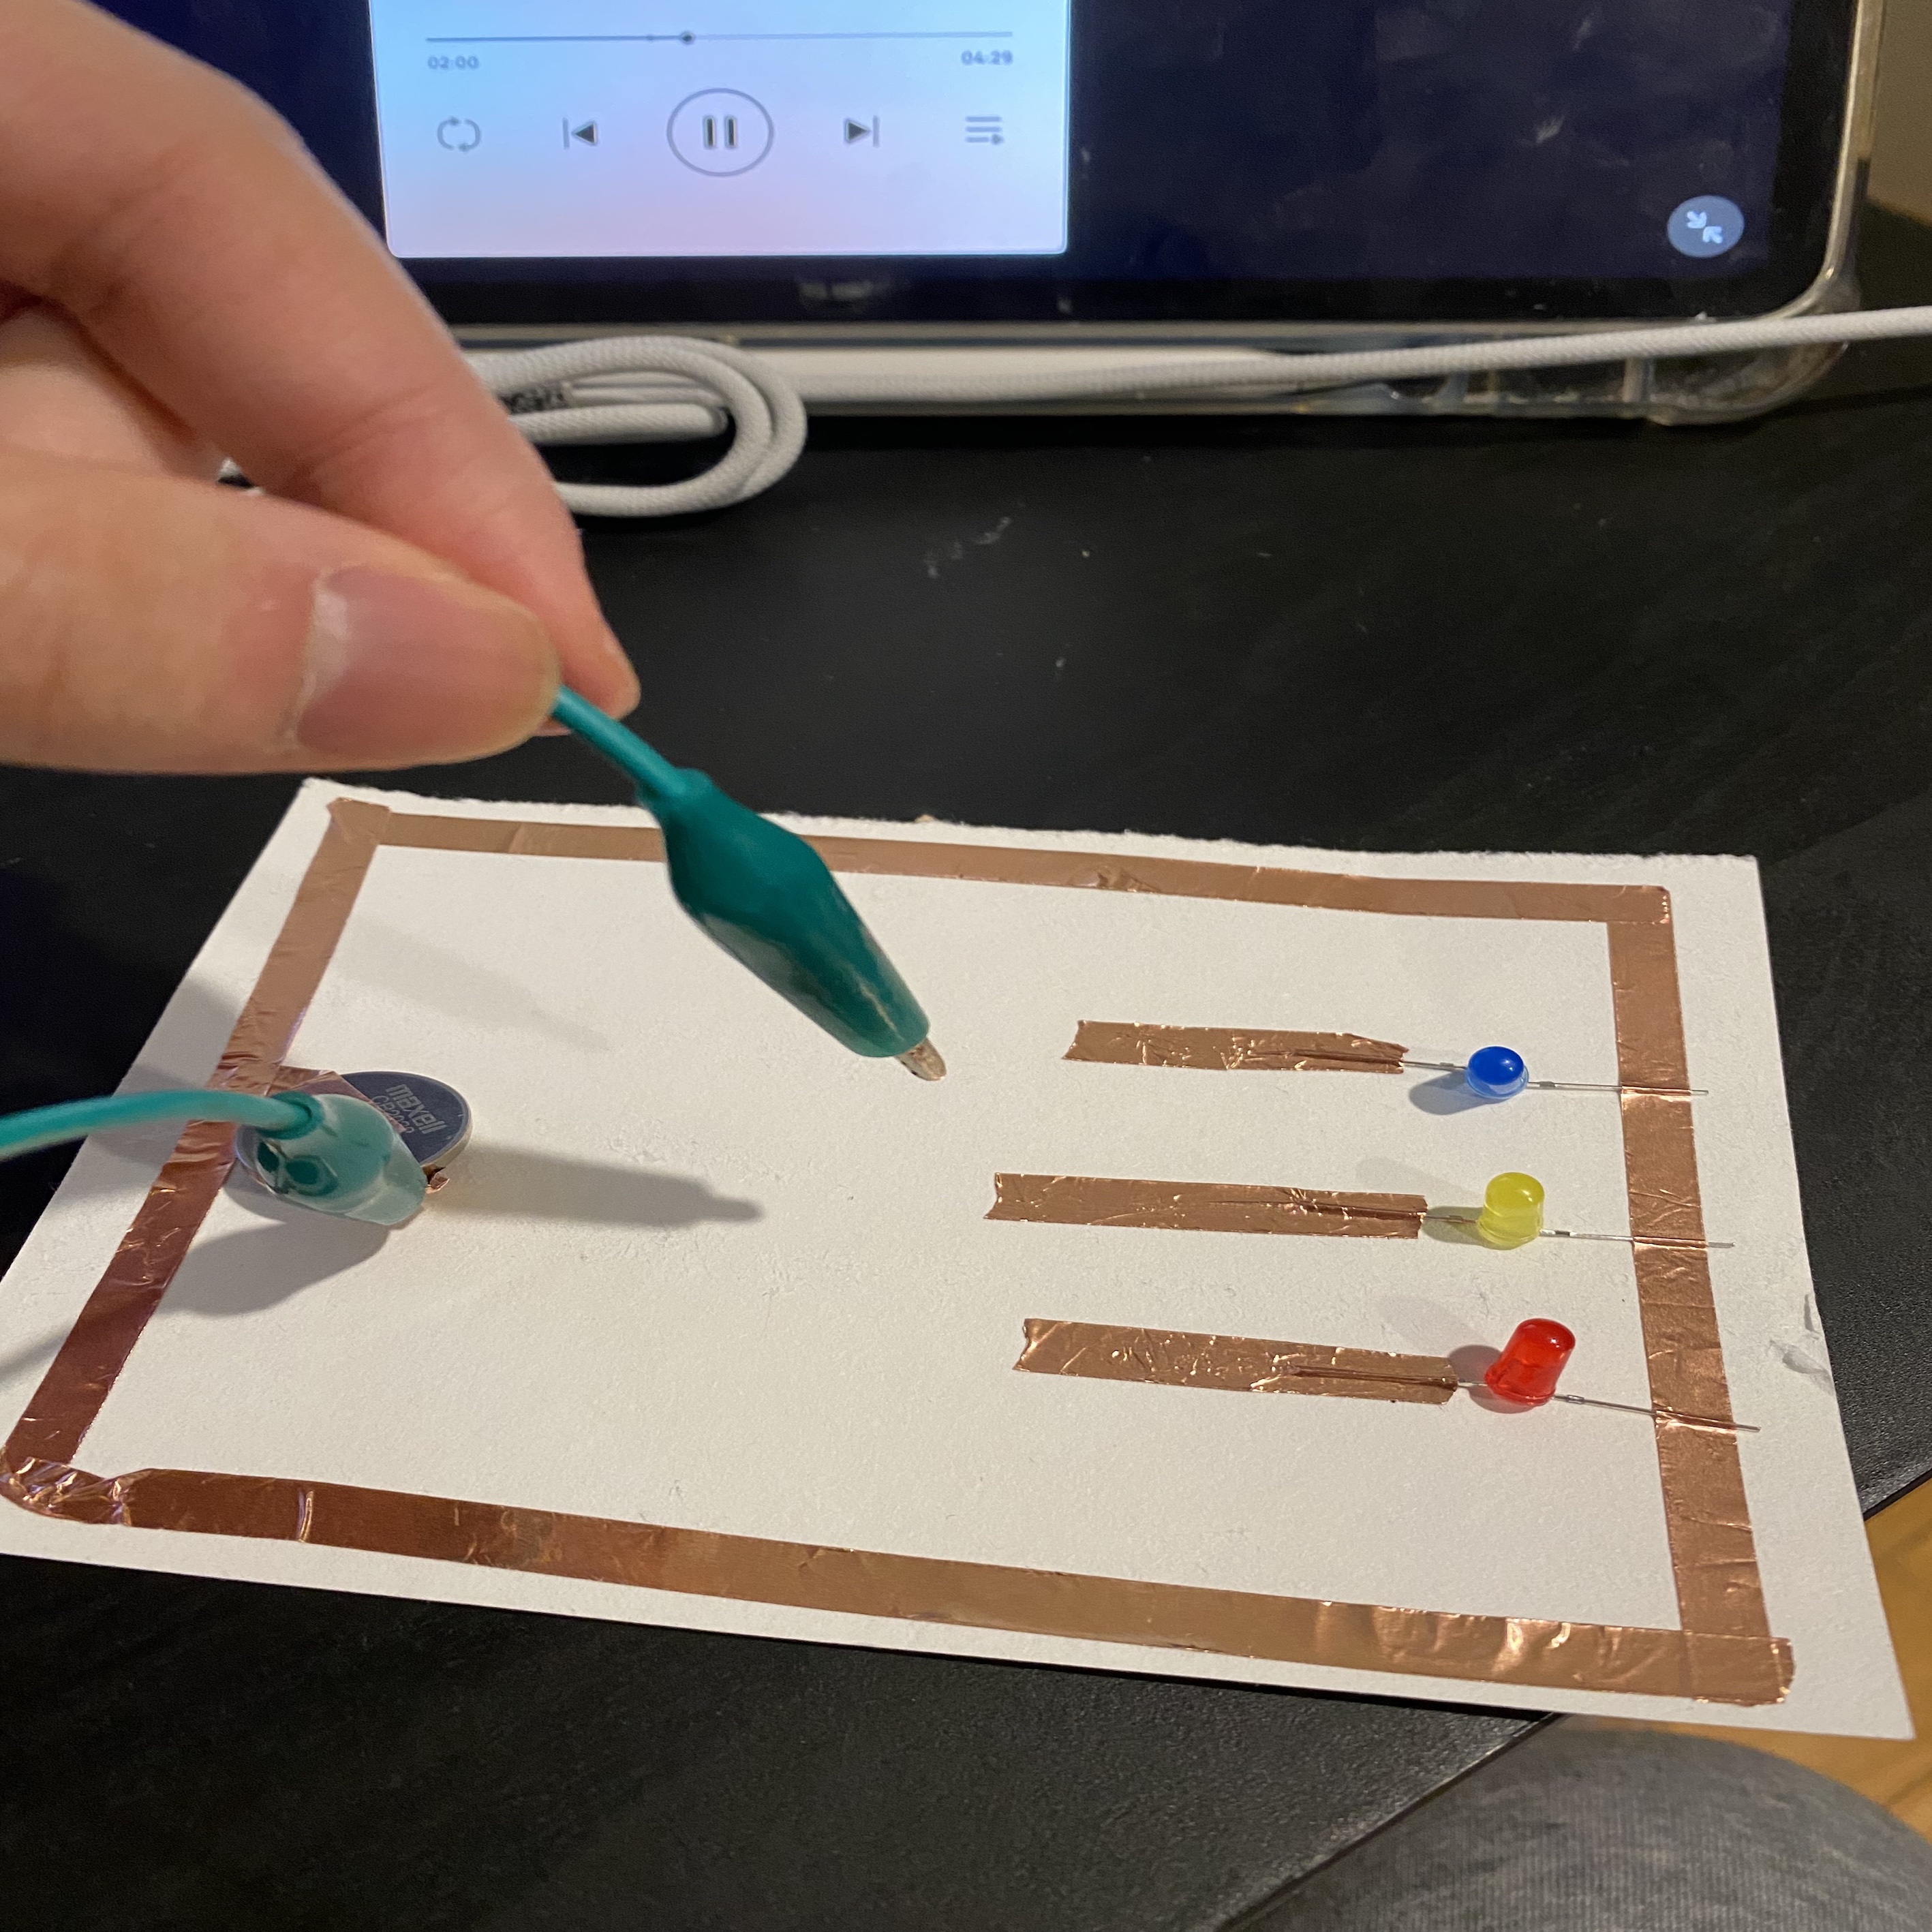
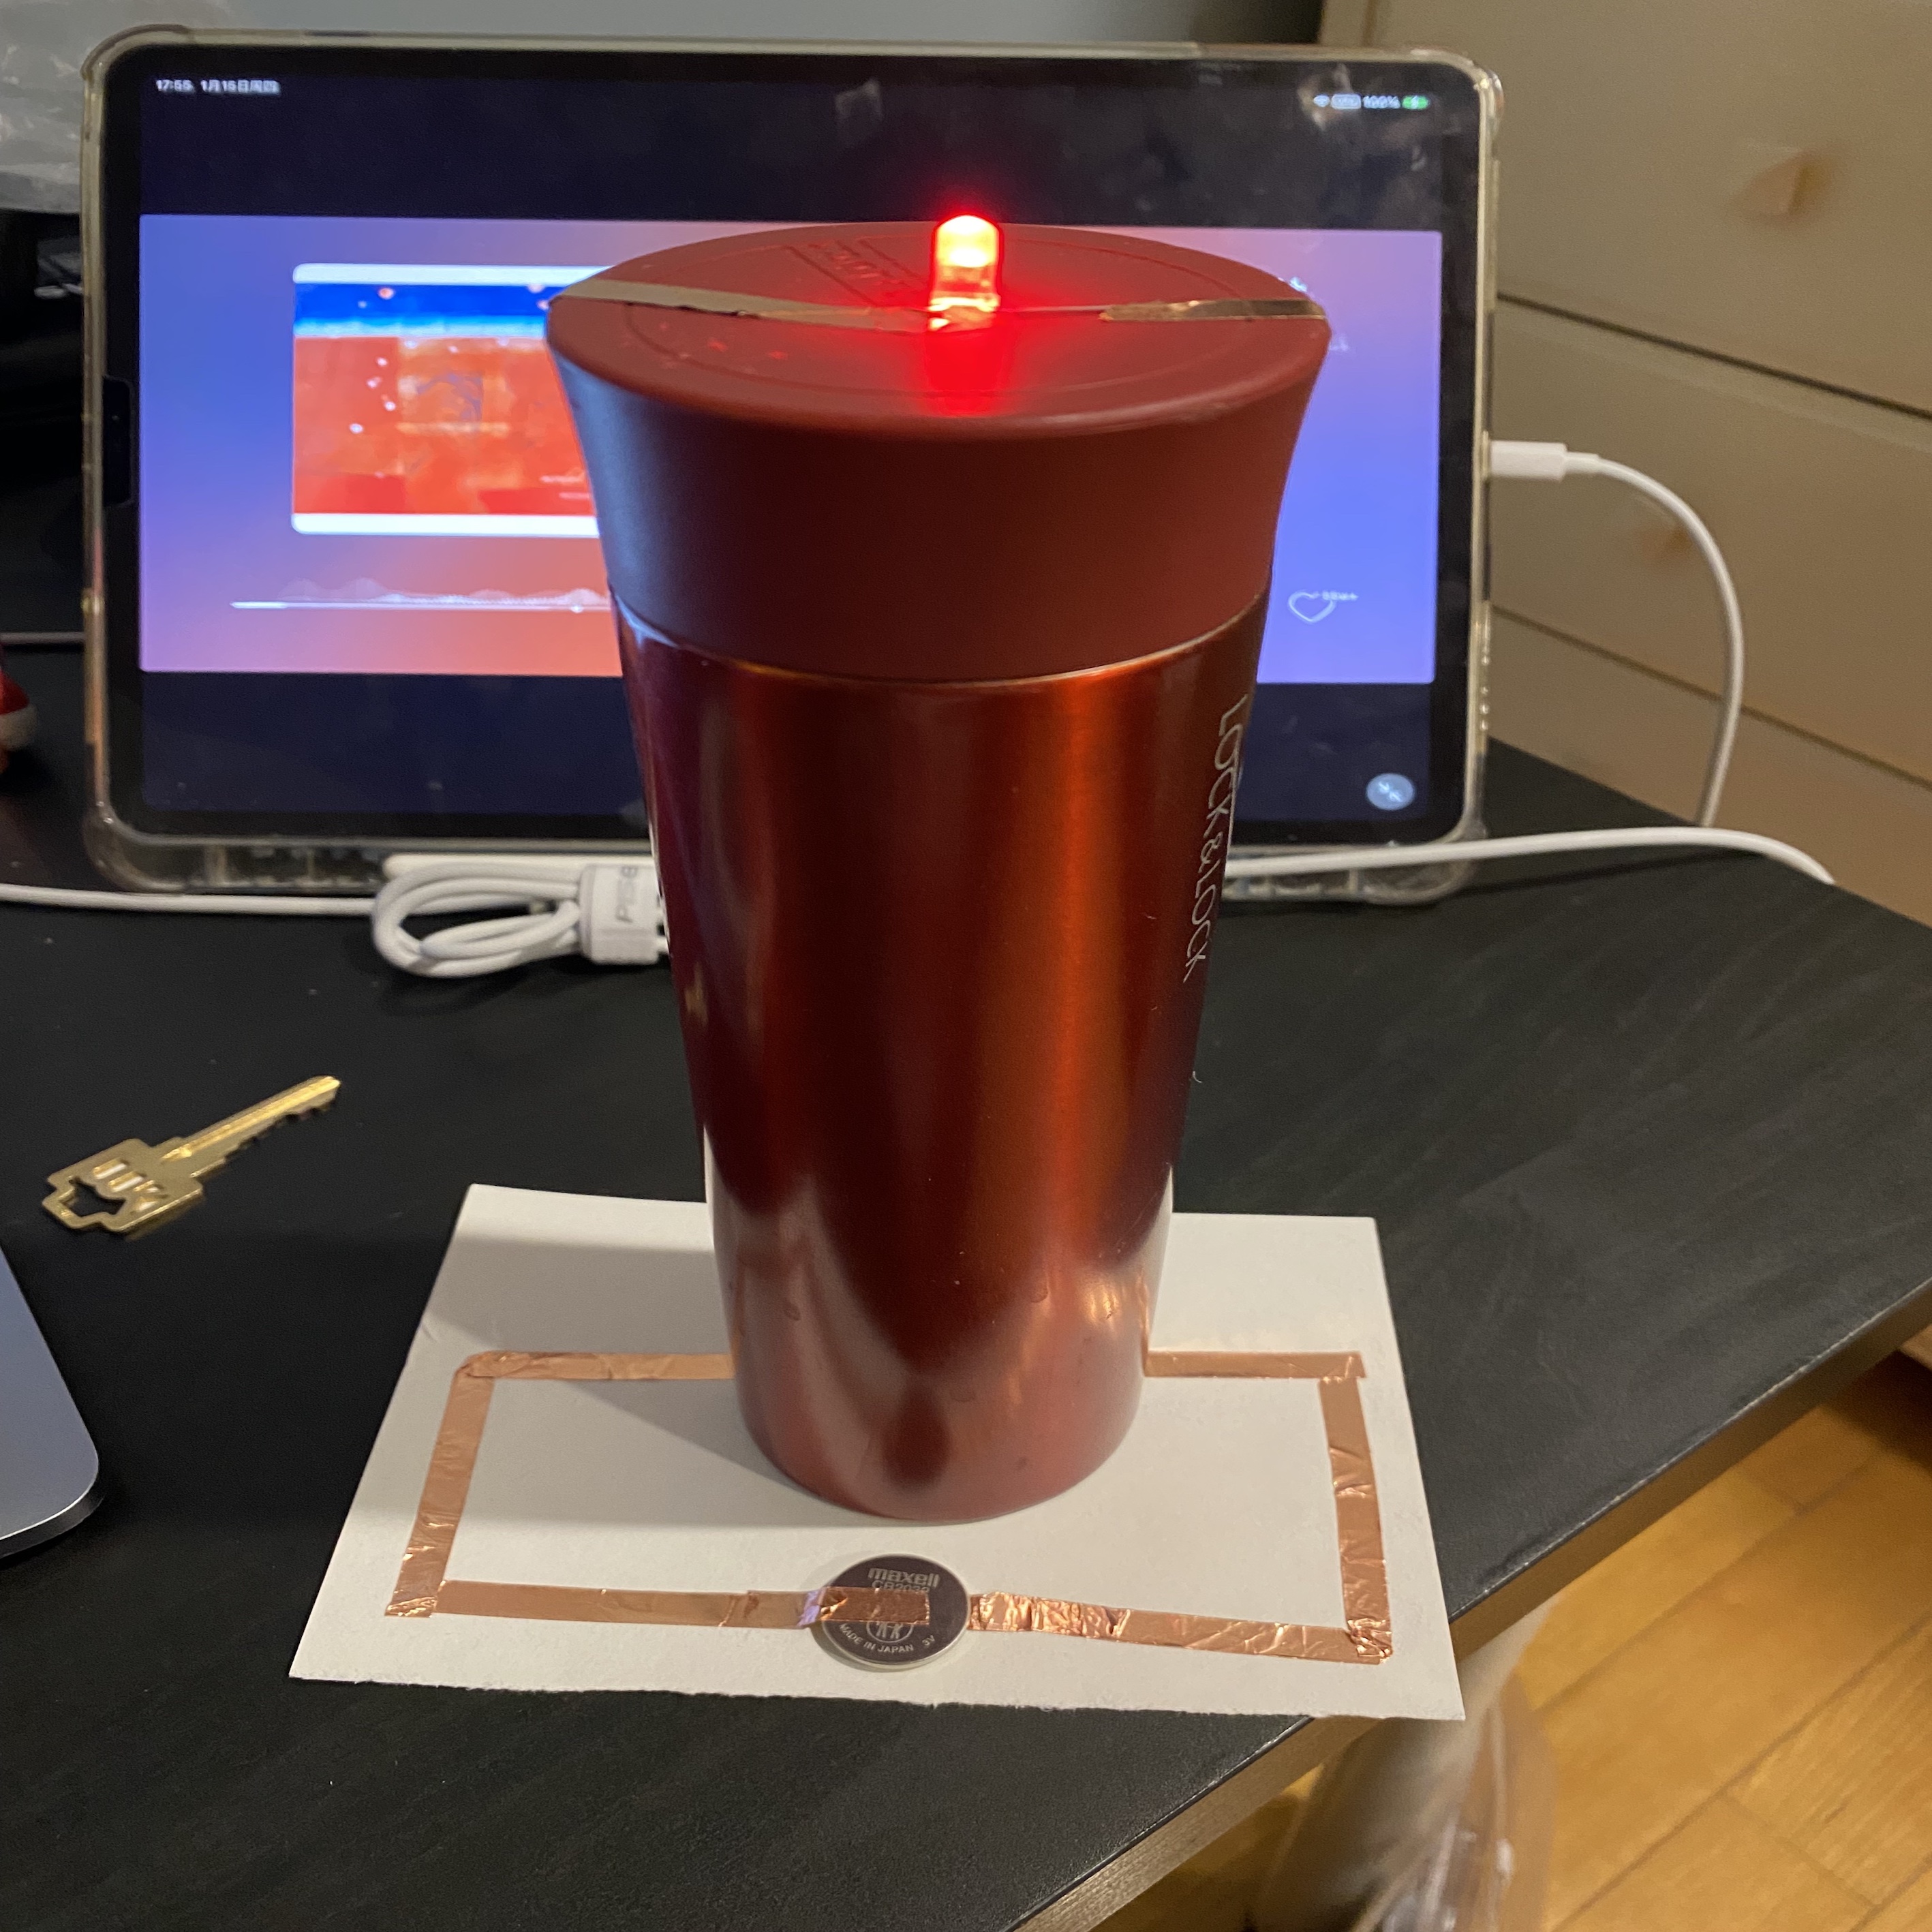
Activity 2


Project 1
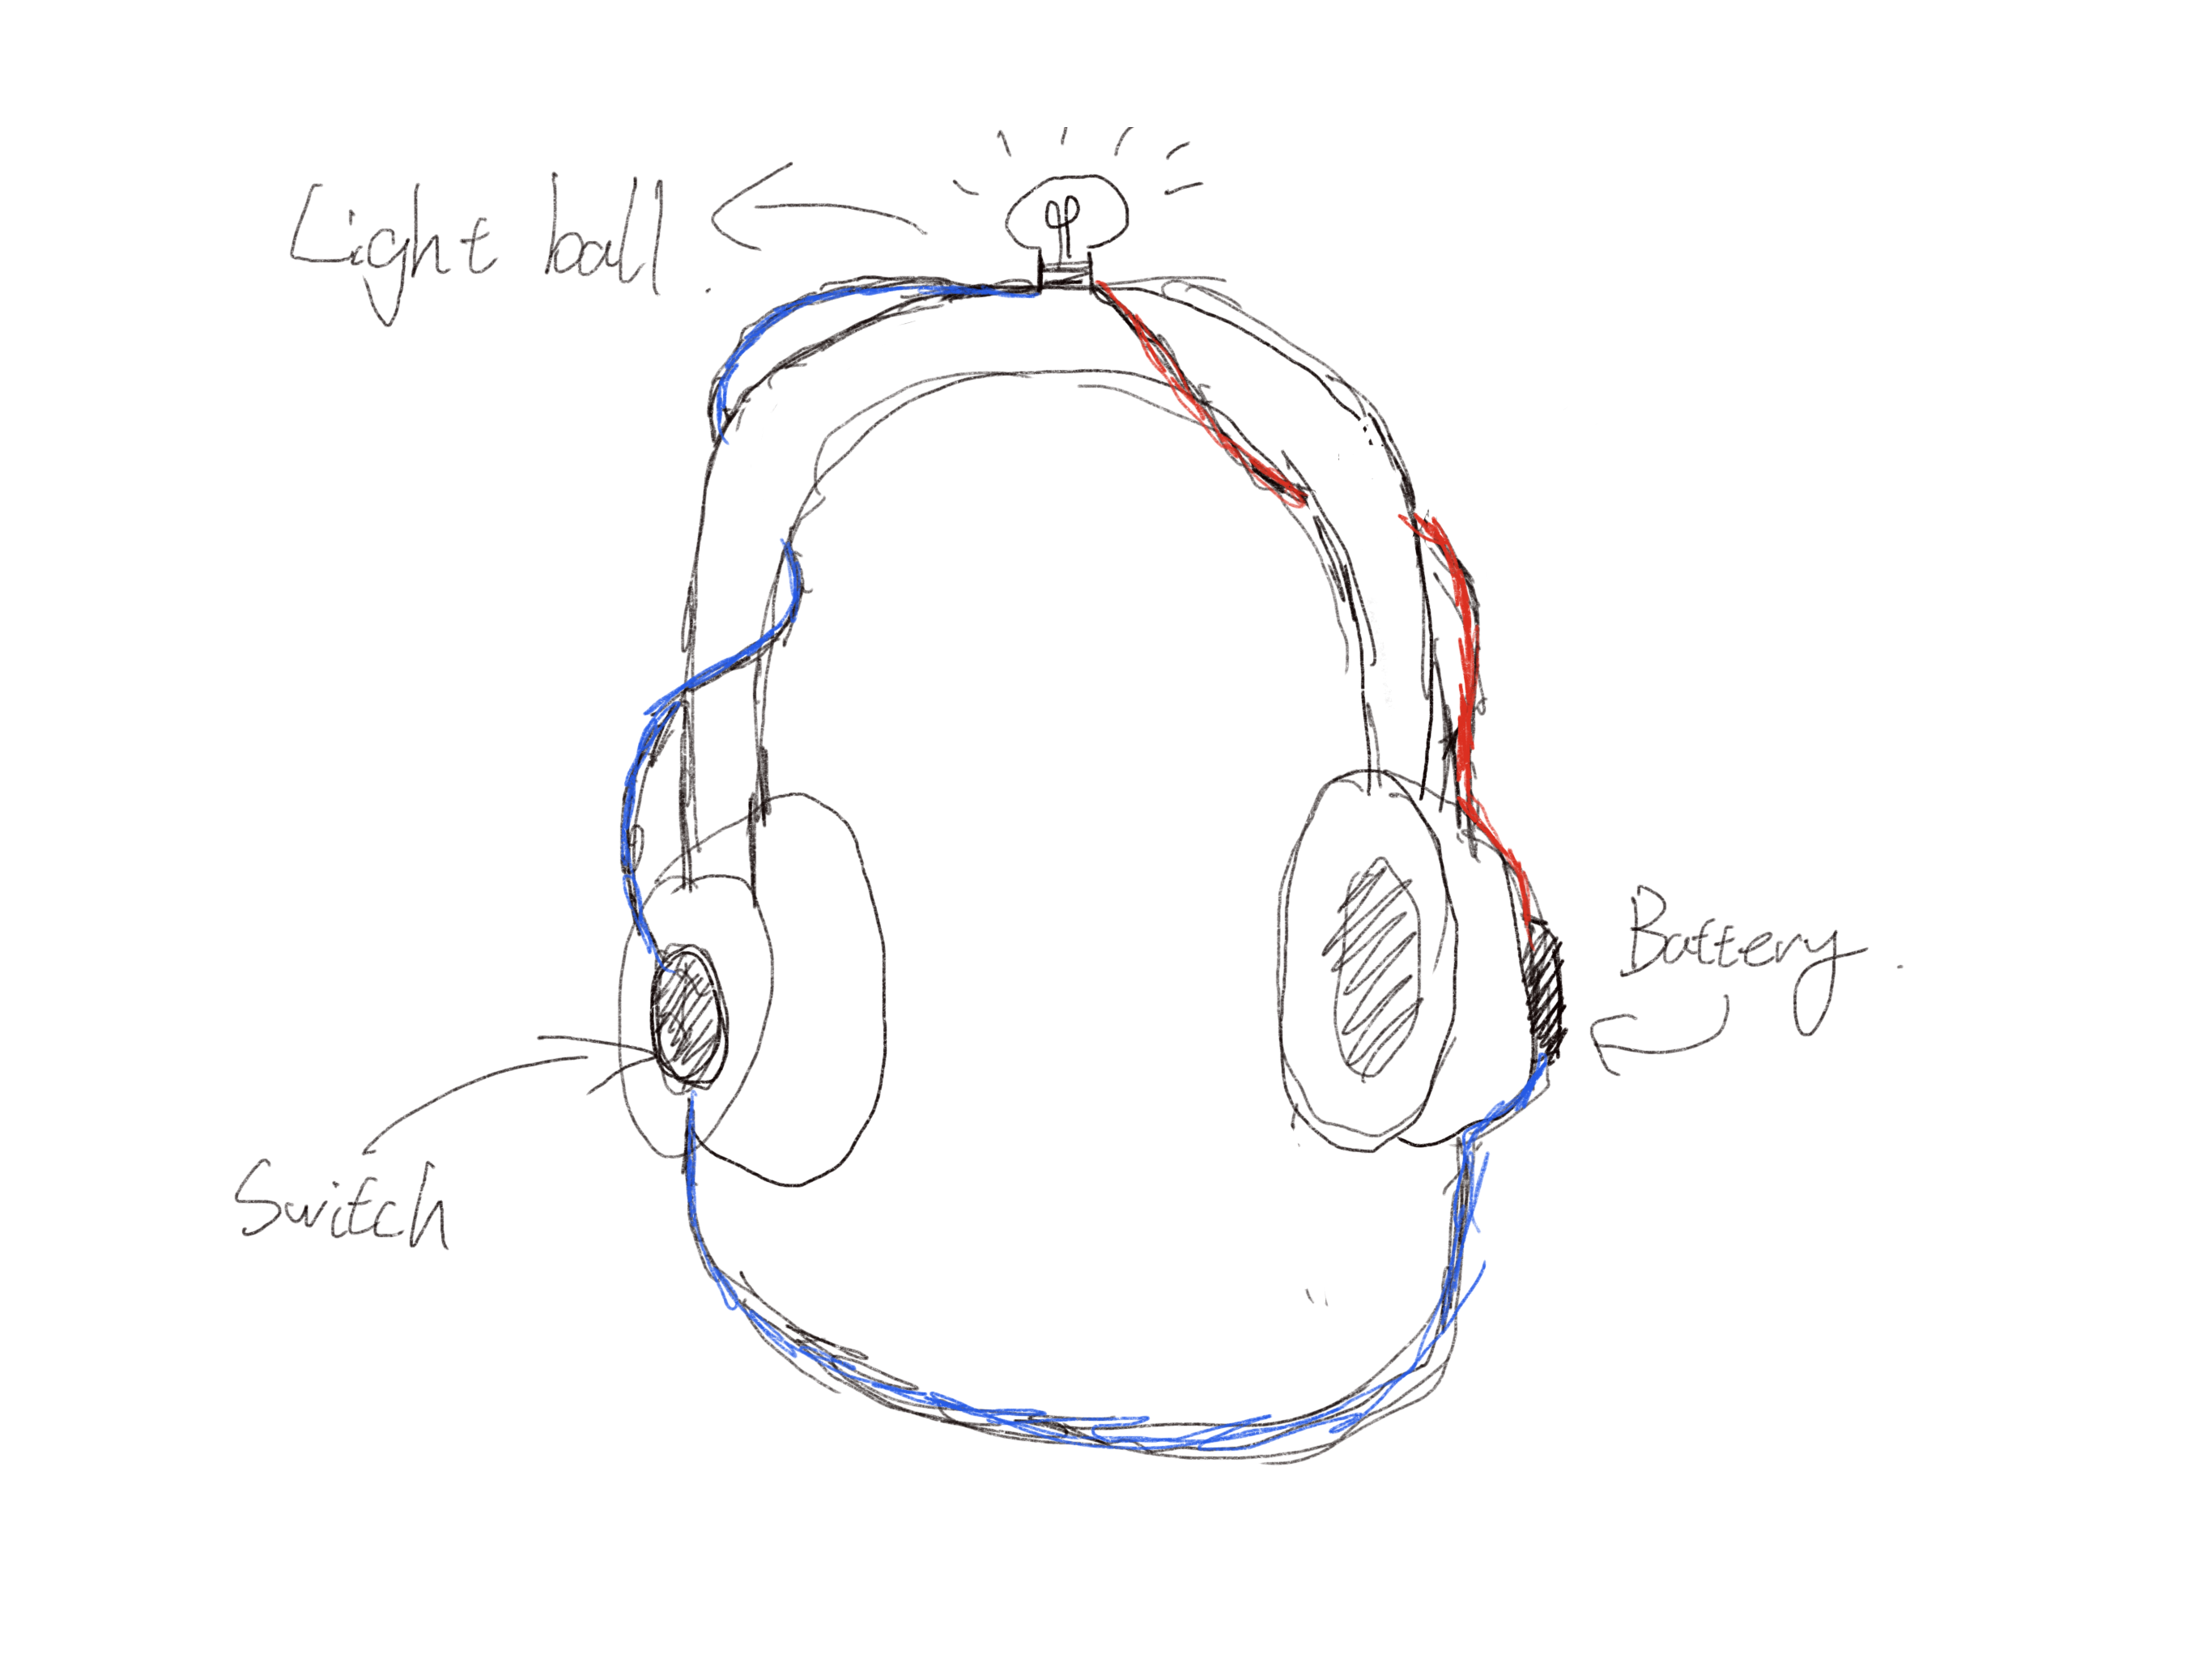
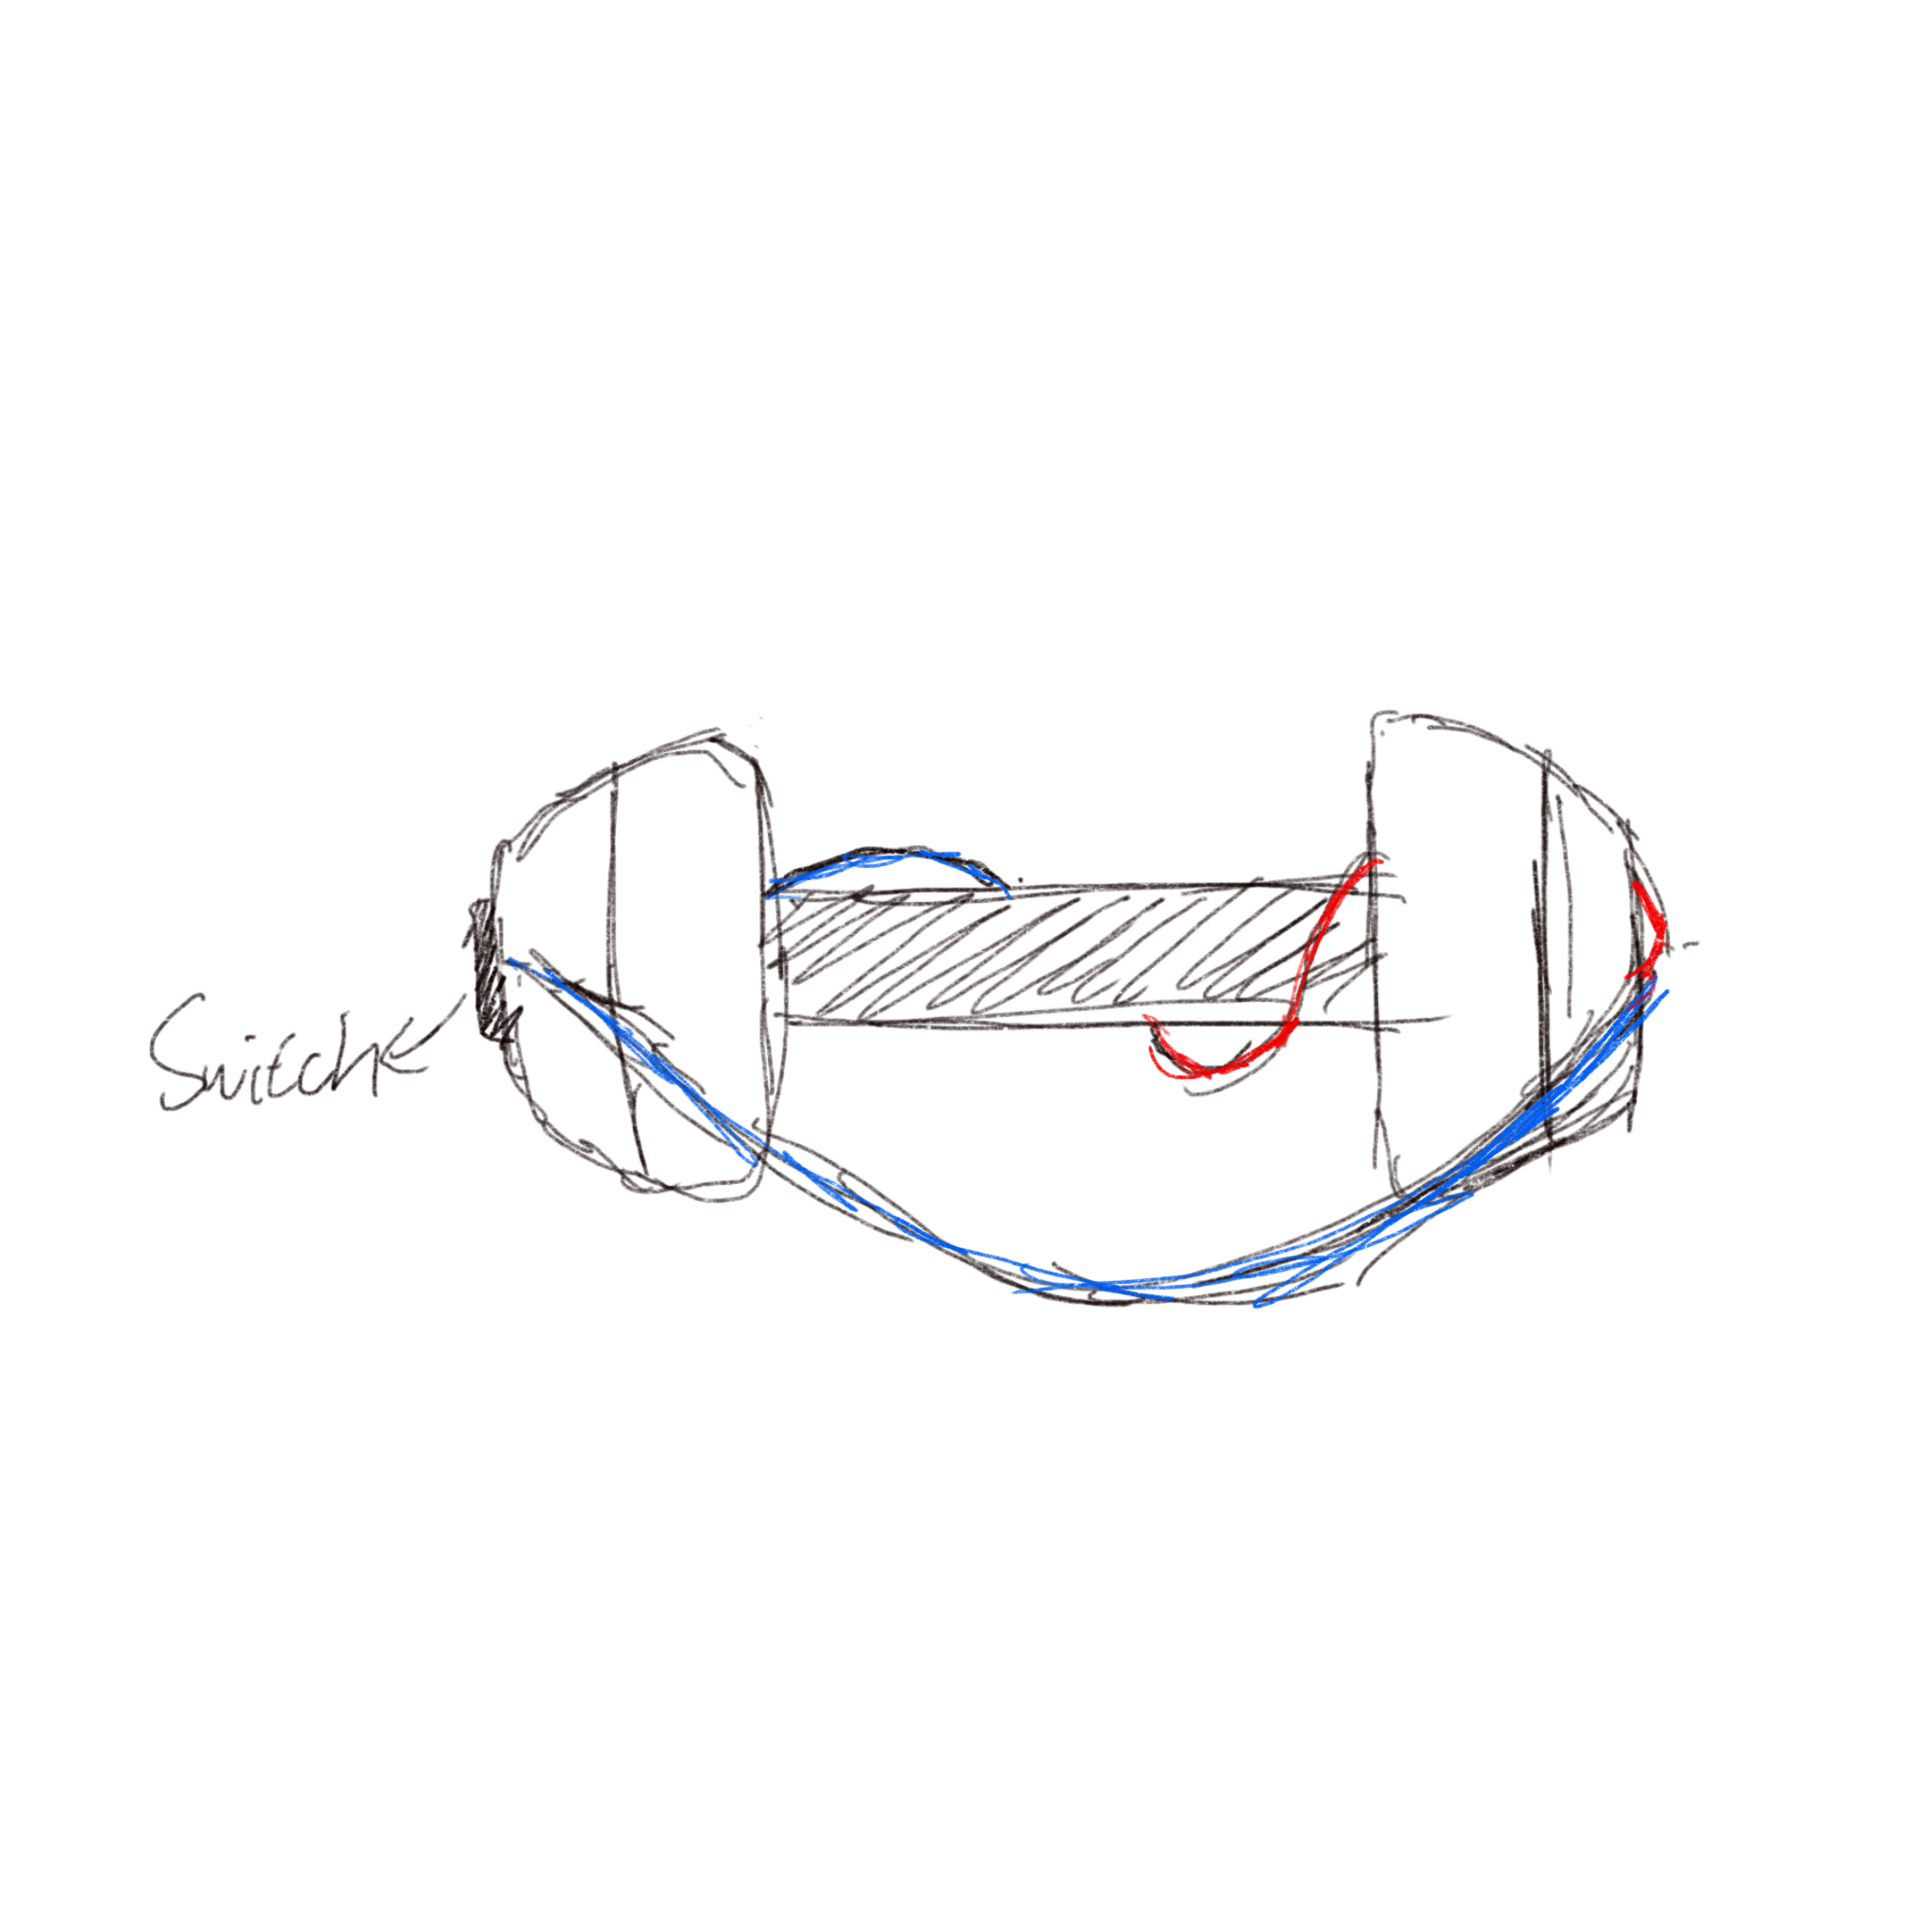
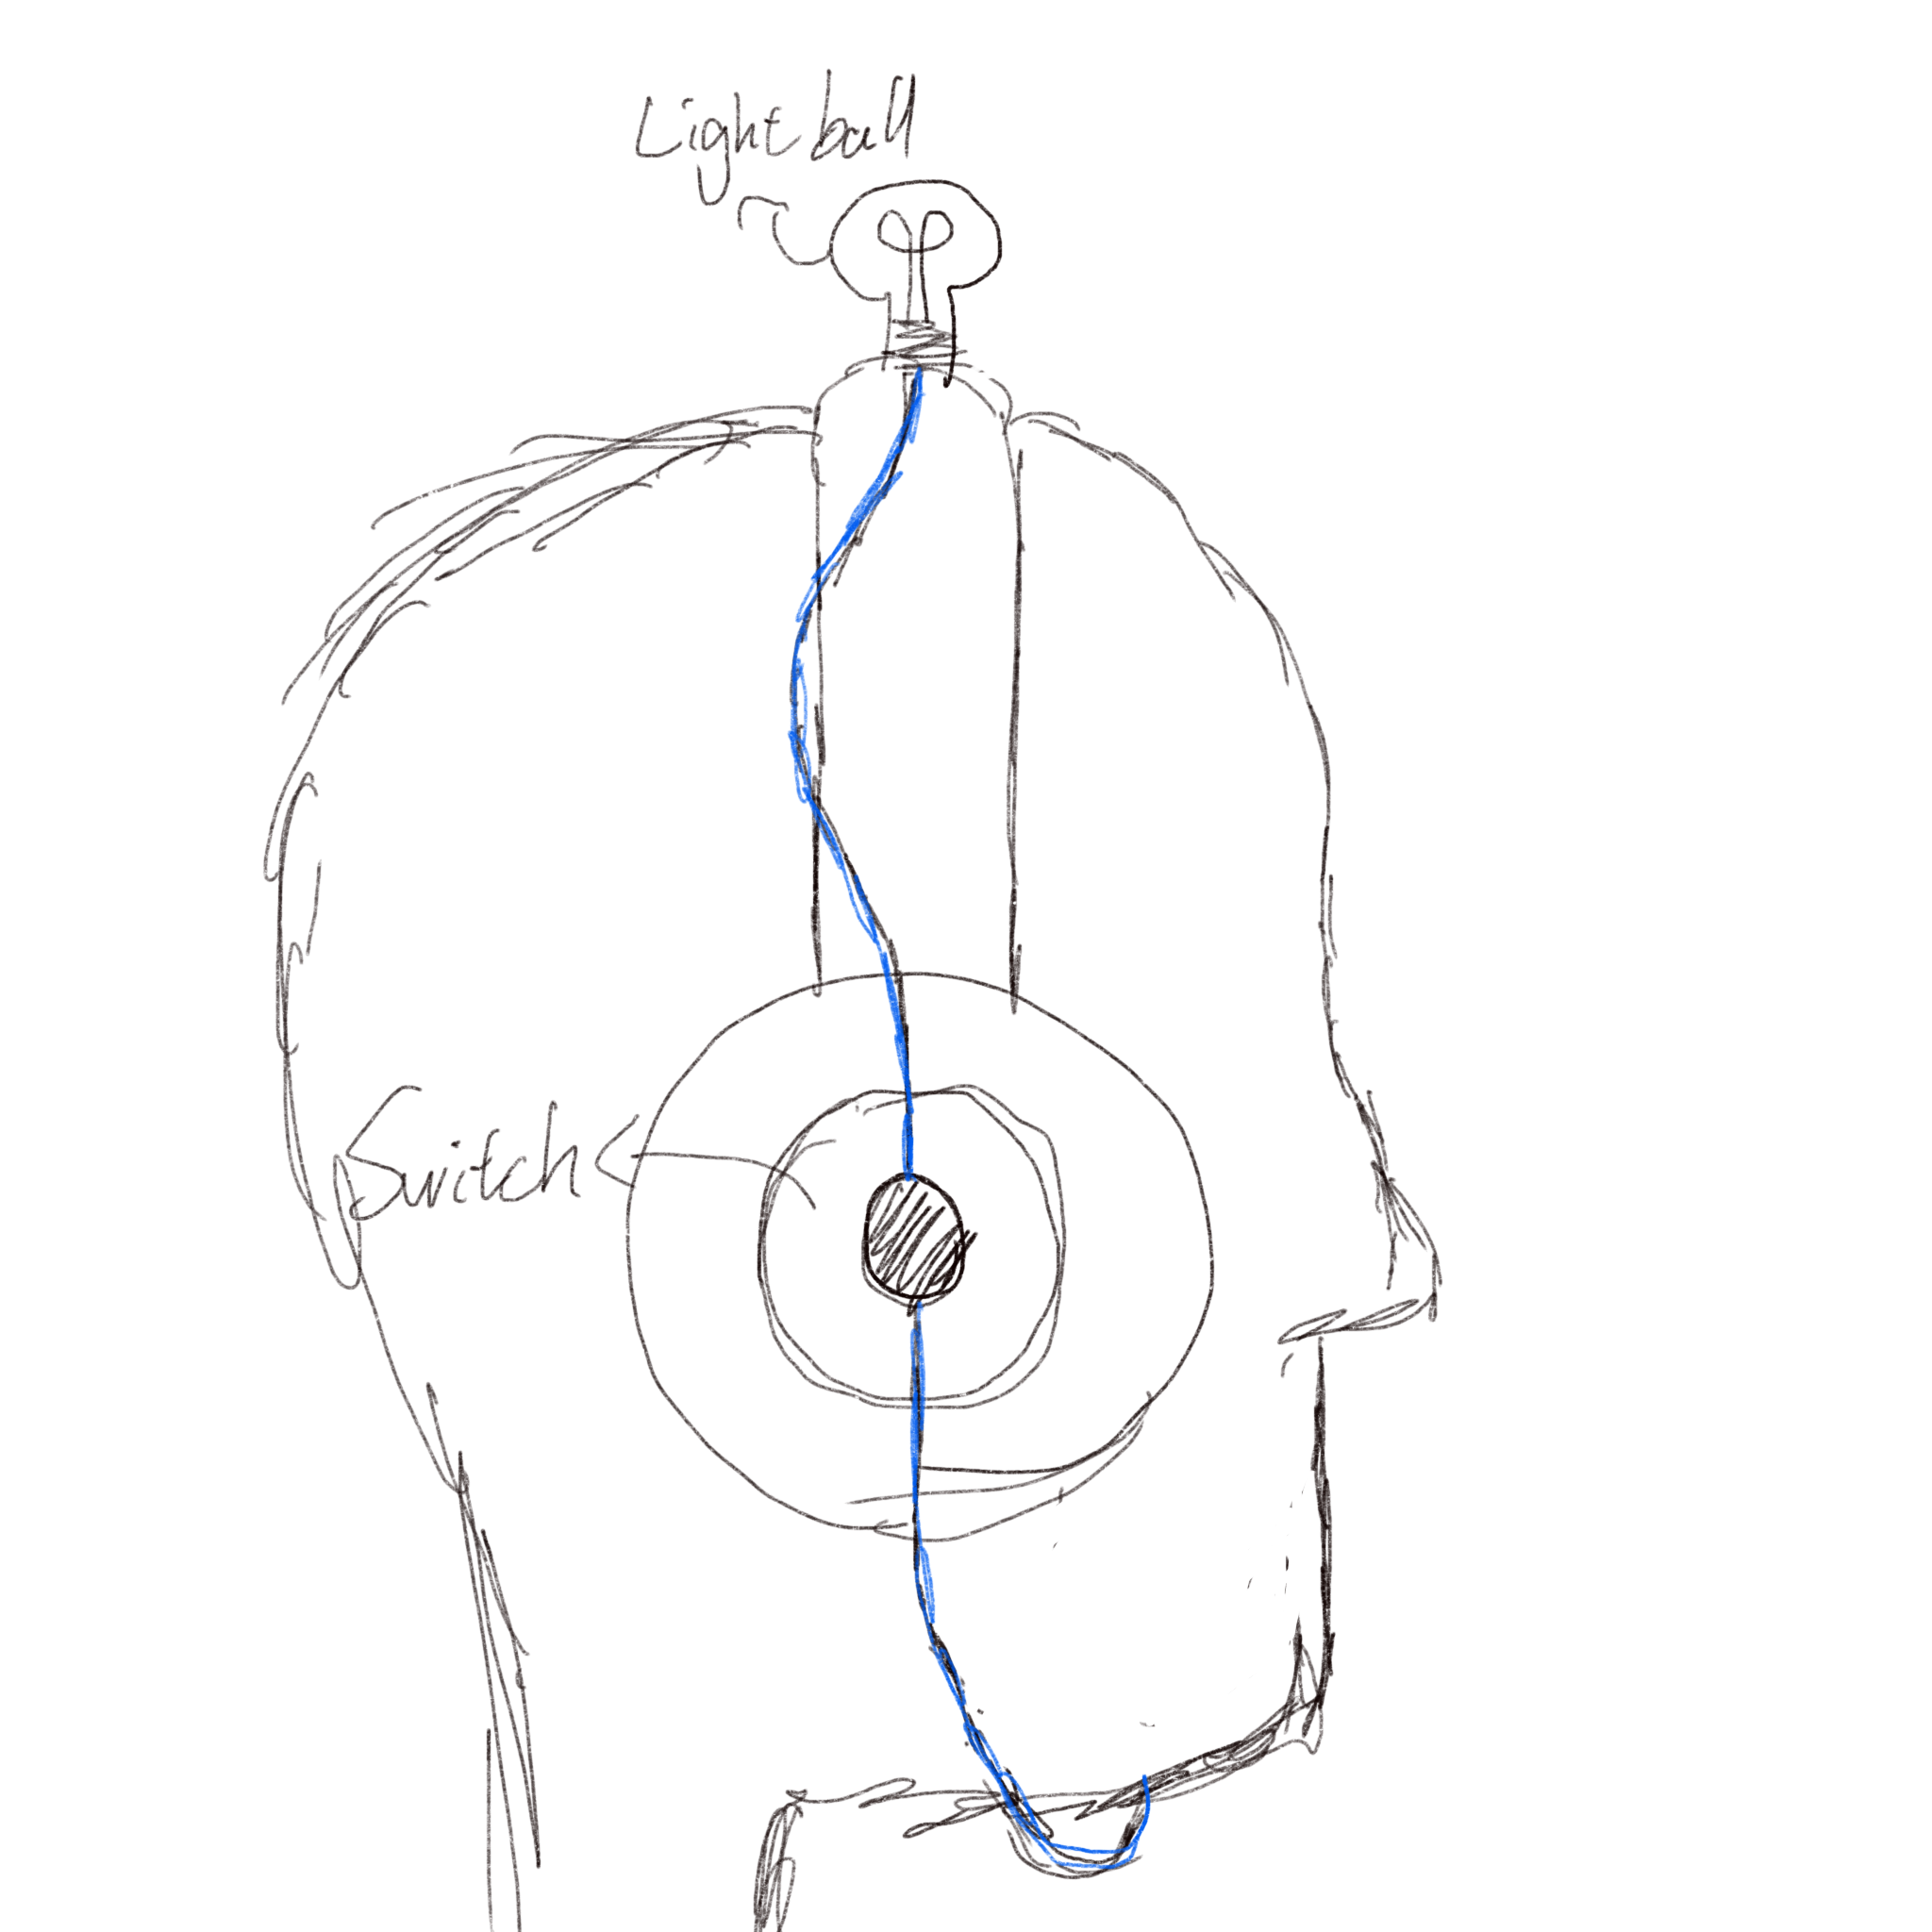
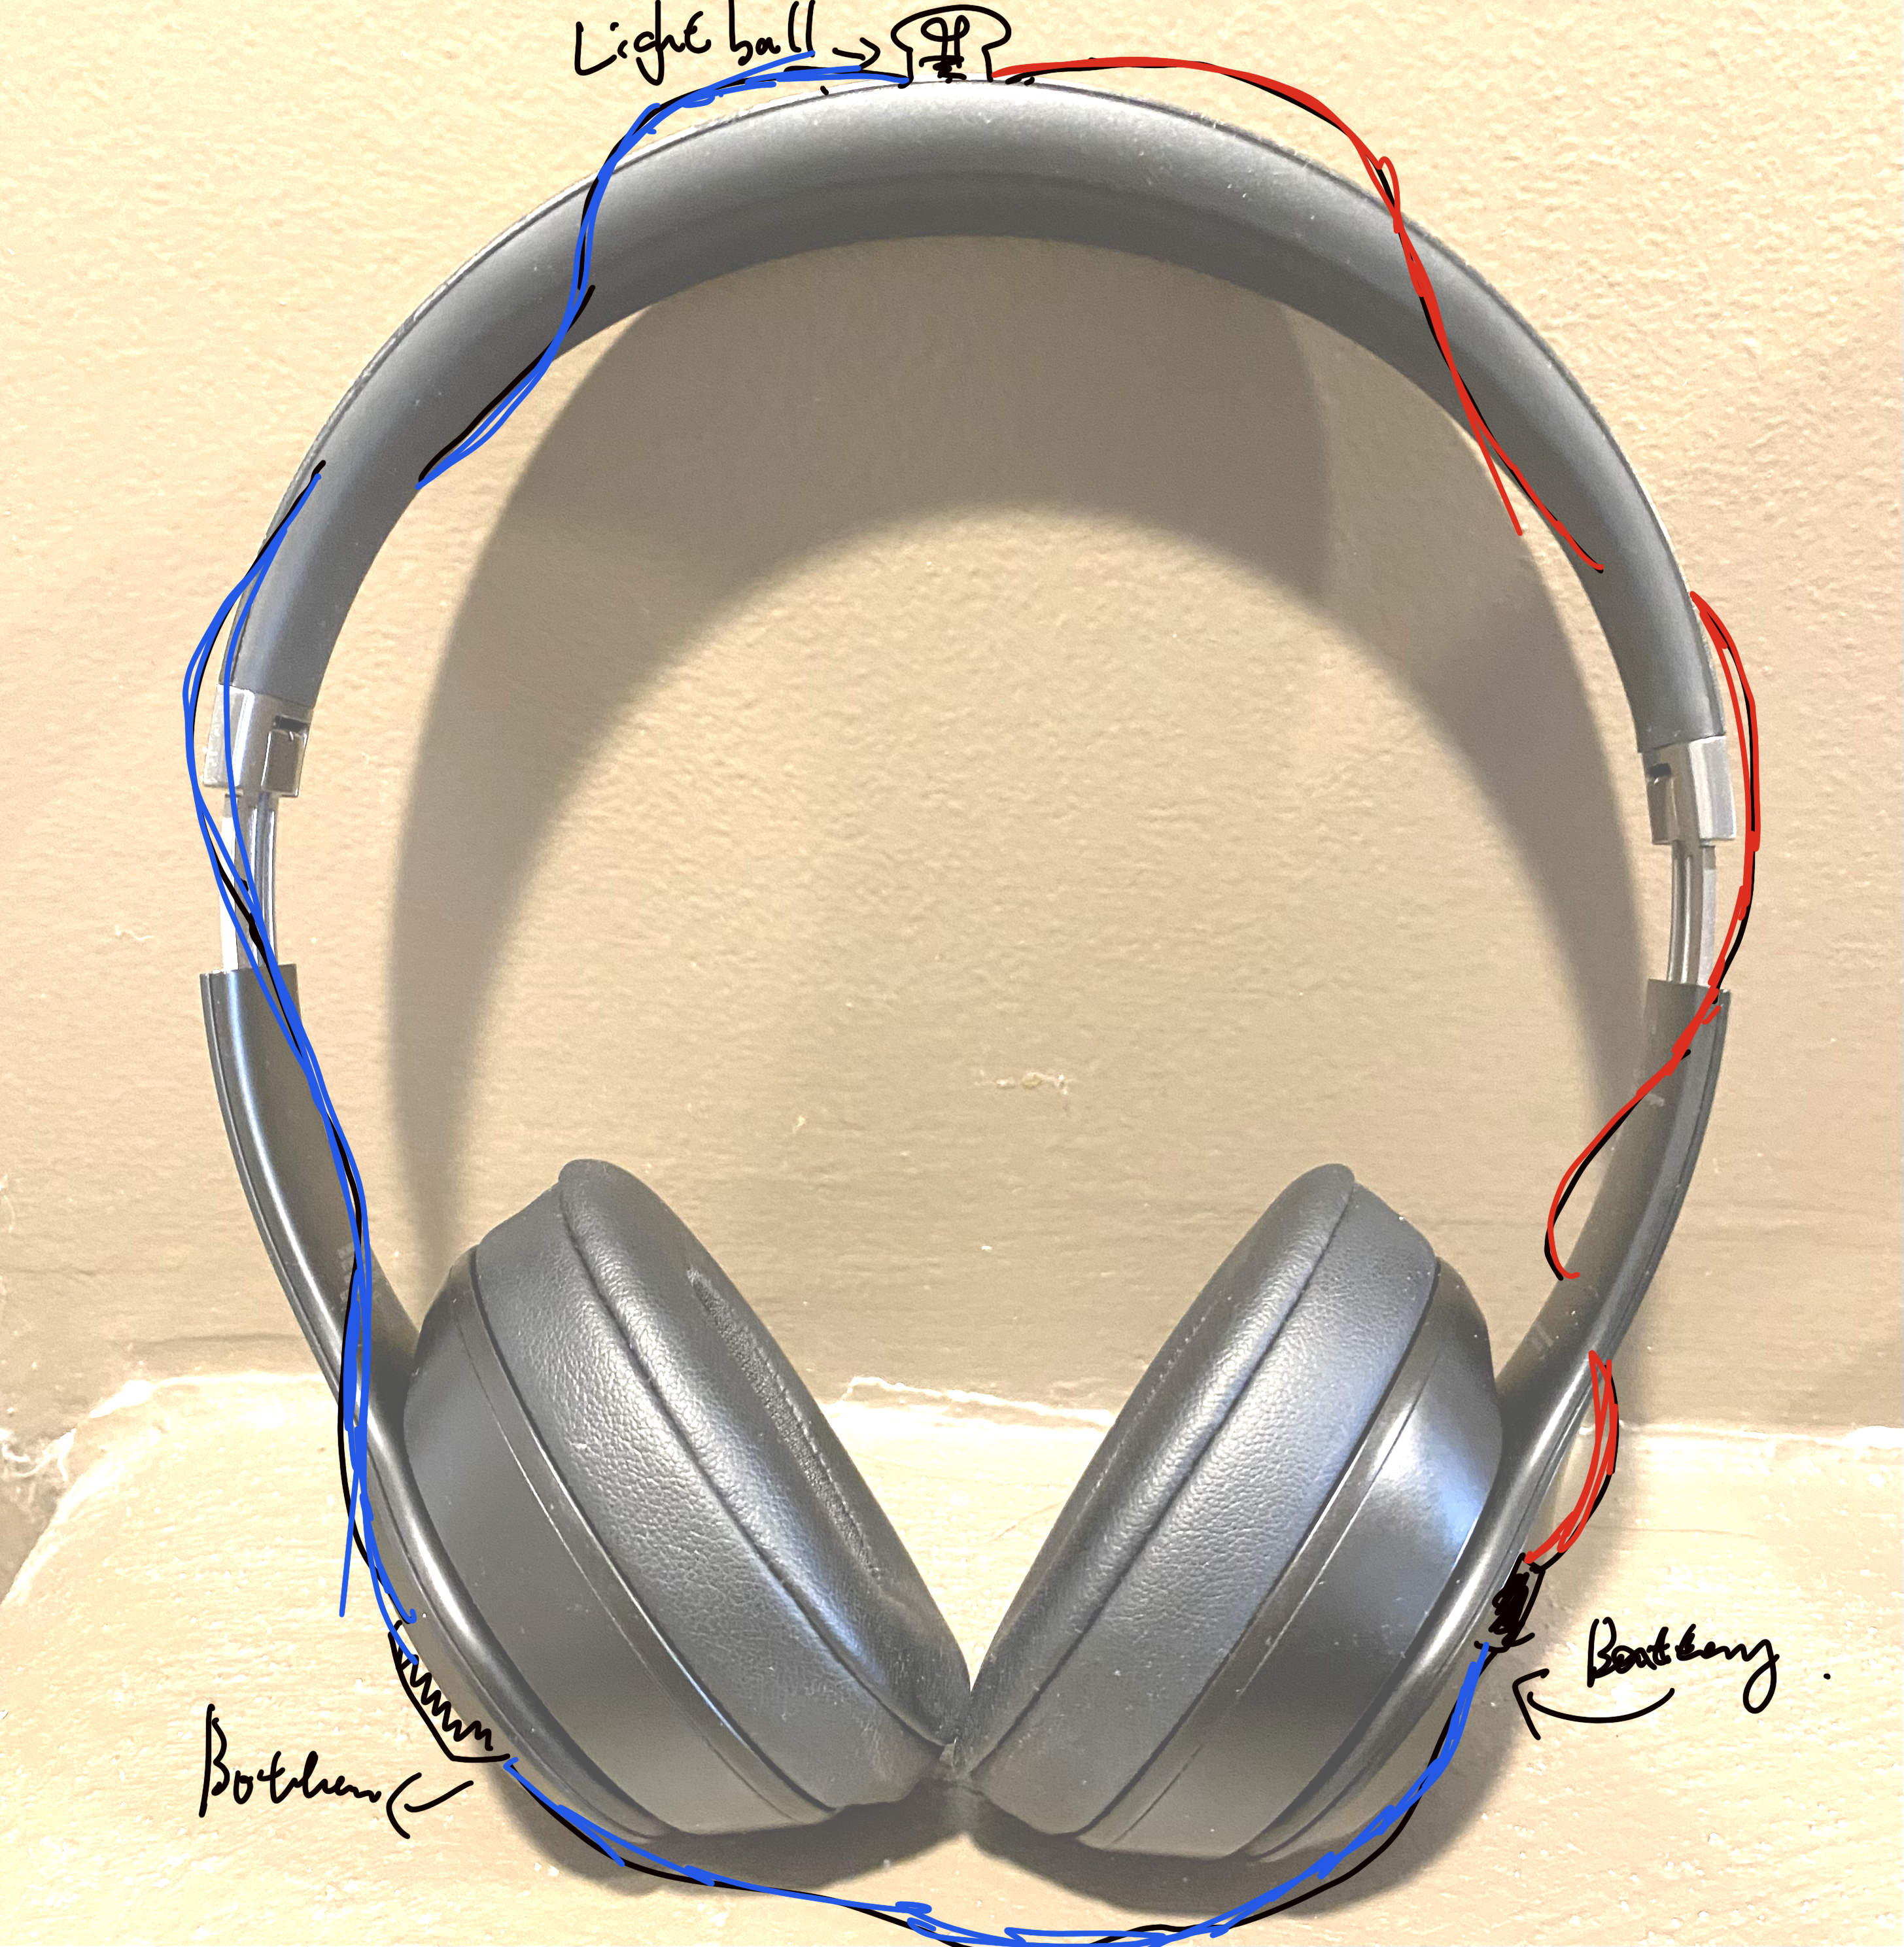
Final Project 1 Design
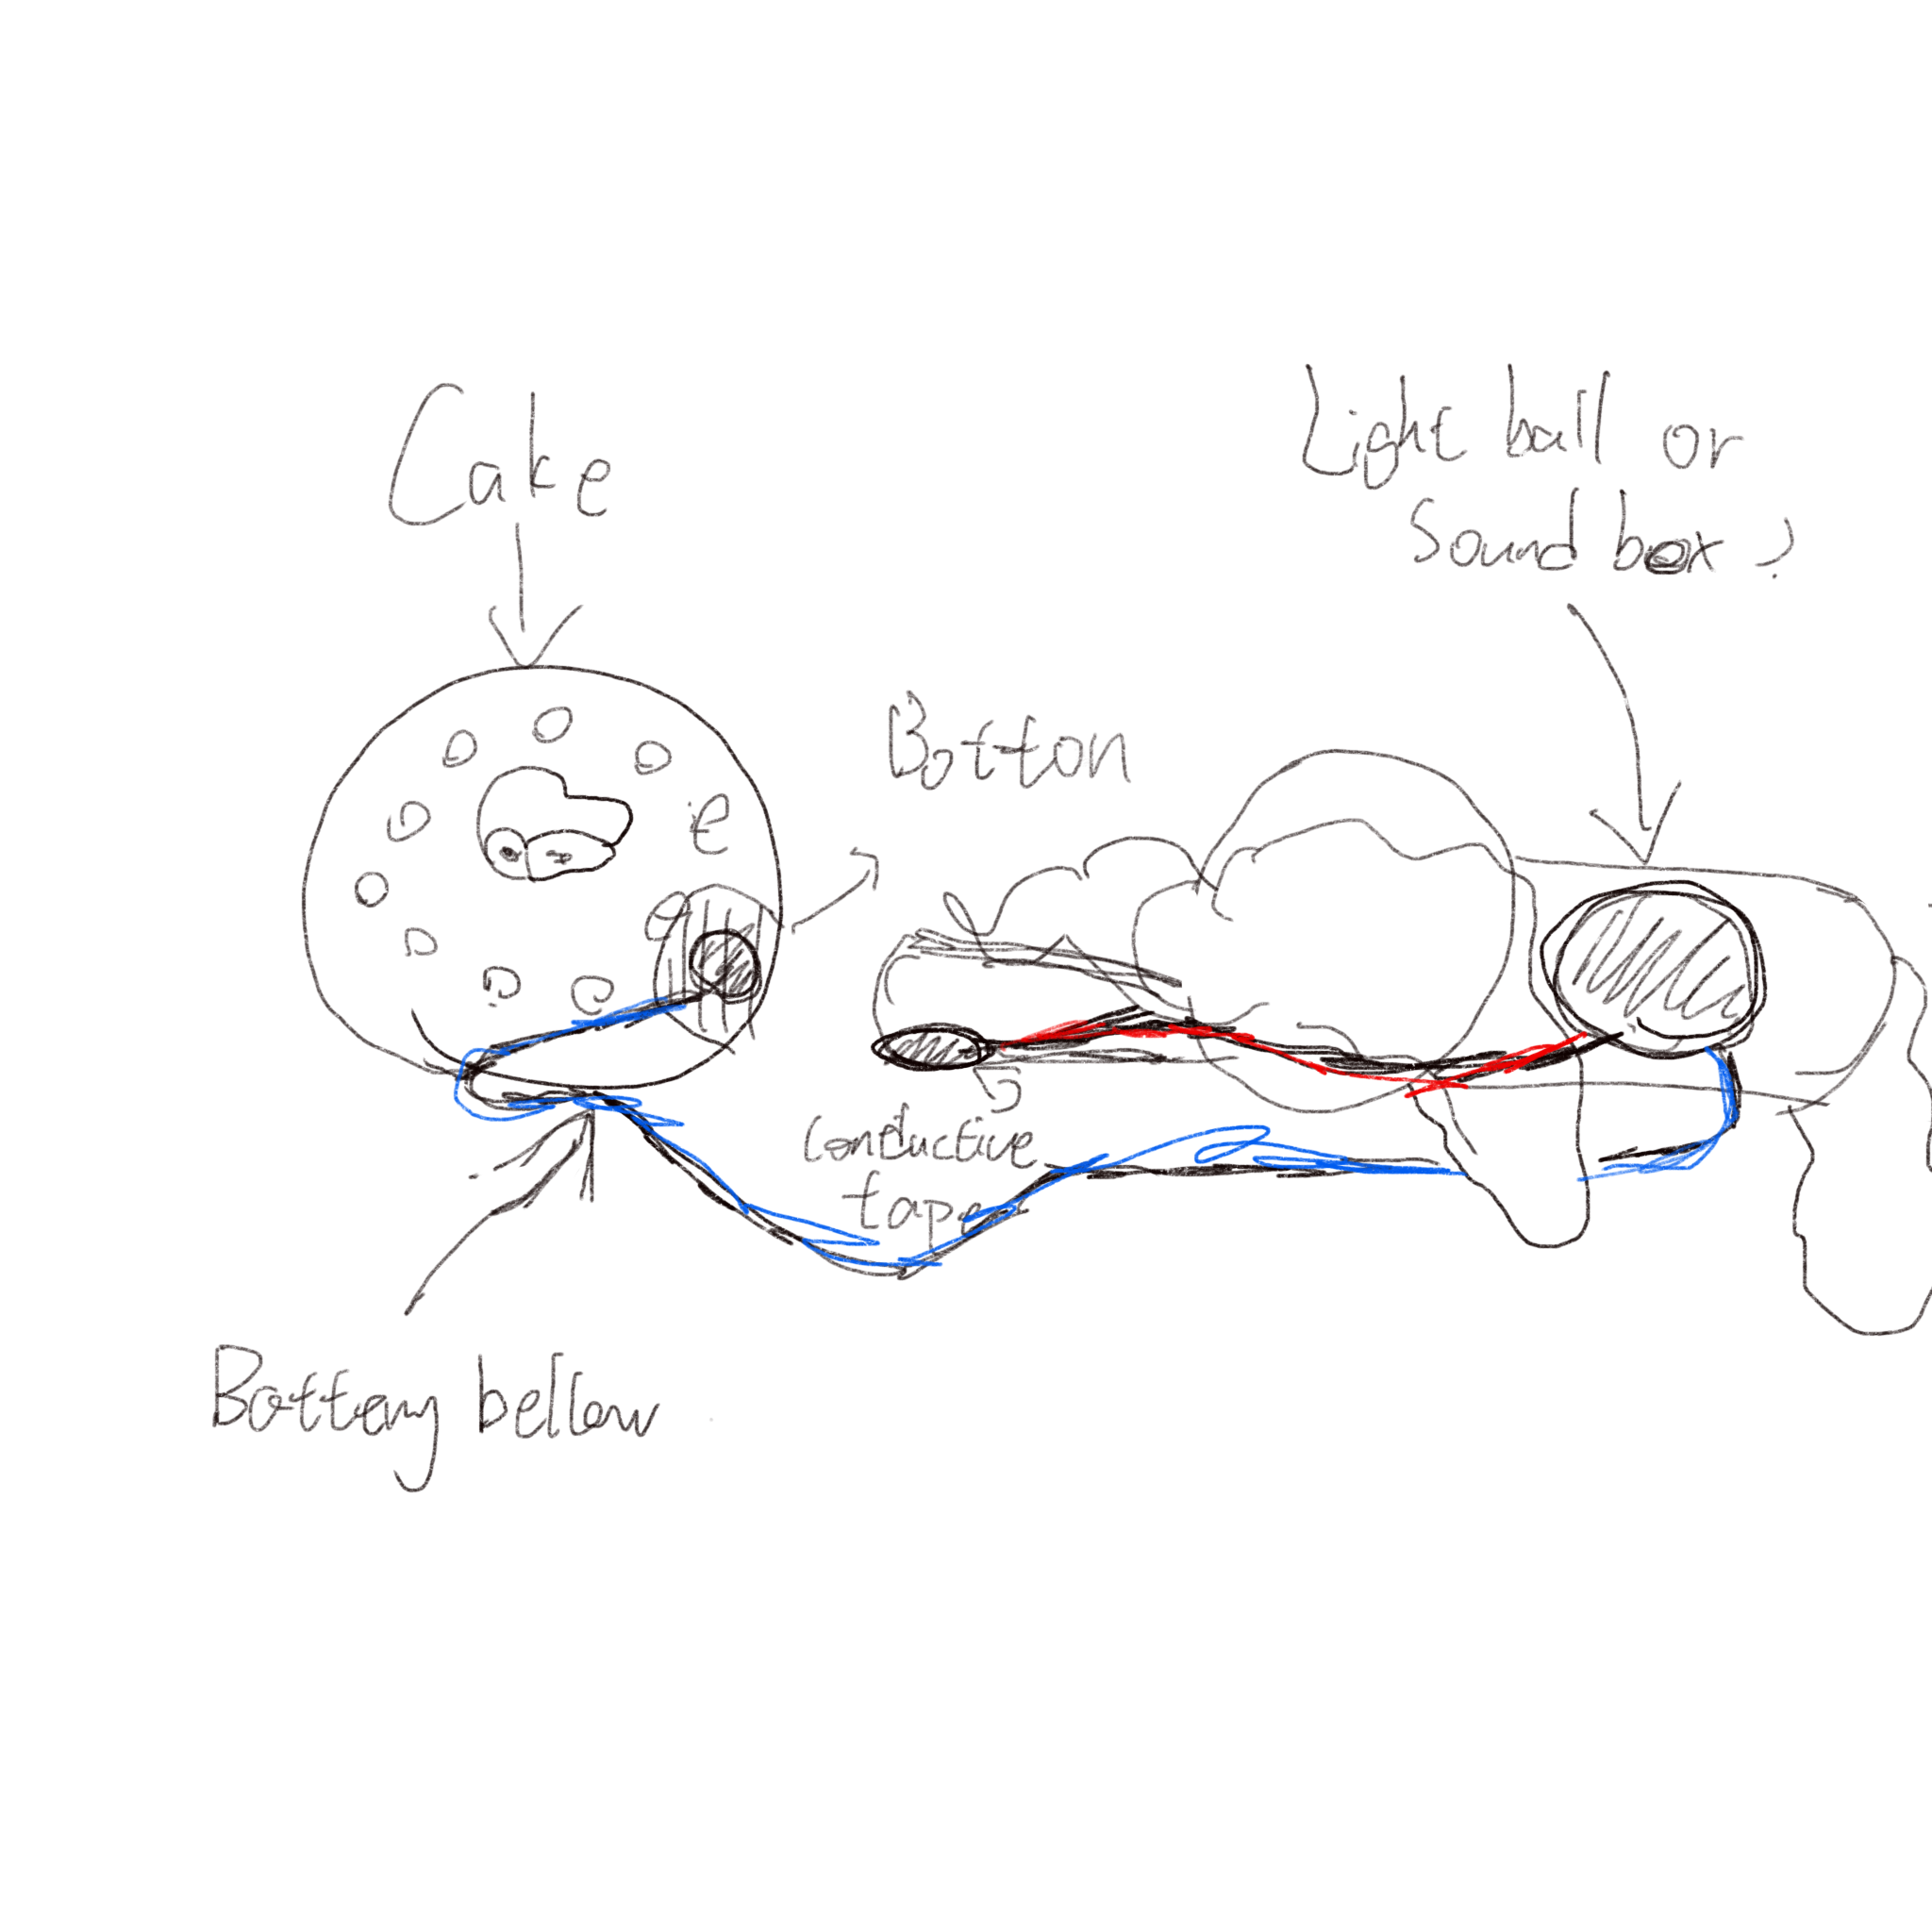
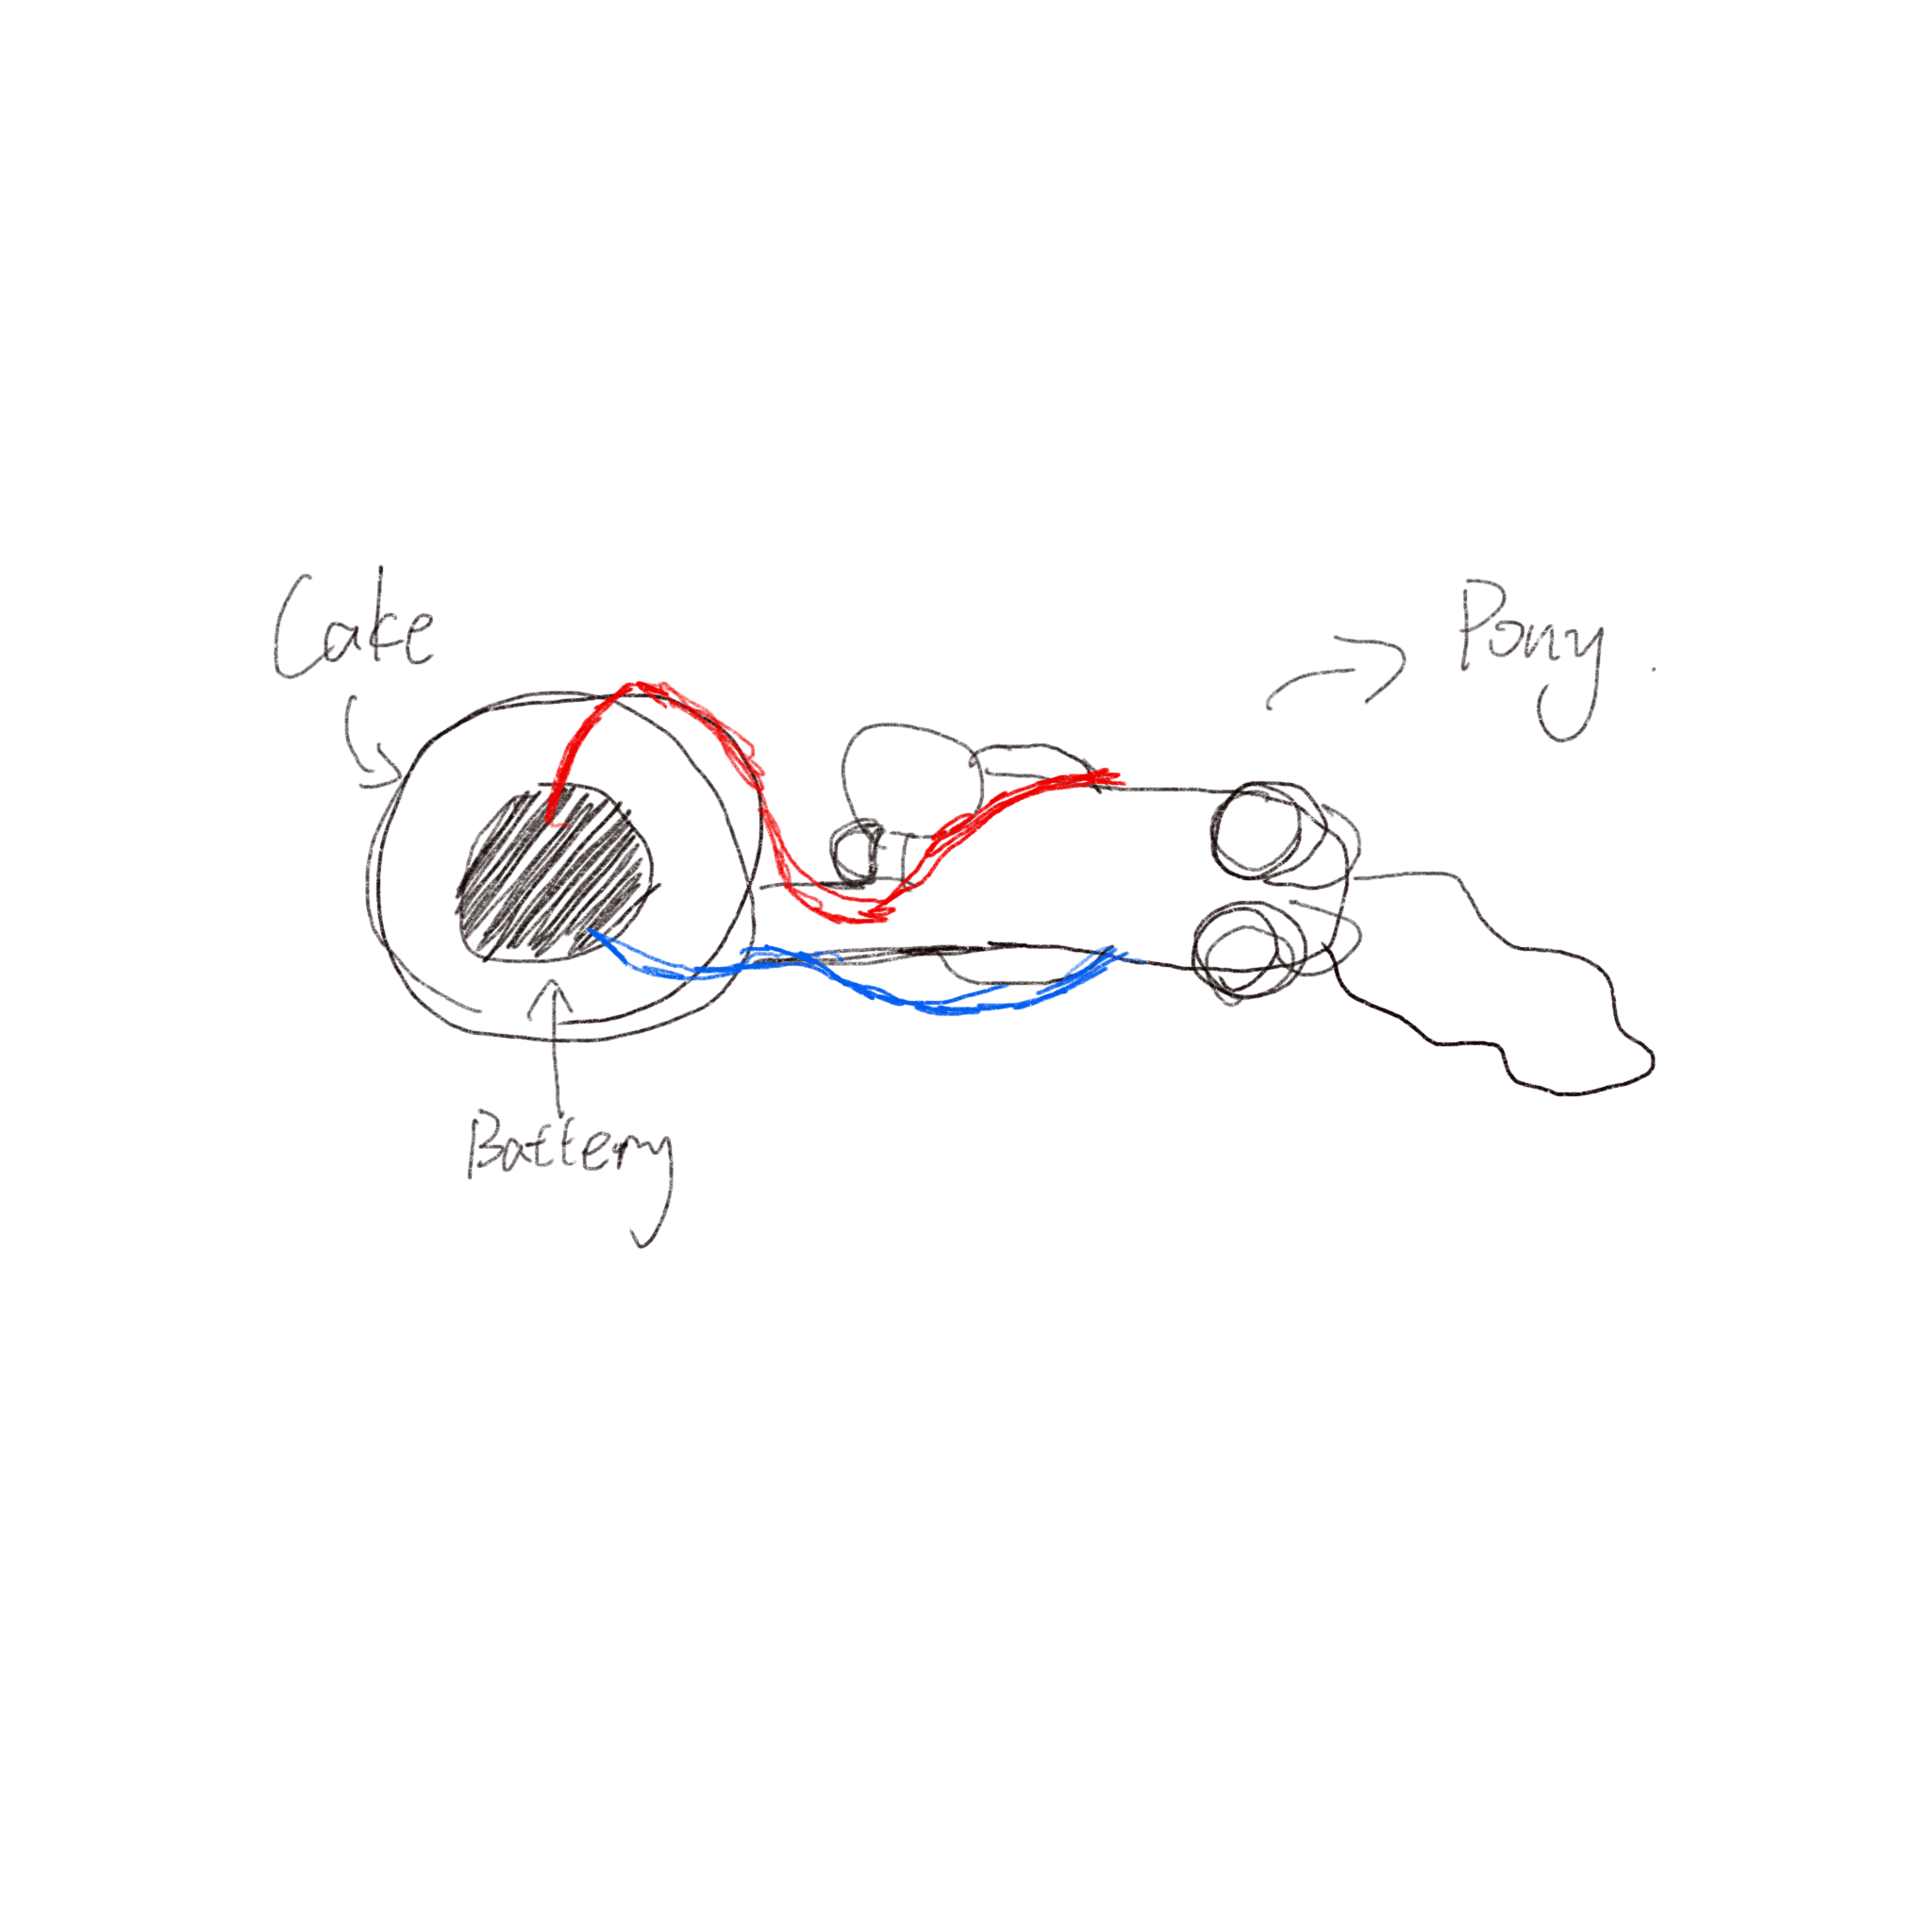
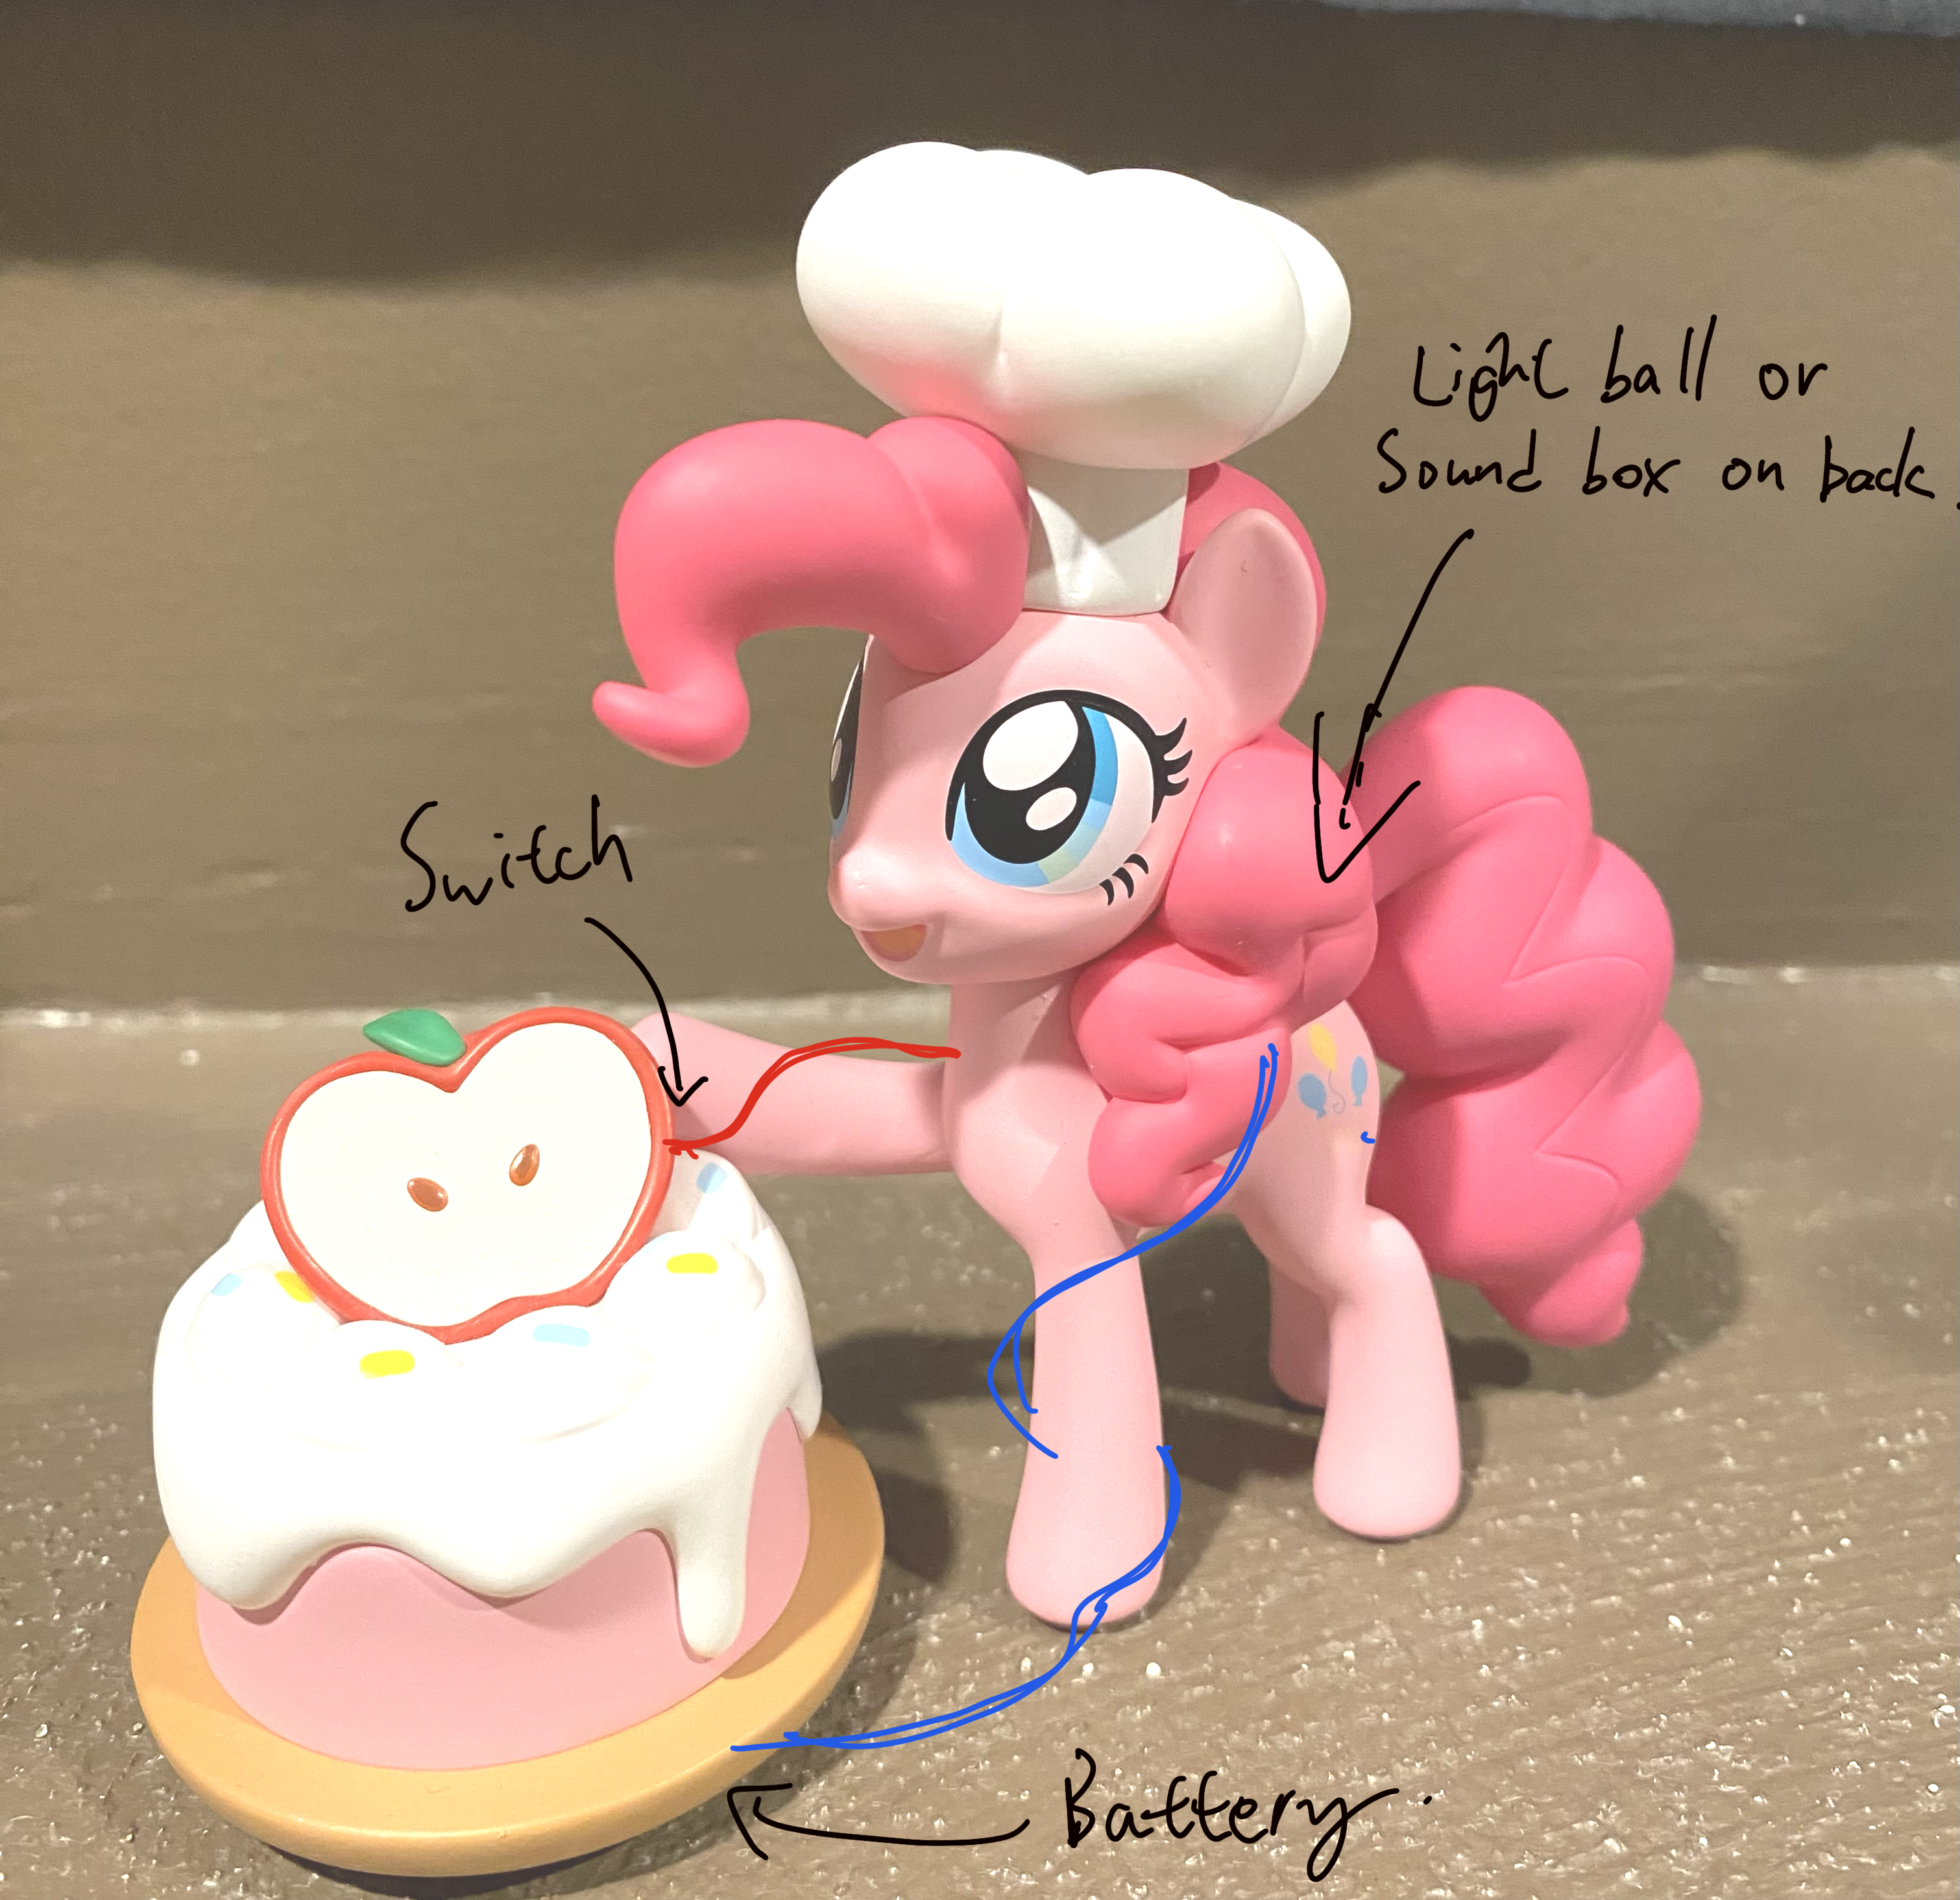
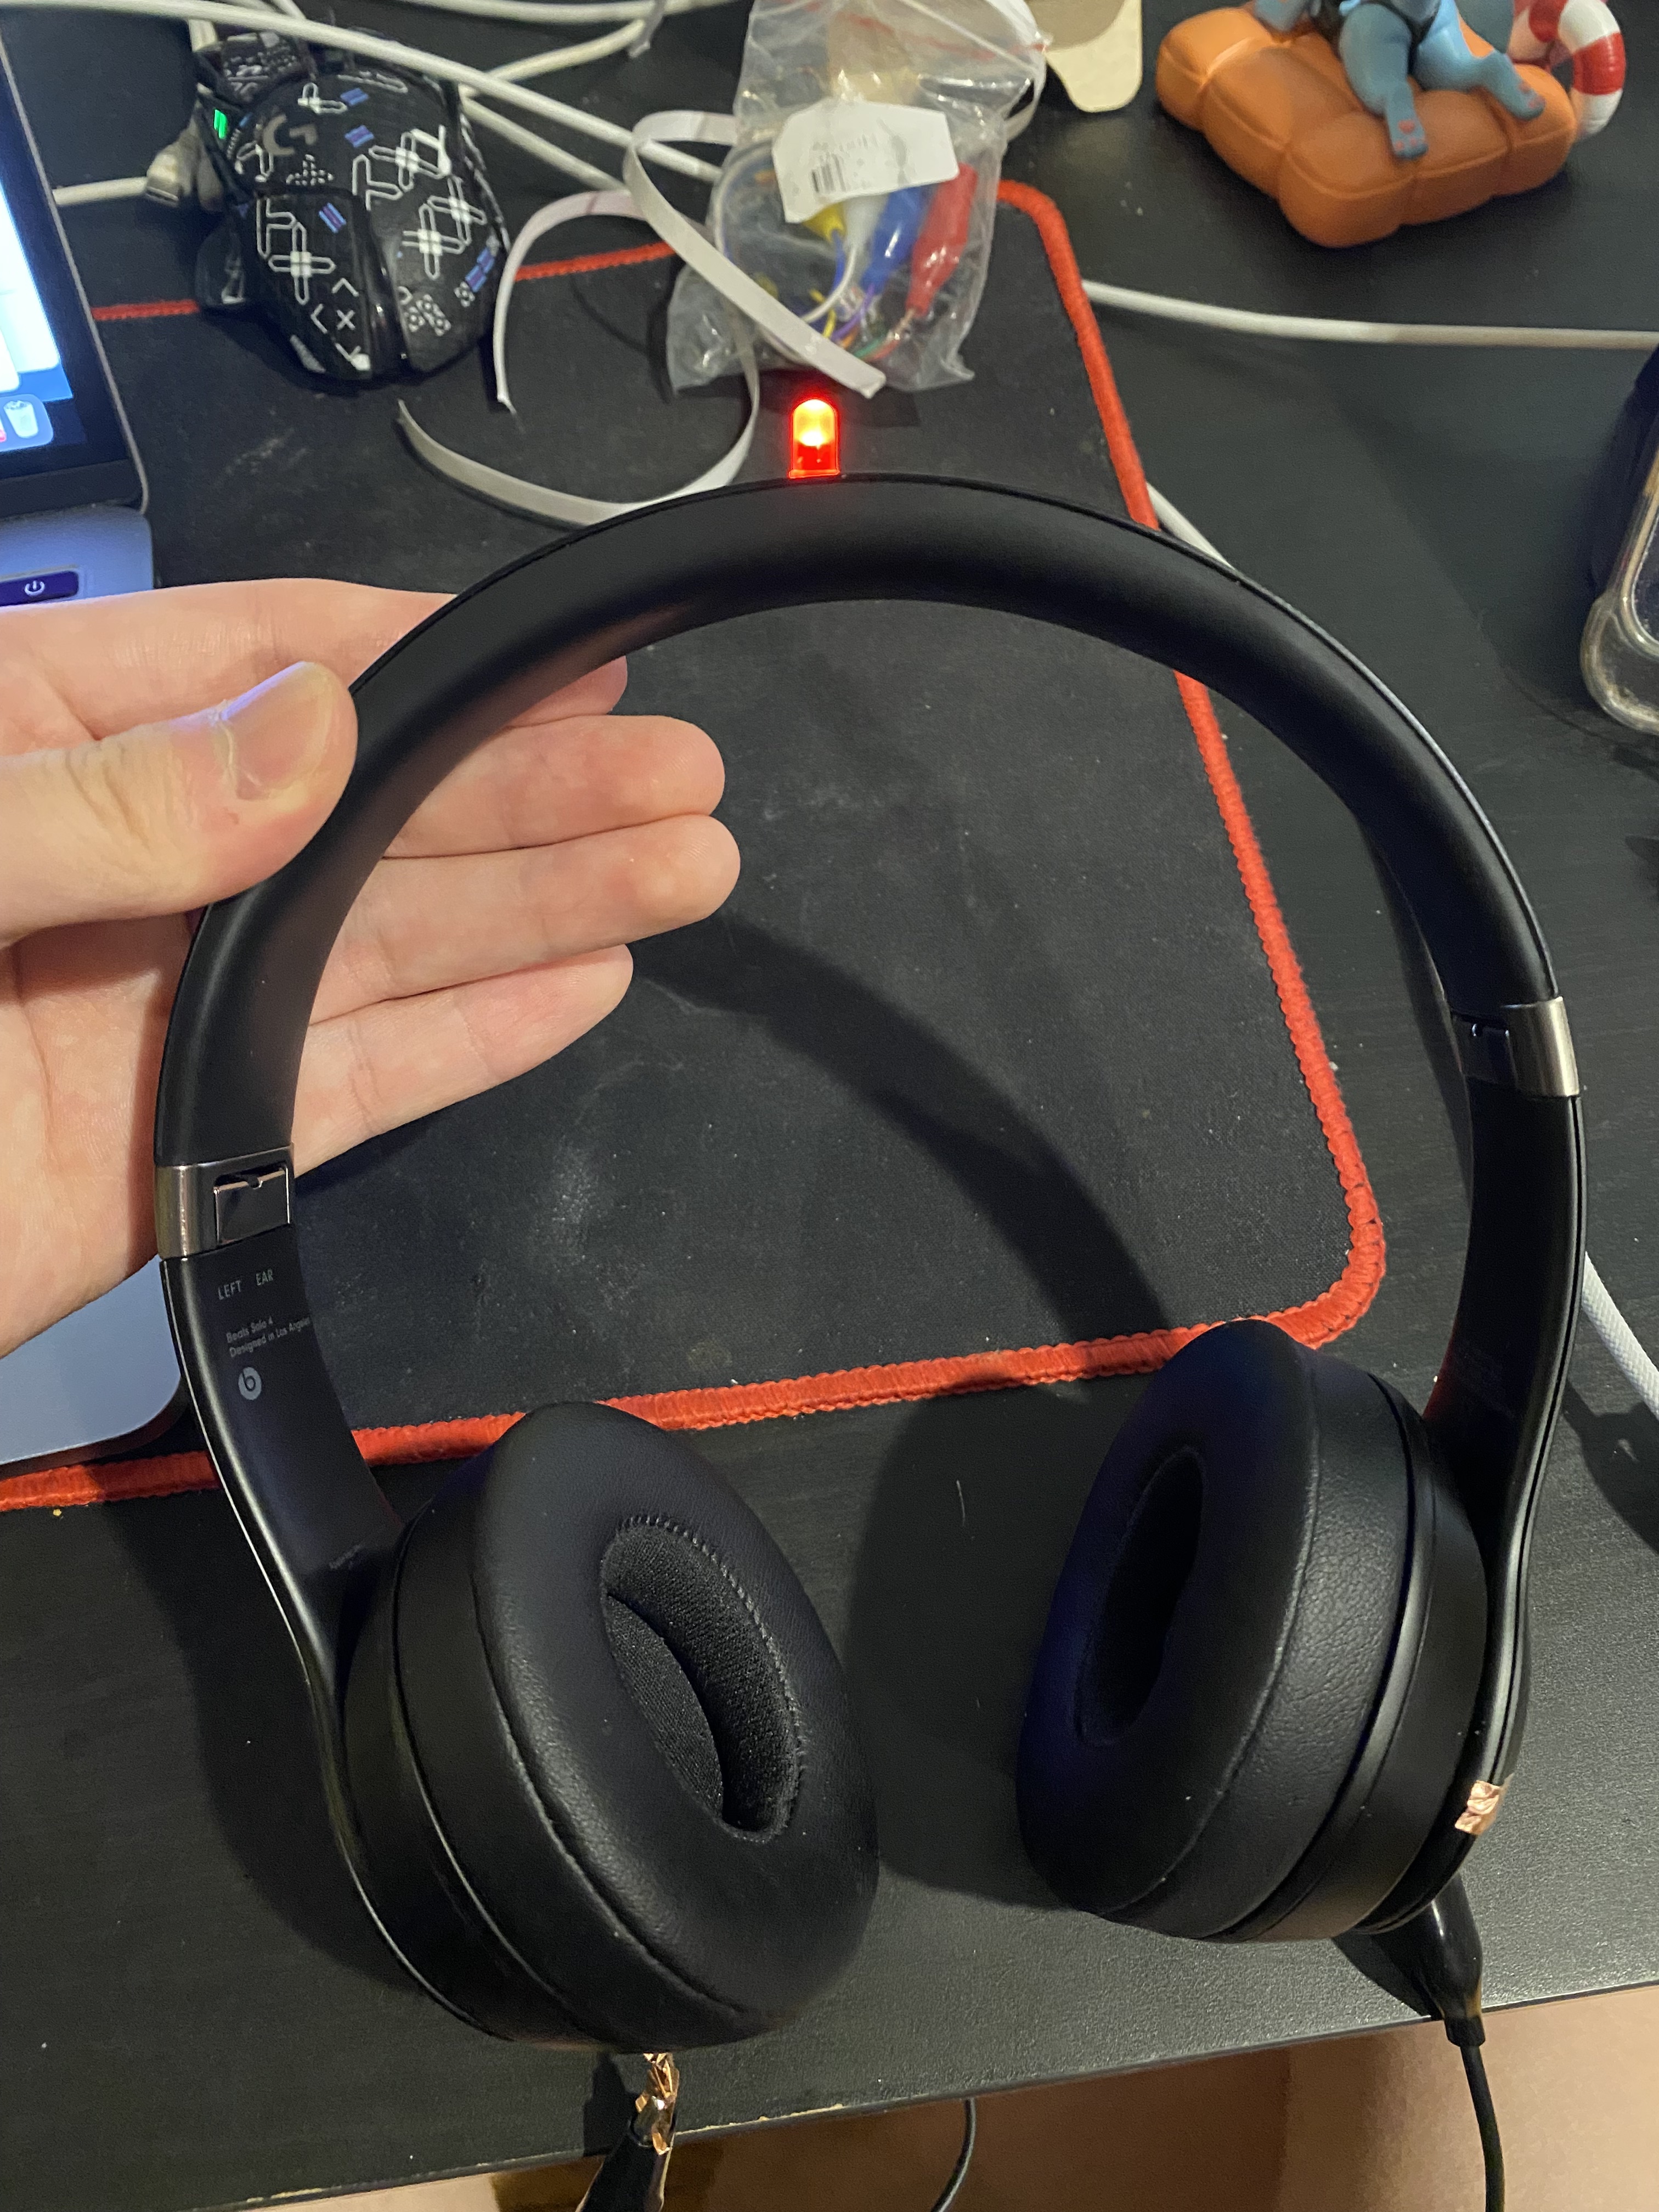
Wearable Interactive Affordance Based Circuit
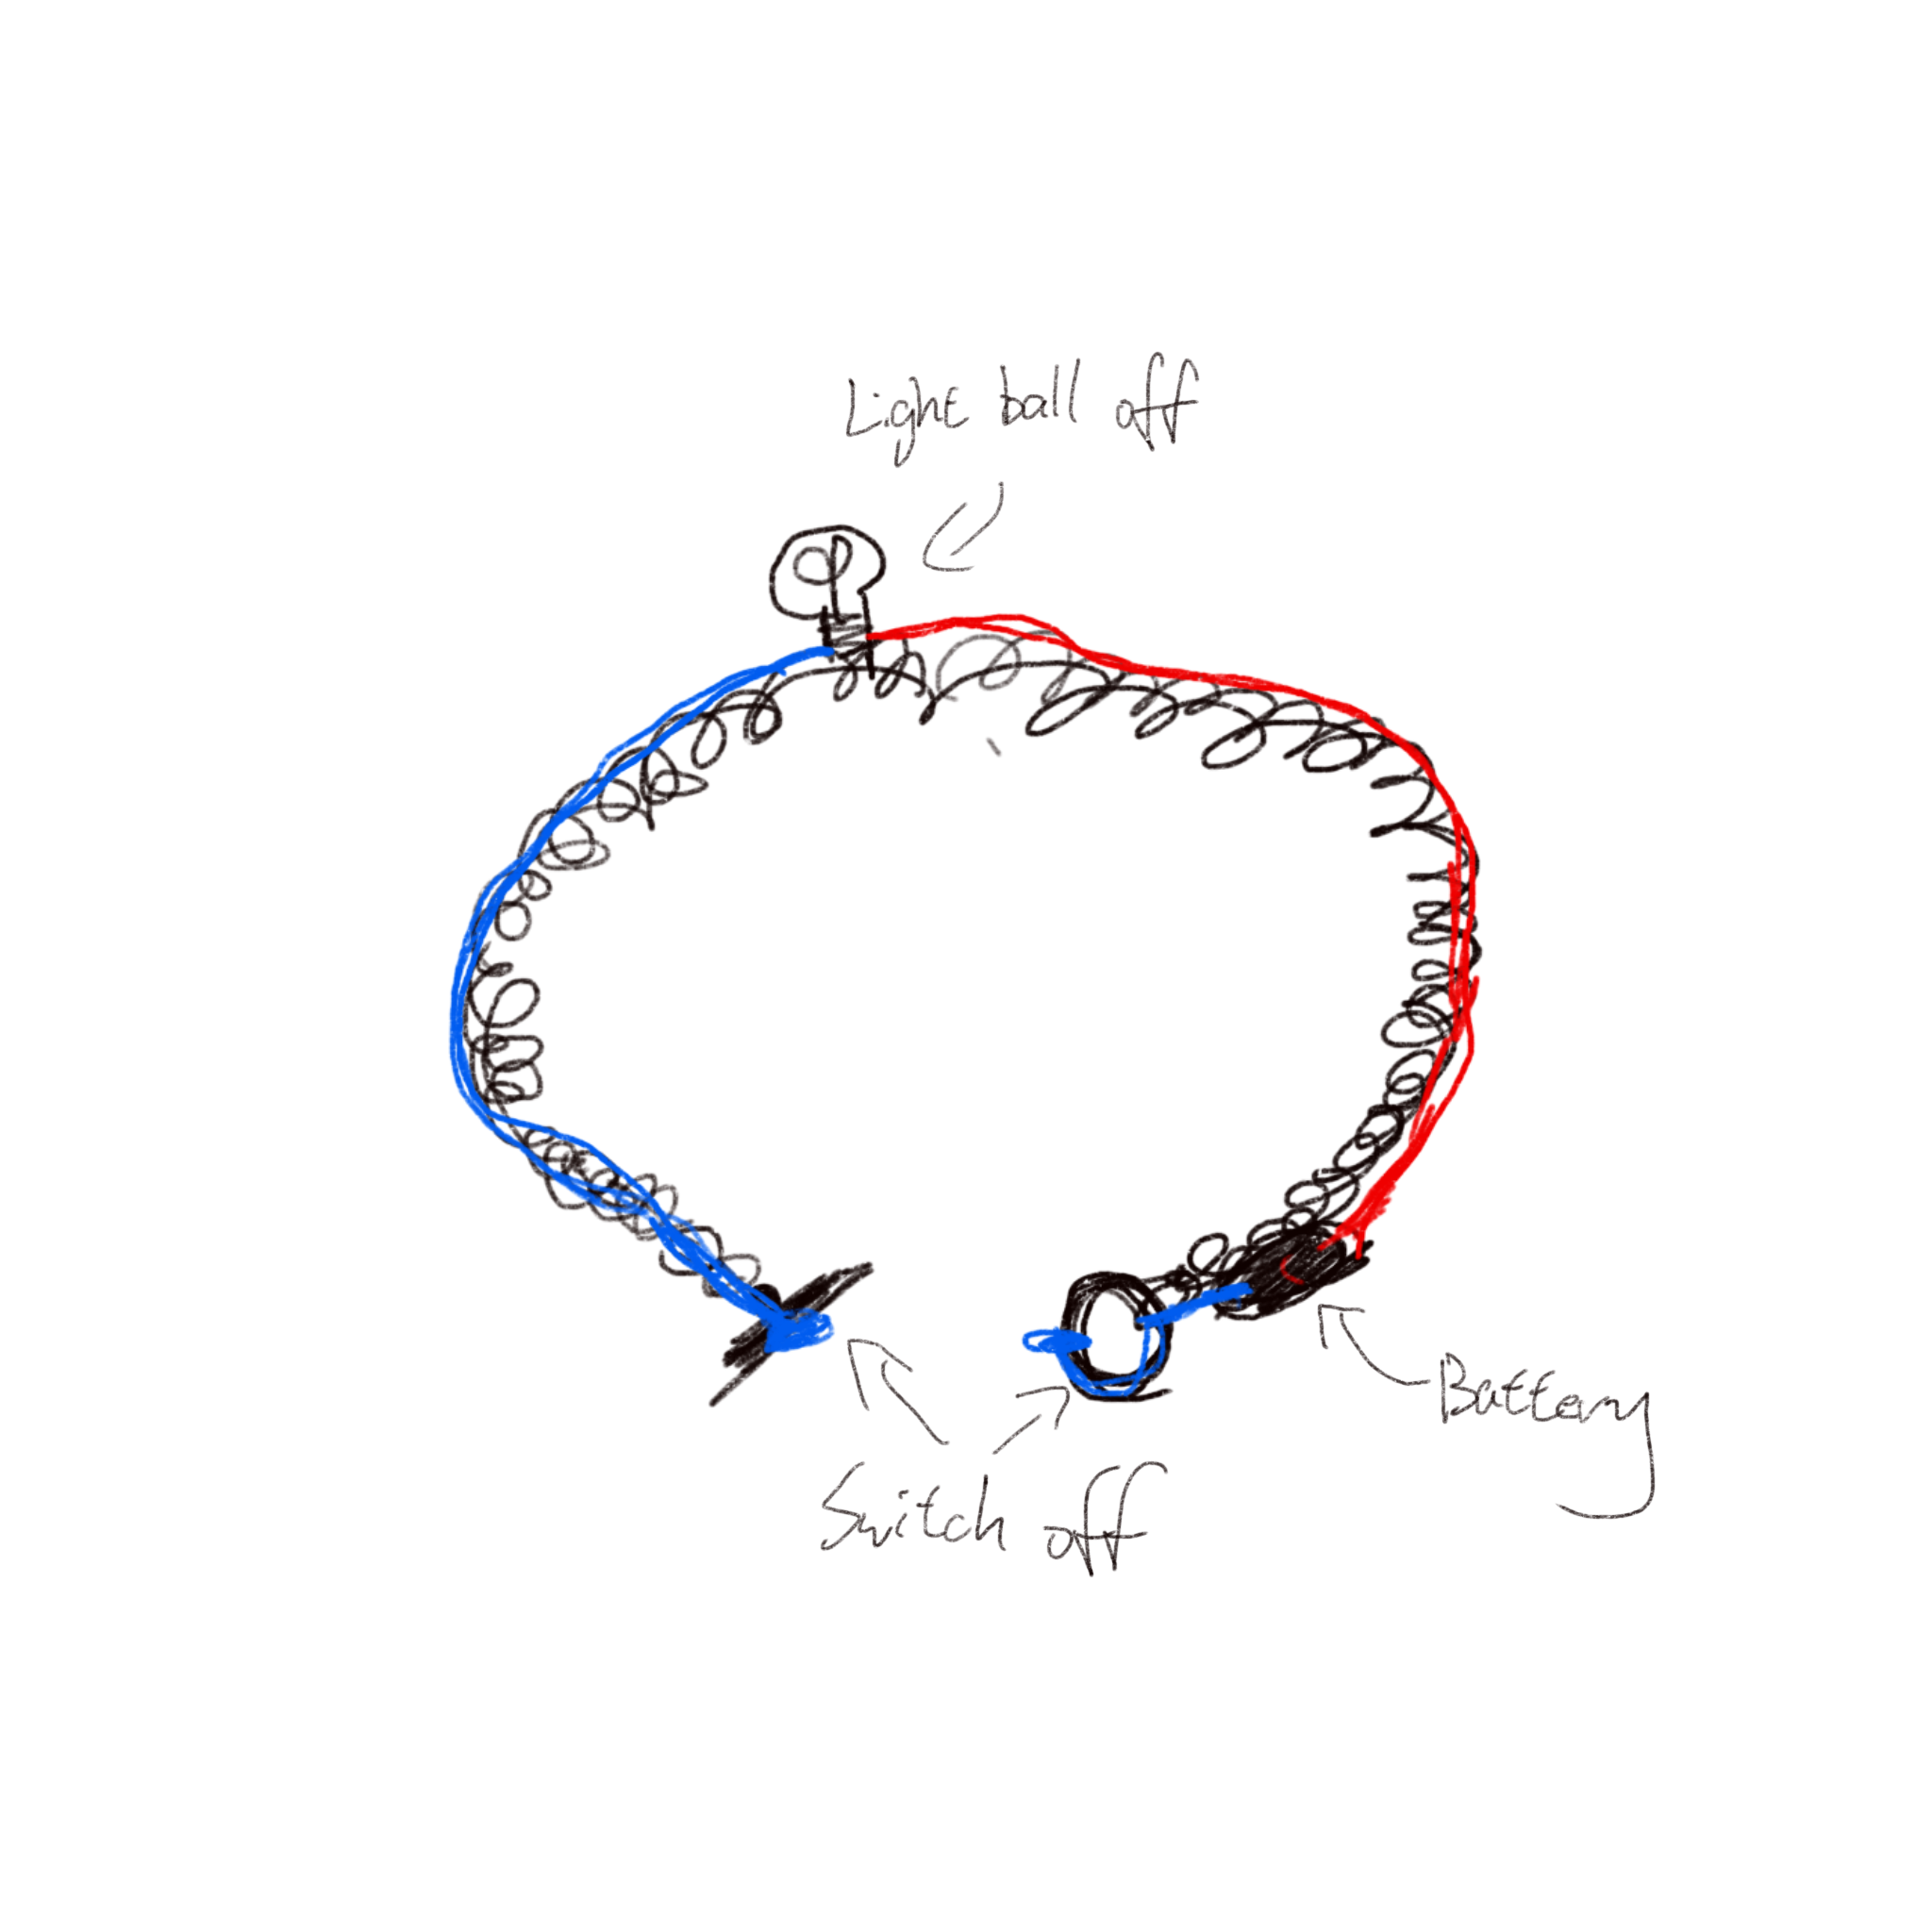
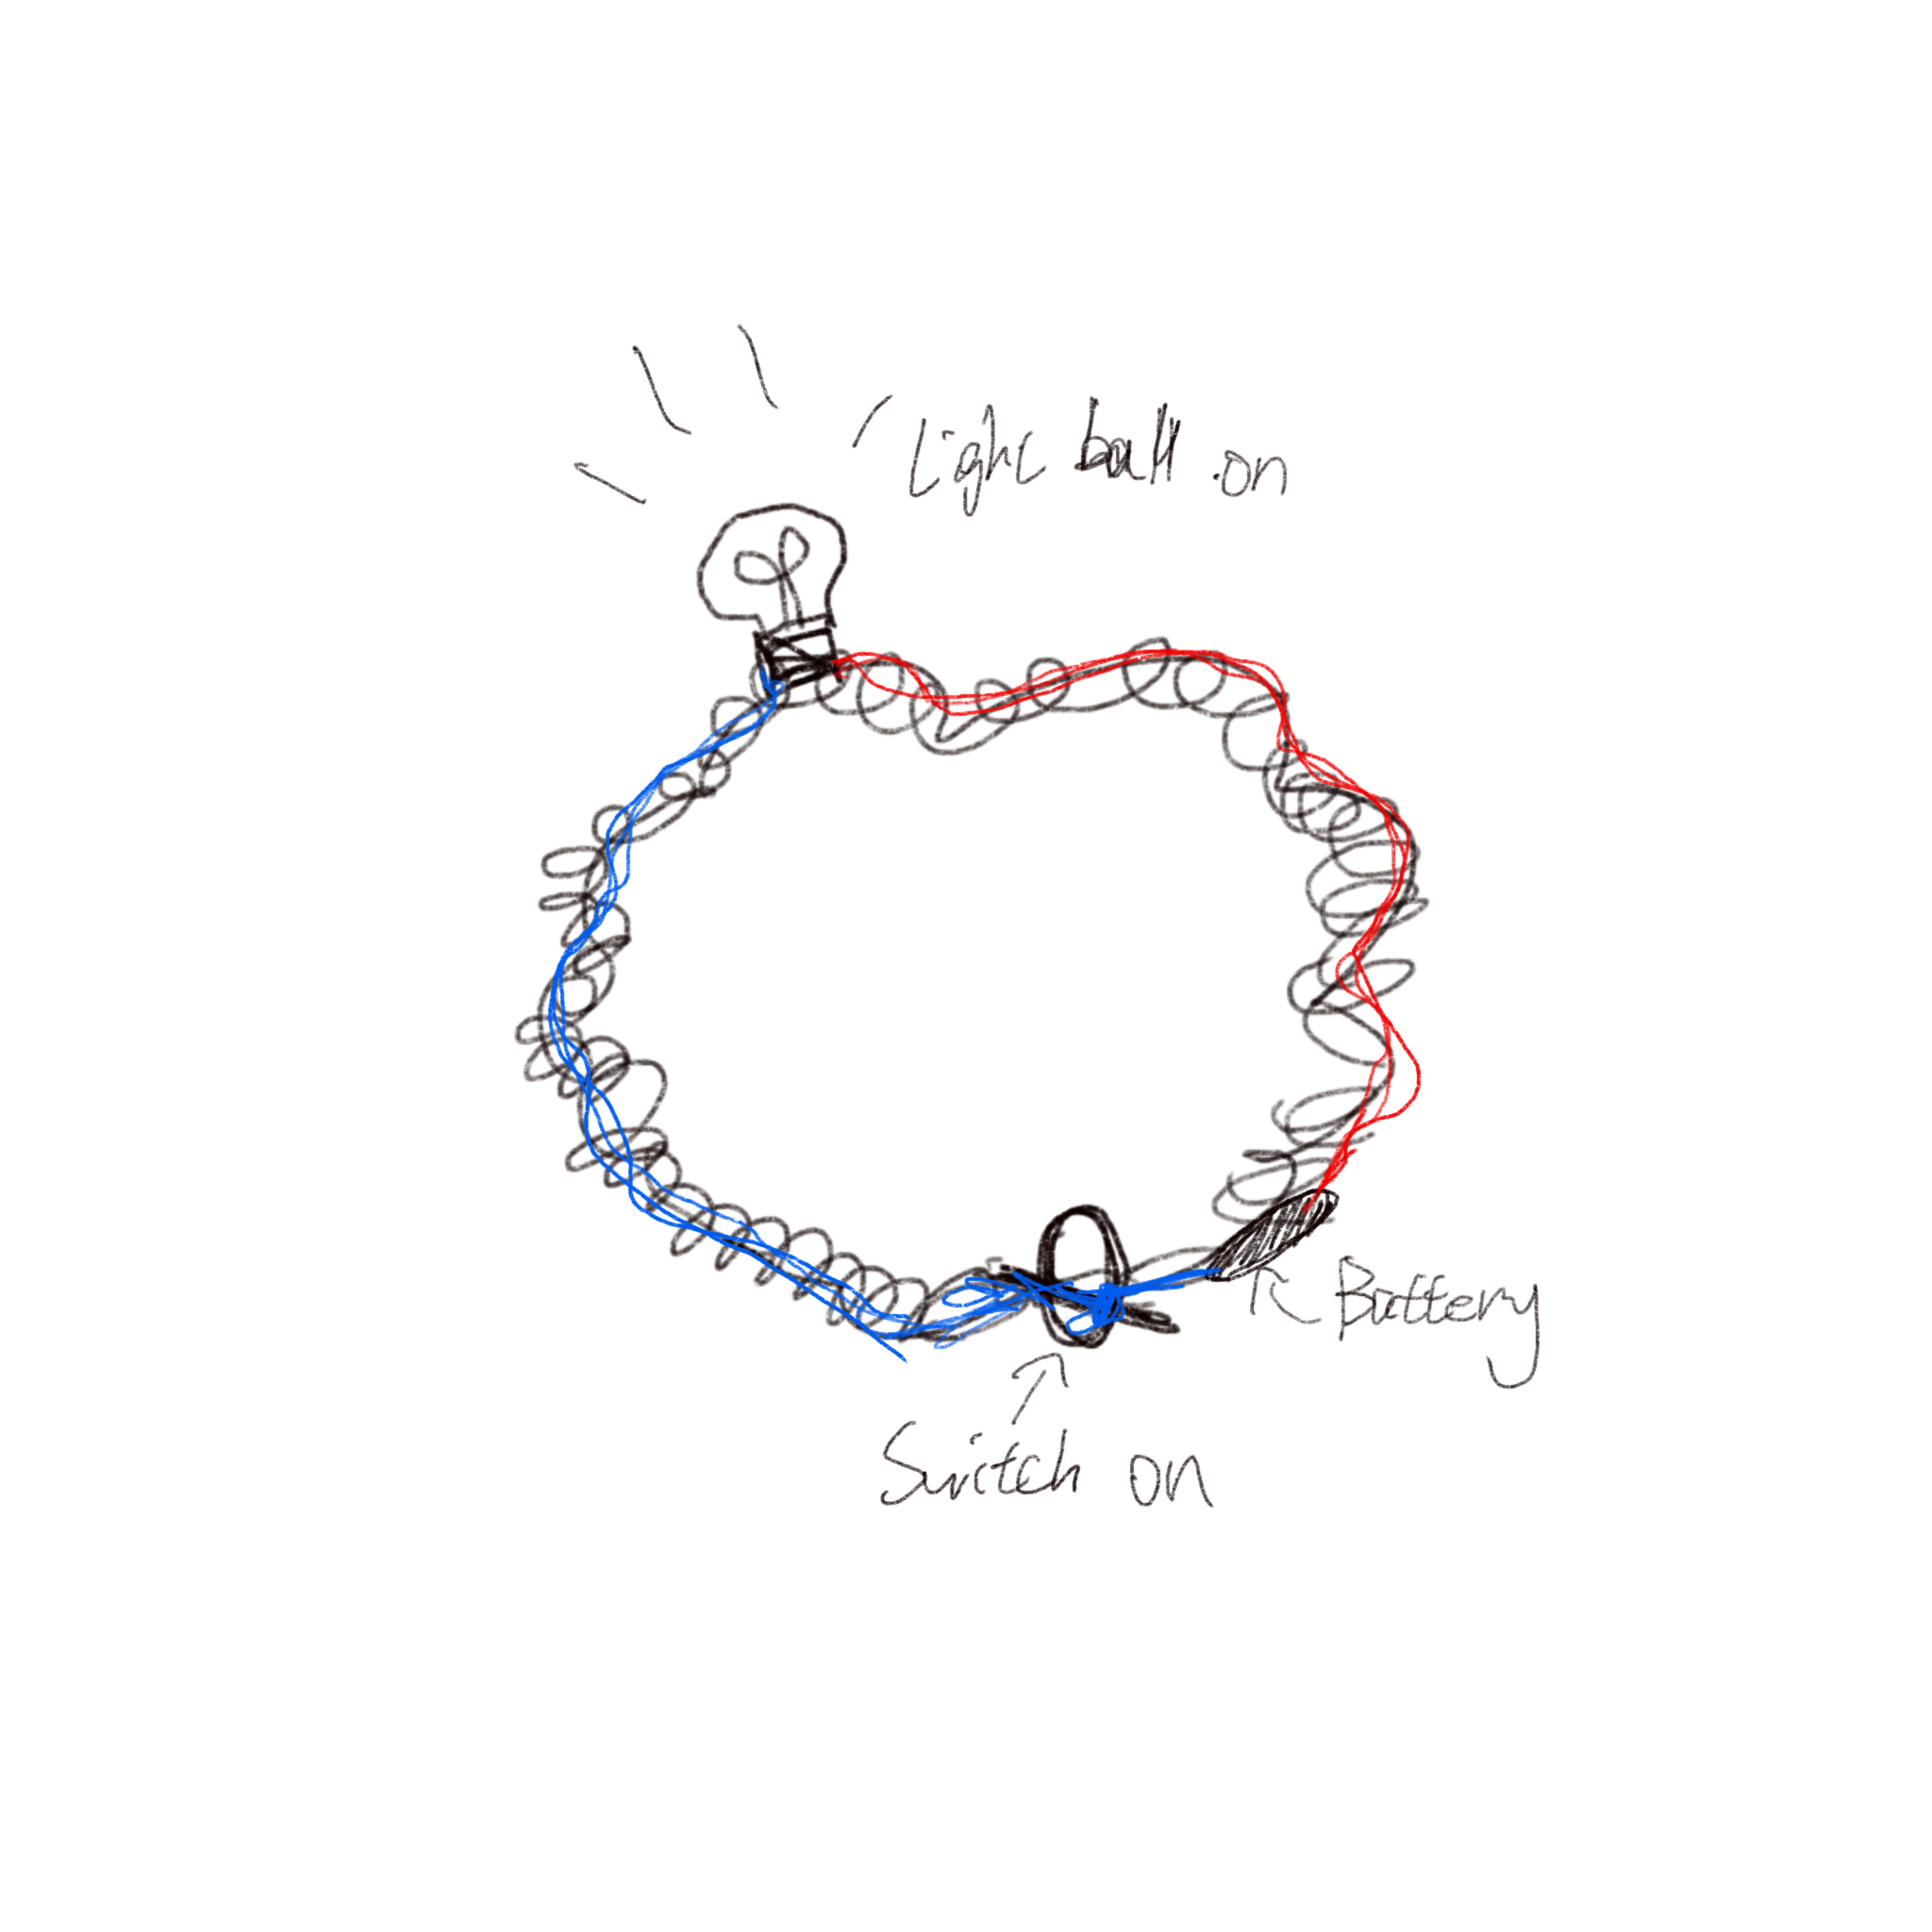
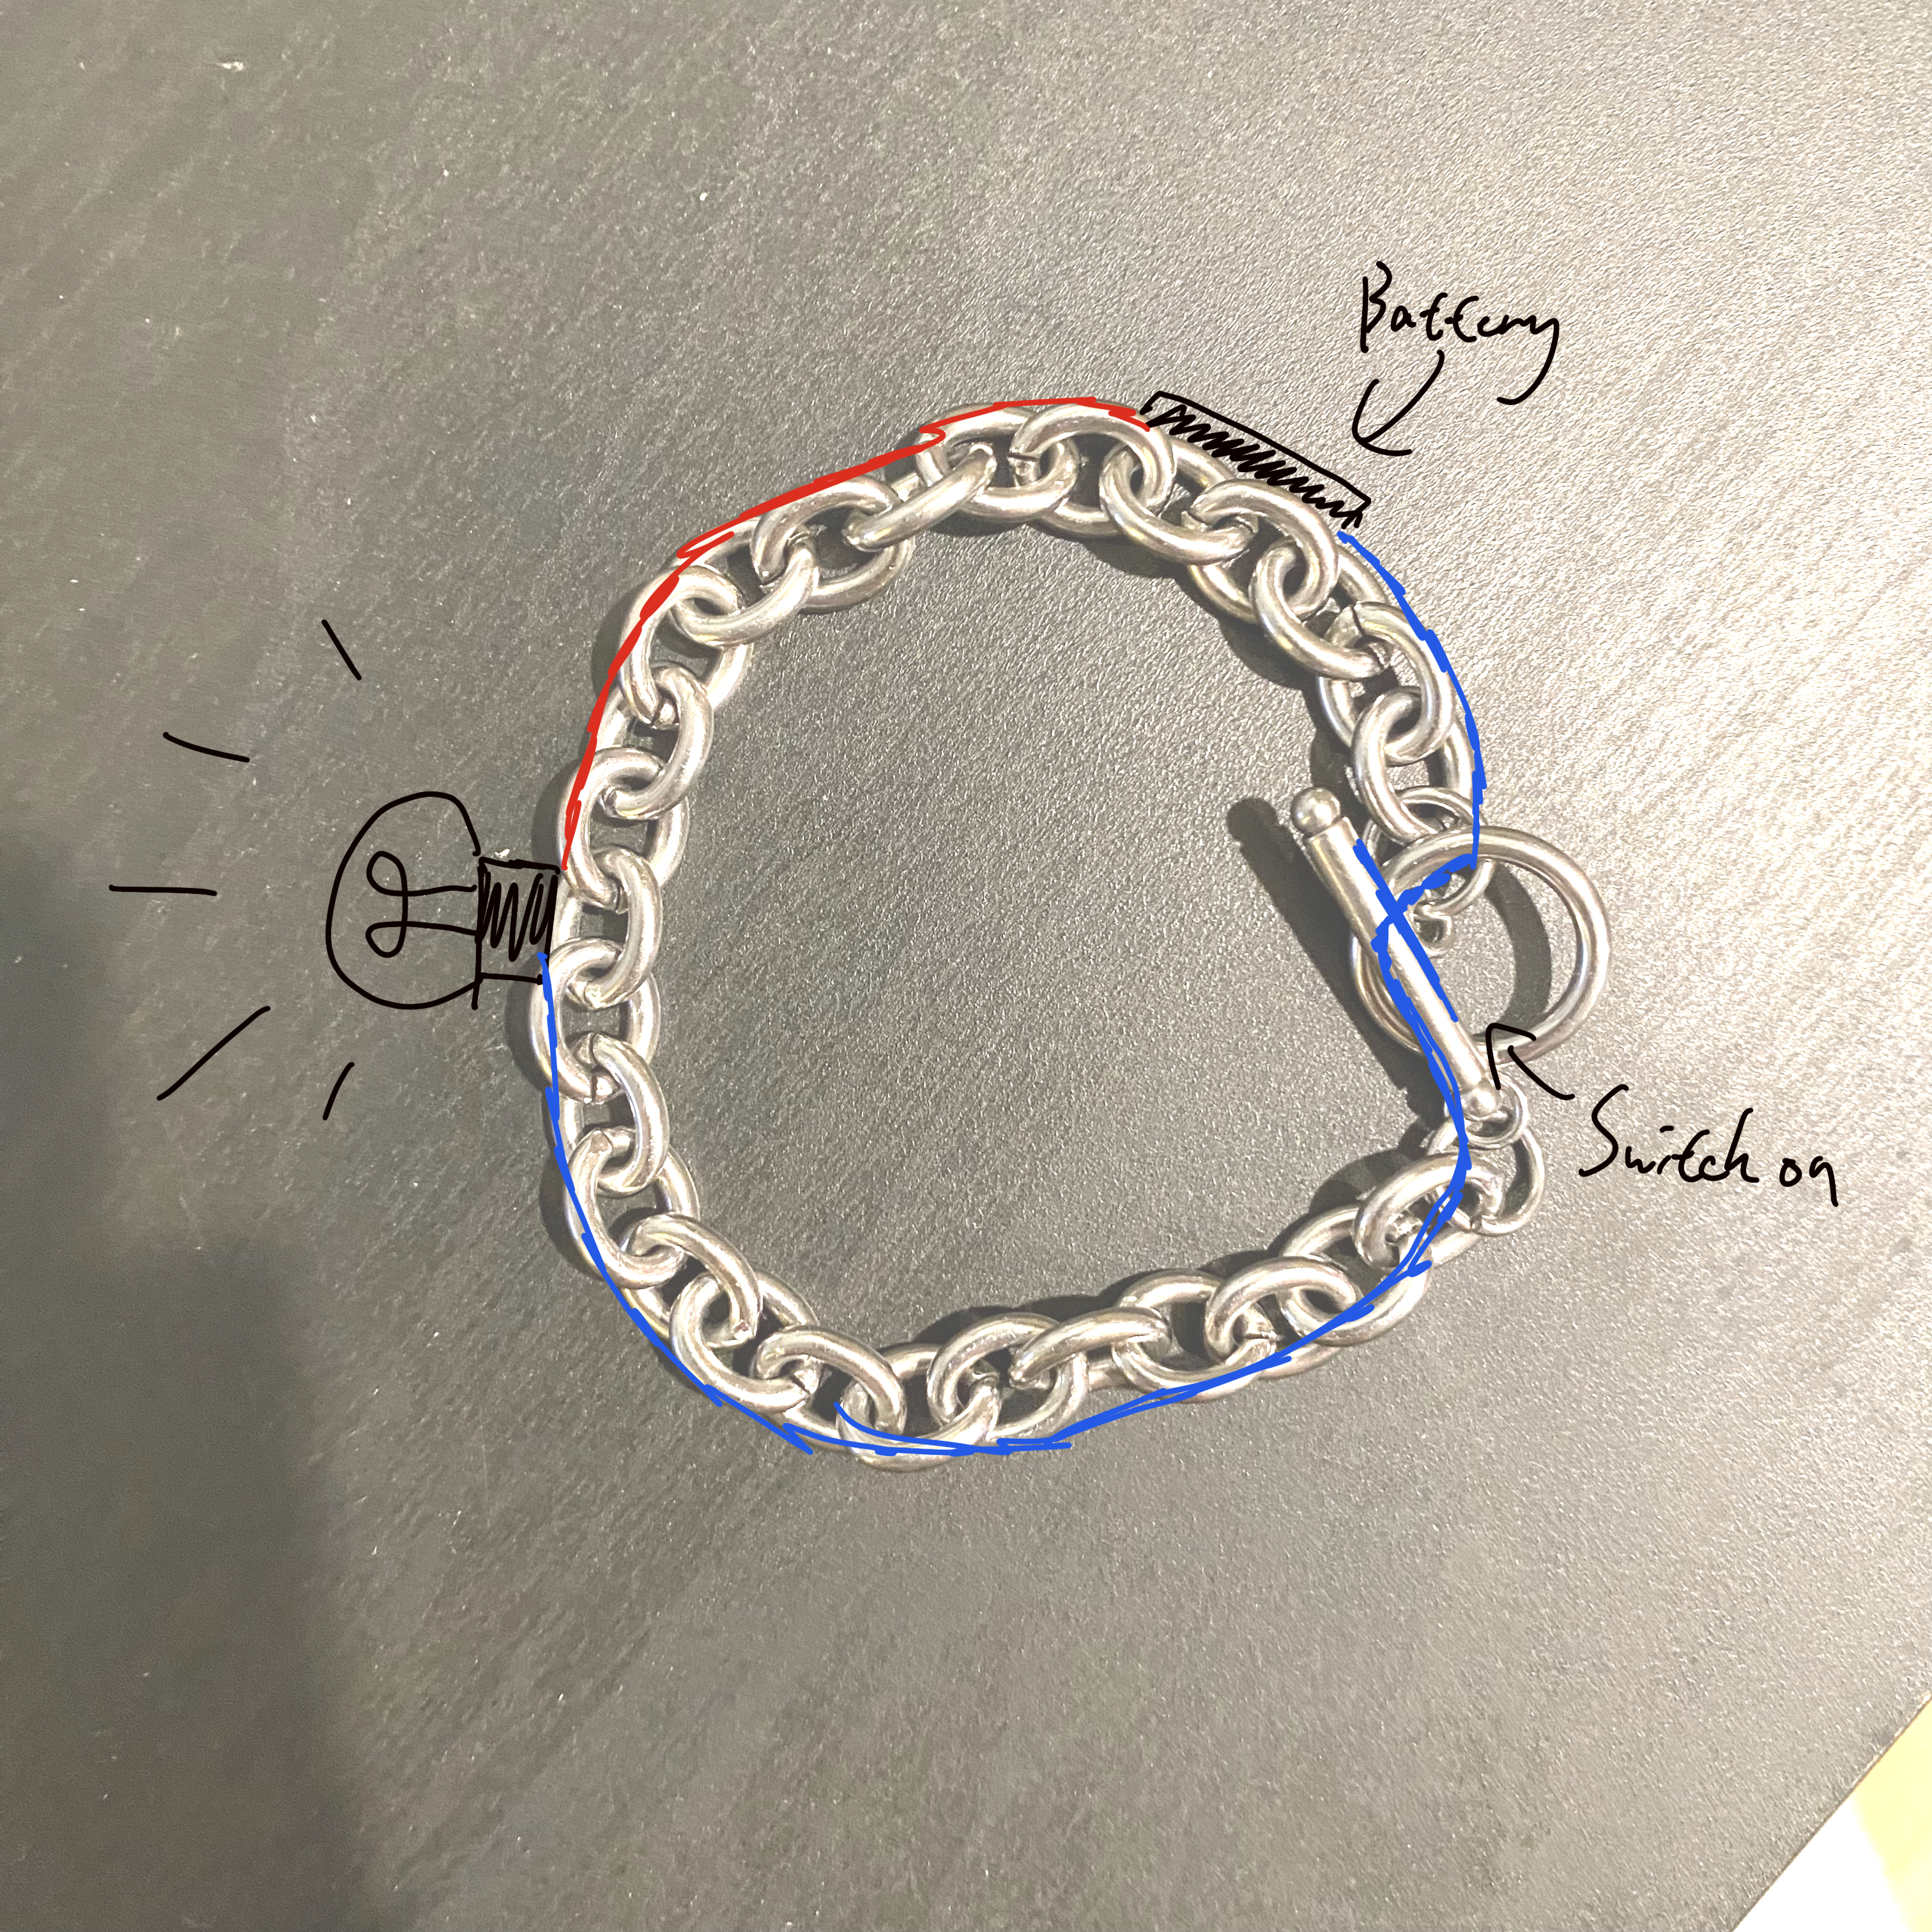
This final design is a pair of headphones with an interactive circuit added. An LED light is added to the top of it. To start it, the telescopic parts need to be tightened to ensure that the two conductive tapes are connected at their ends, thus forming a series circuit.
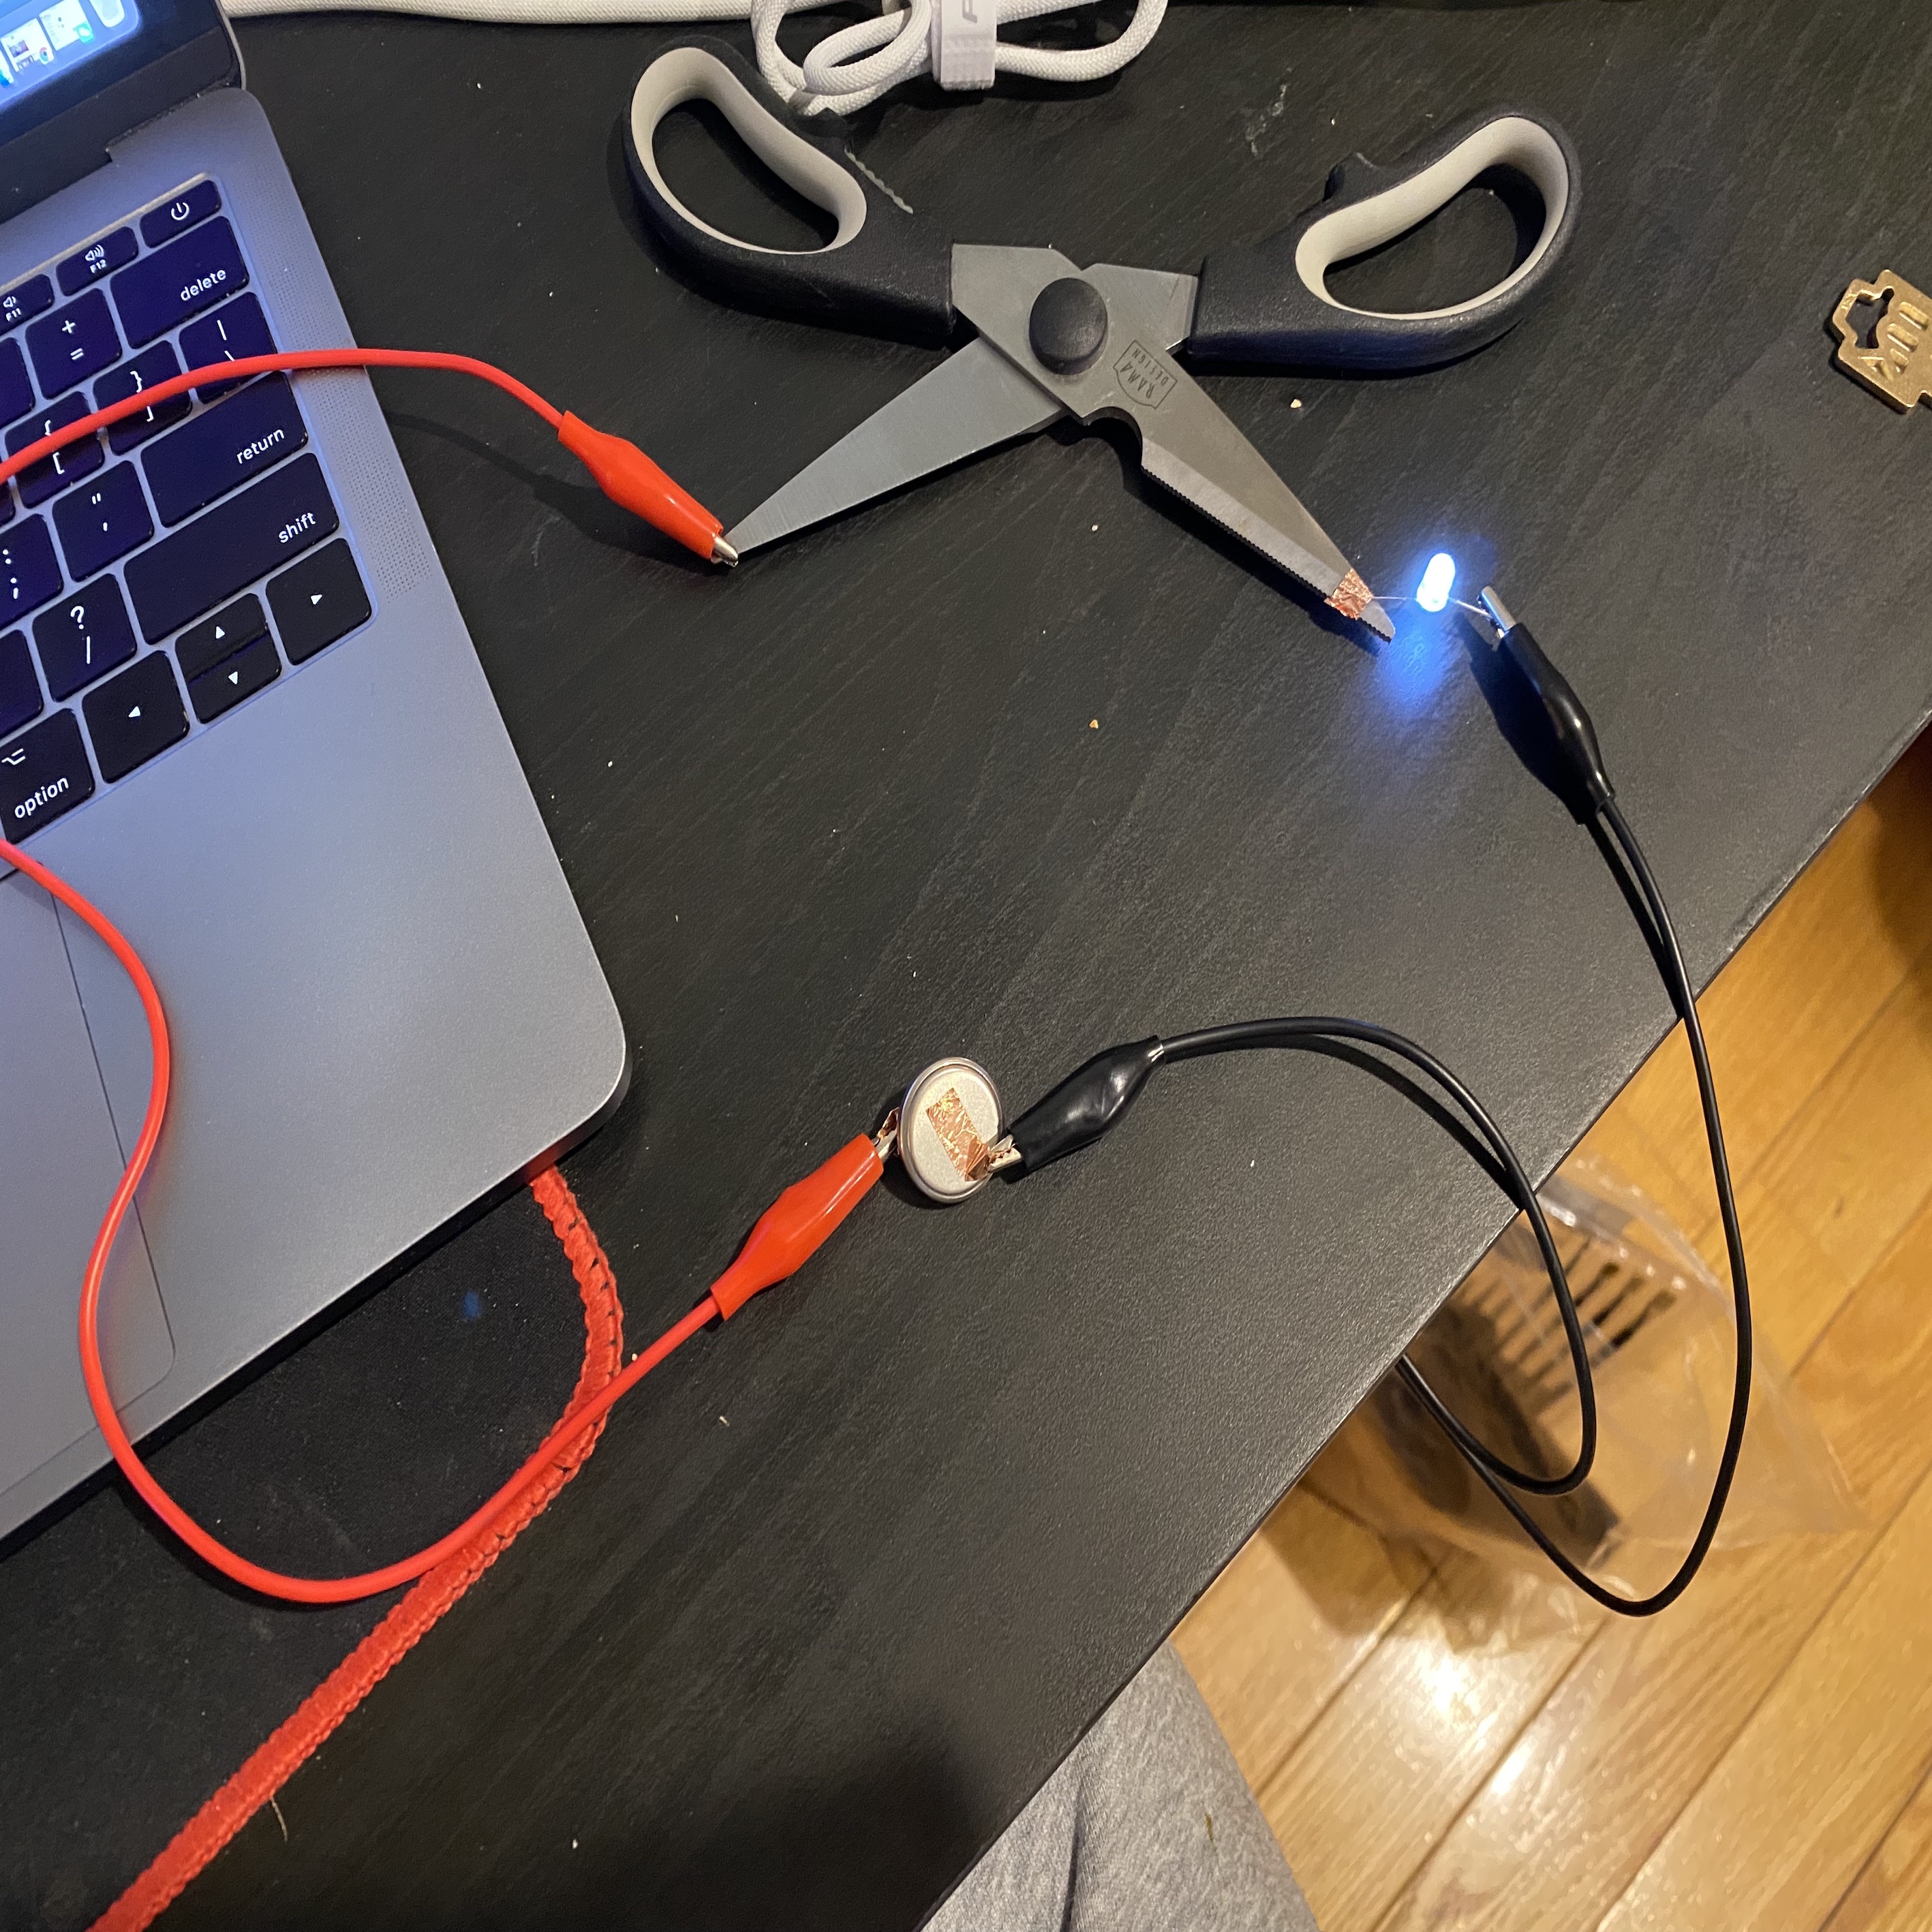
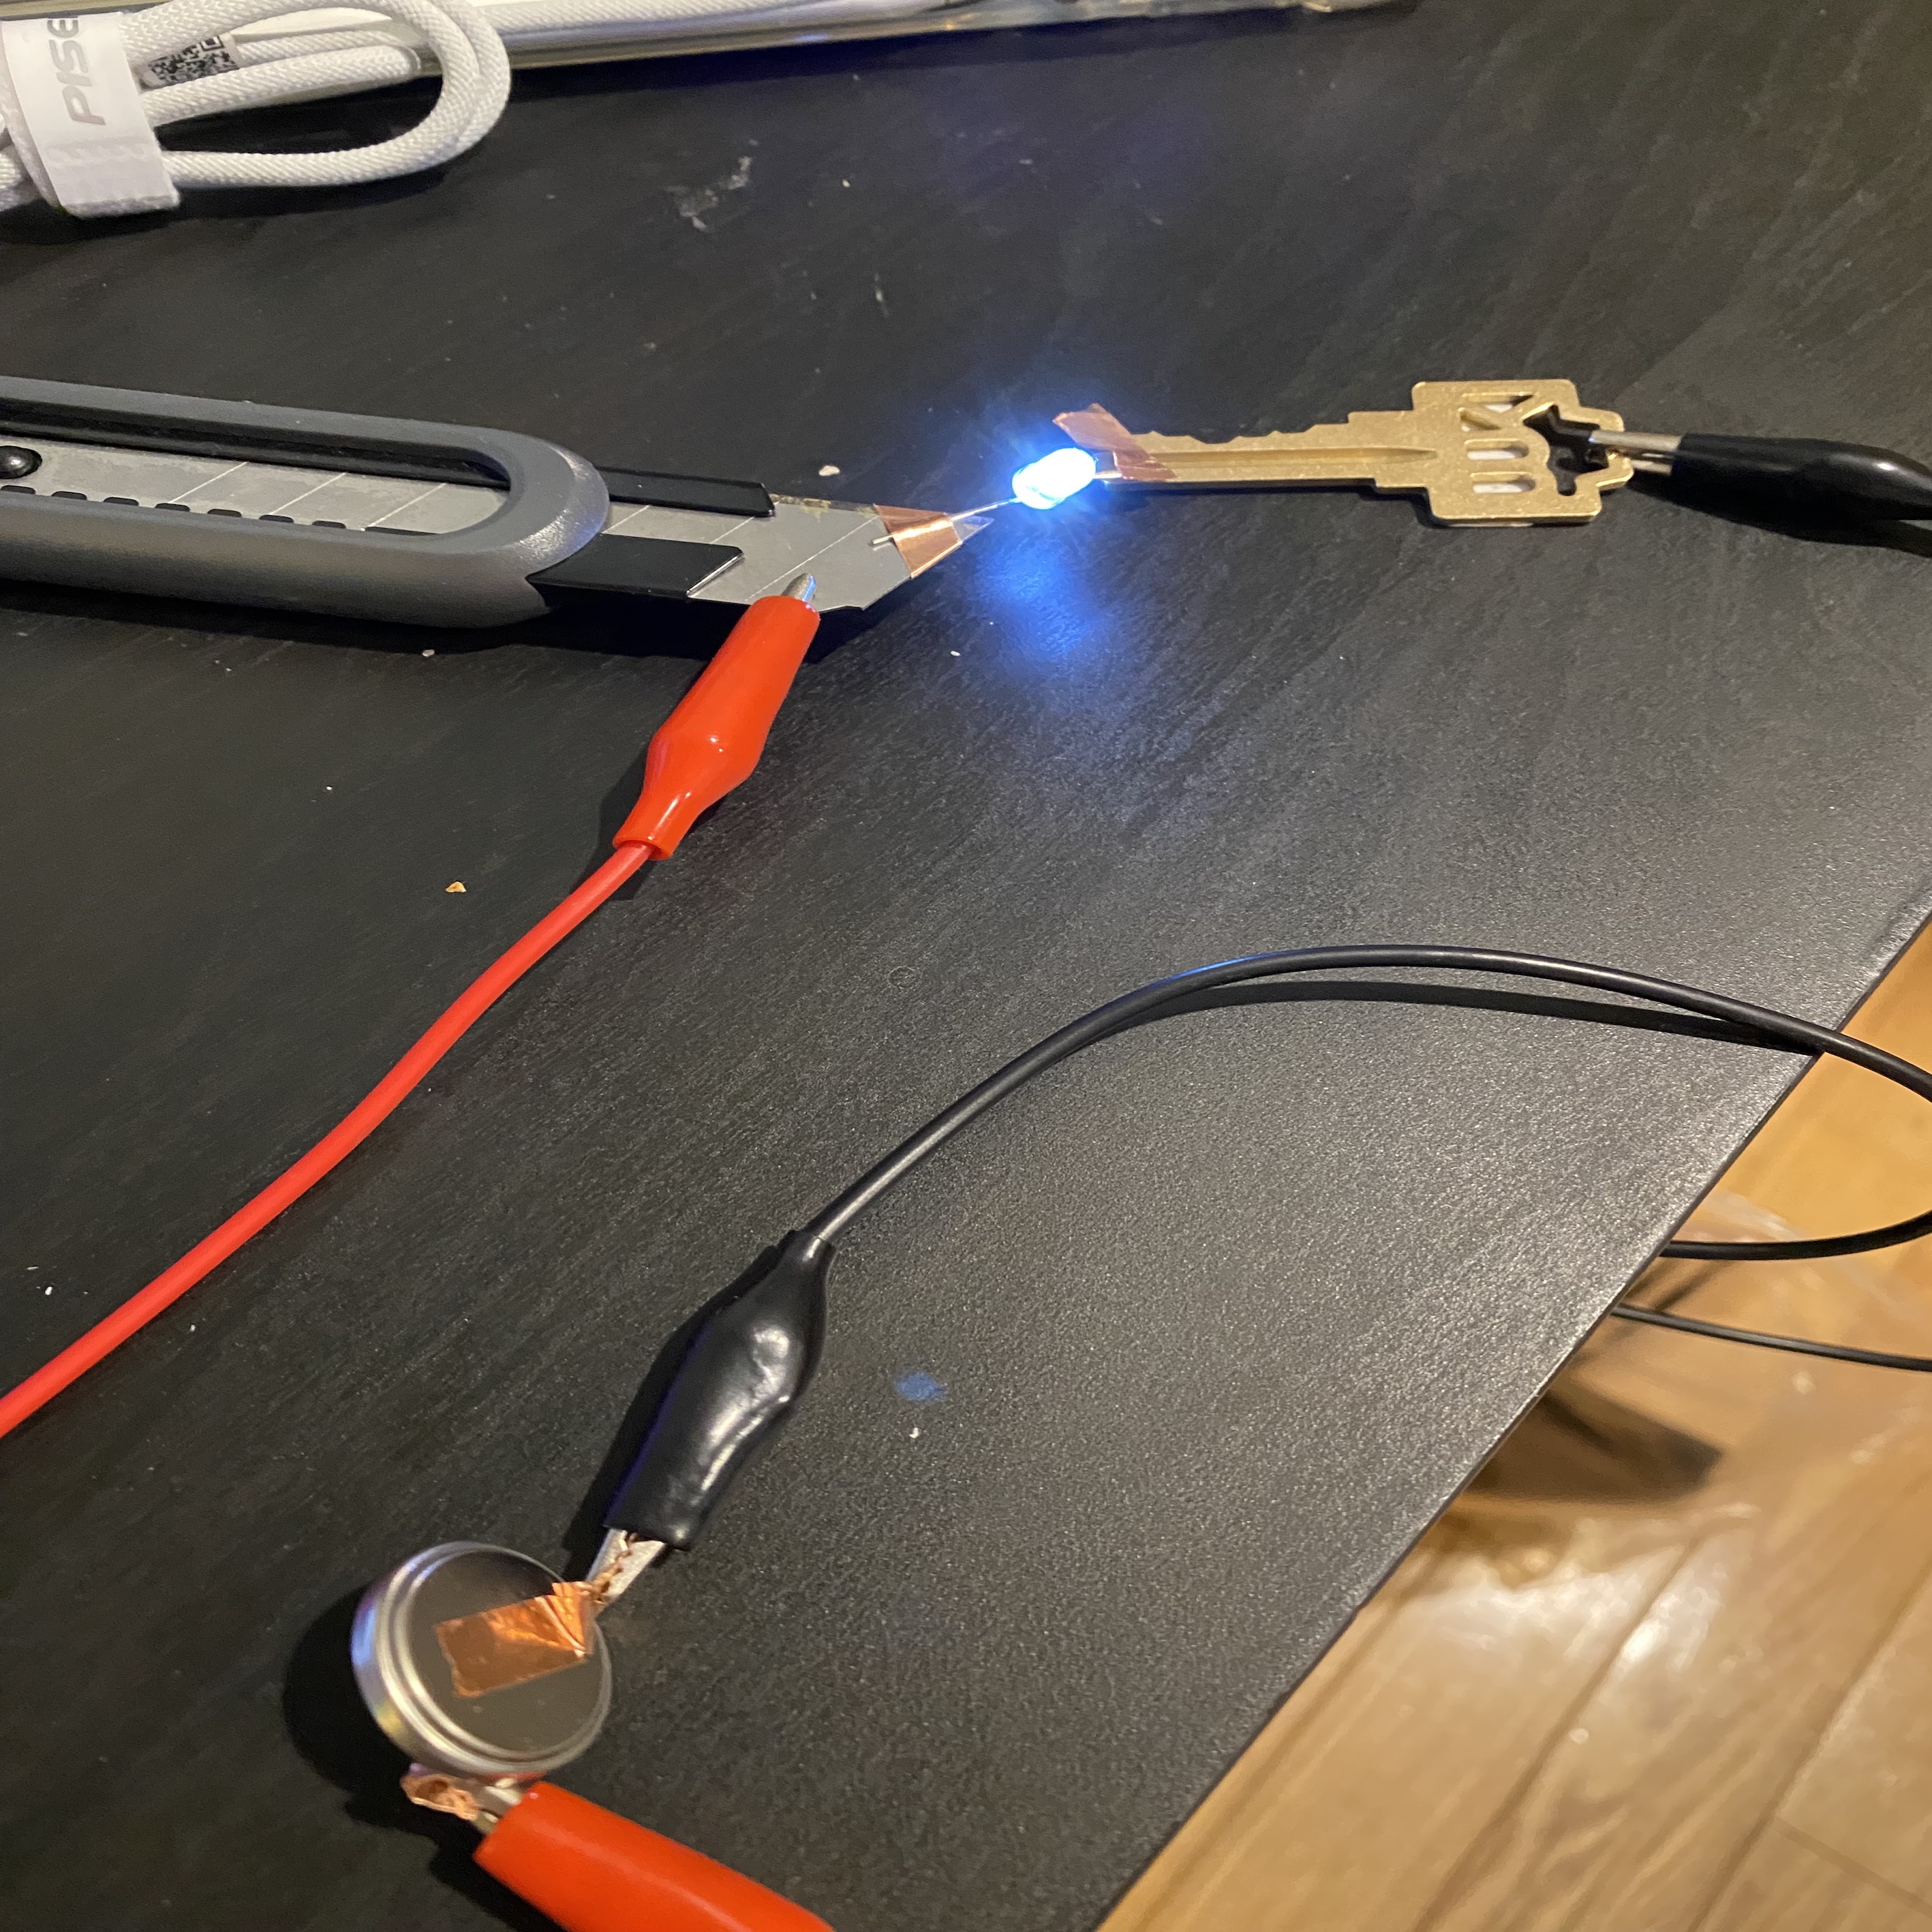
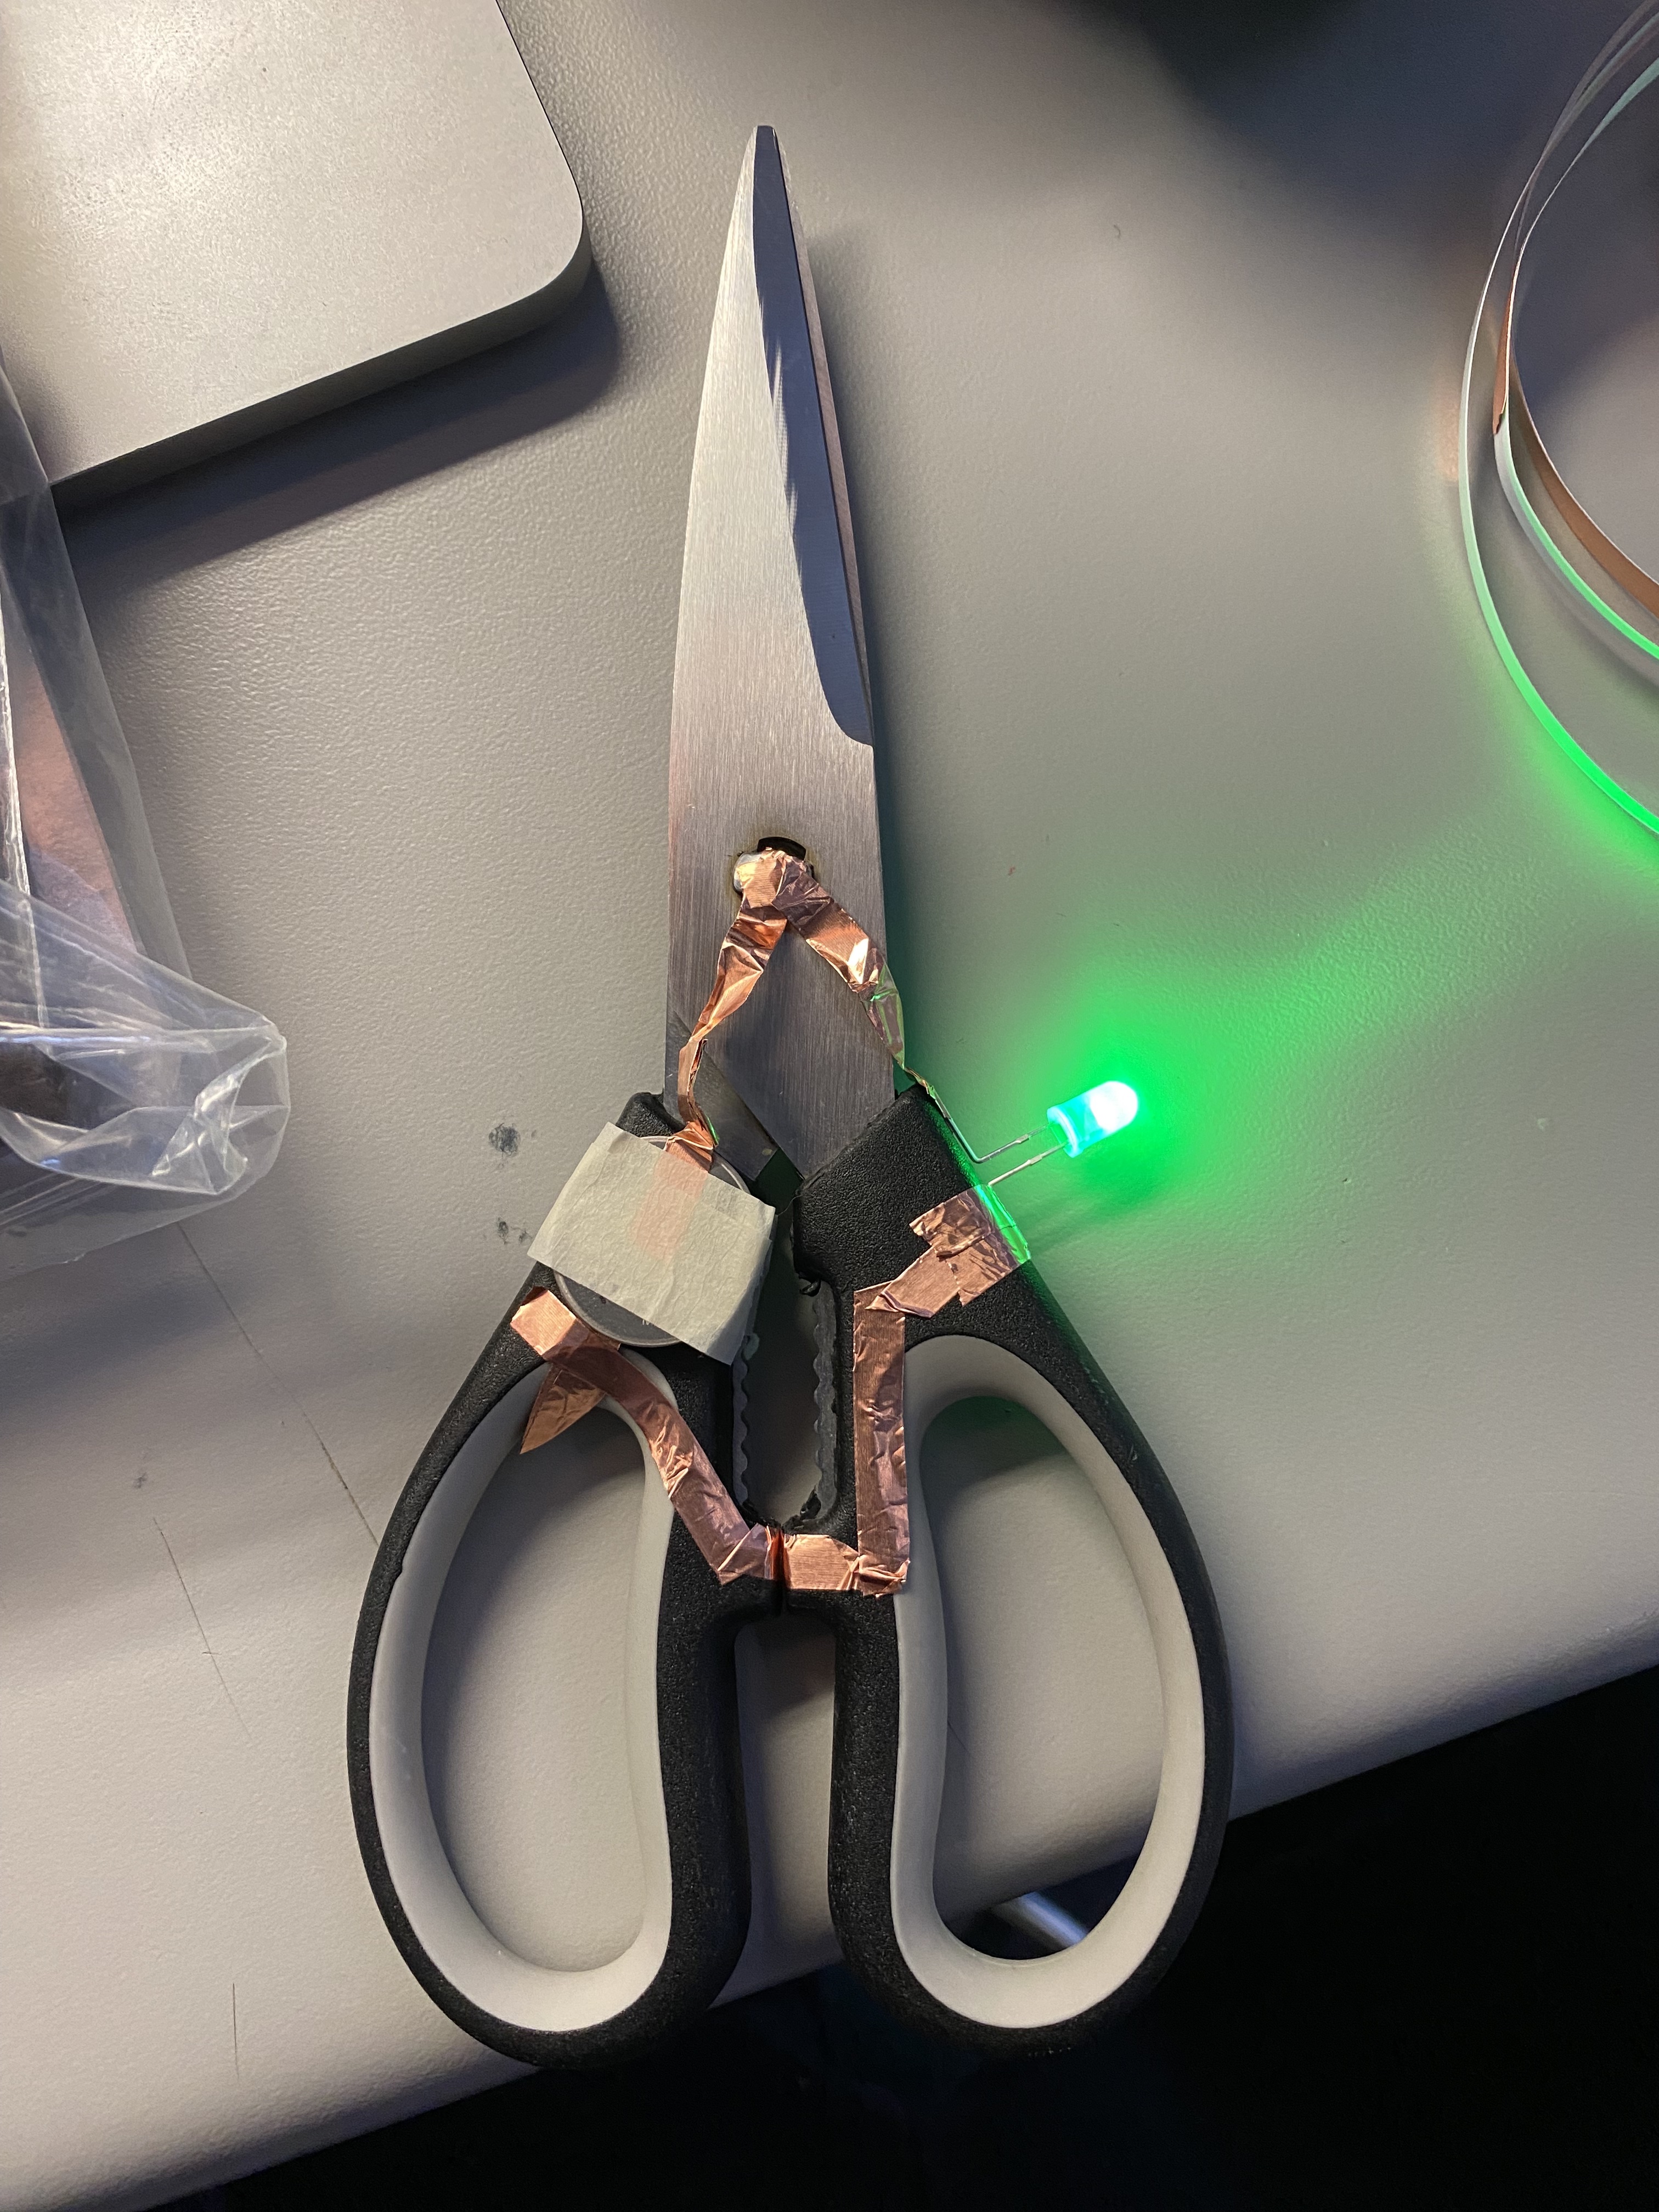
Non-Wearable Interactive Affordance Based Circuit
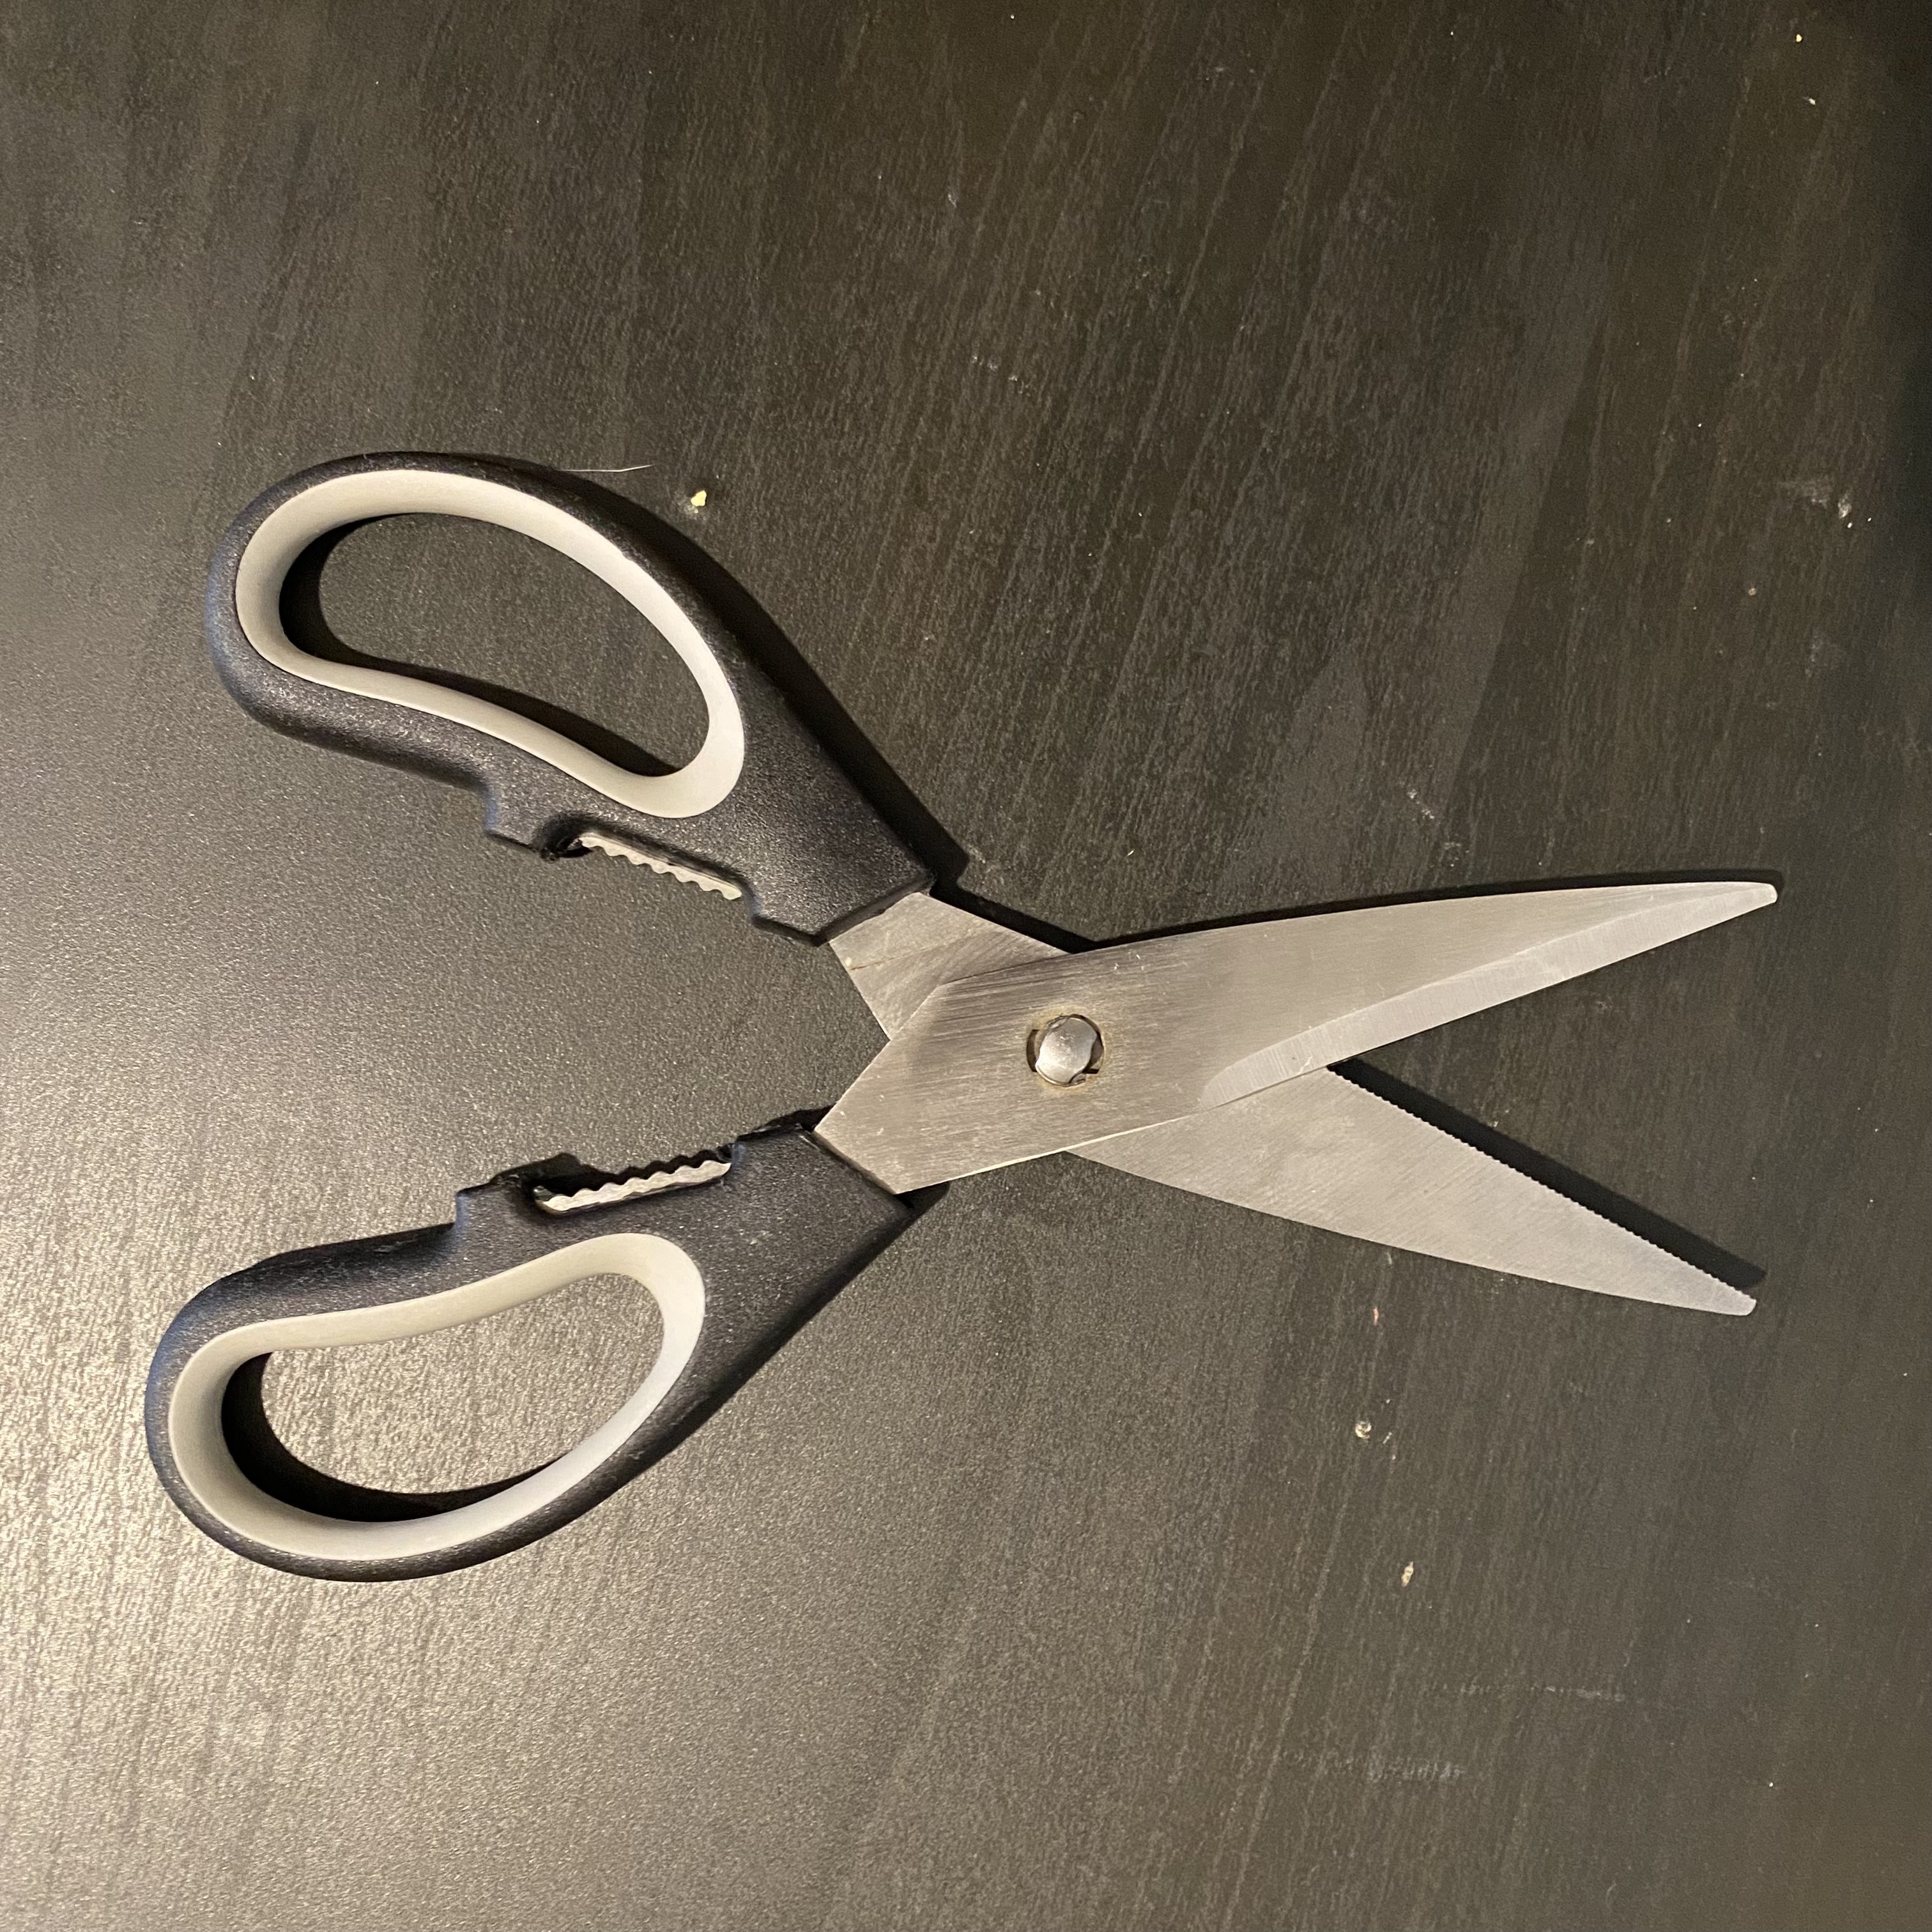
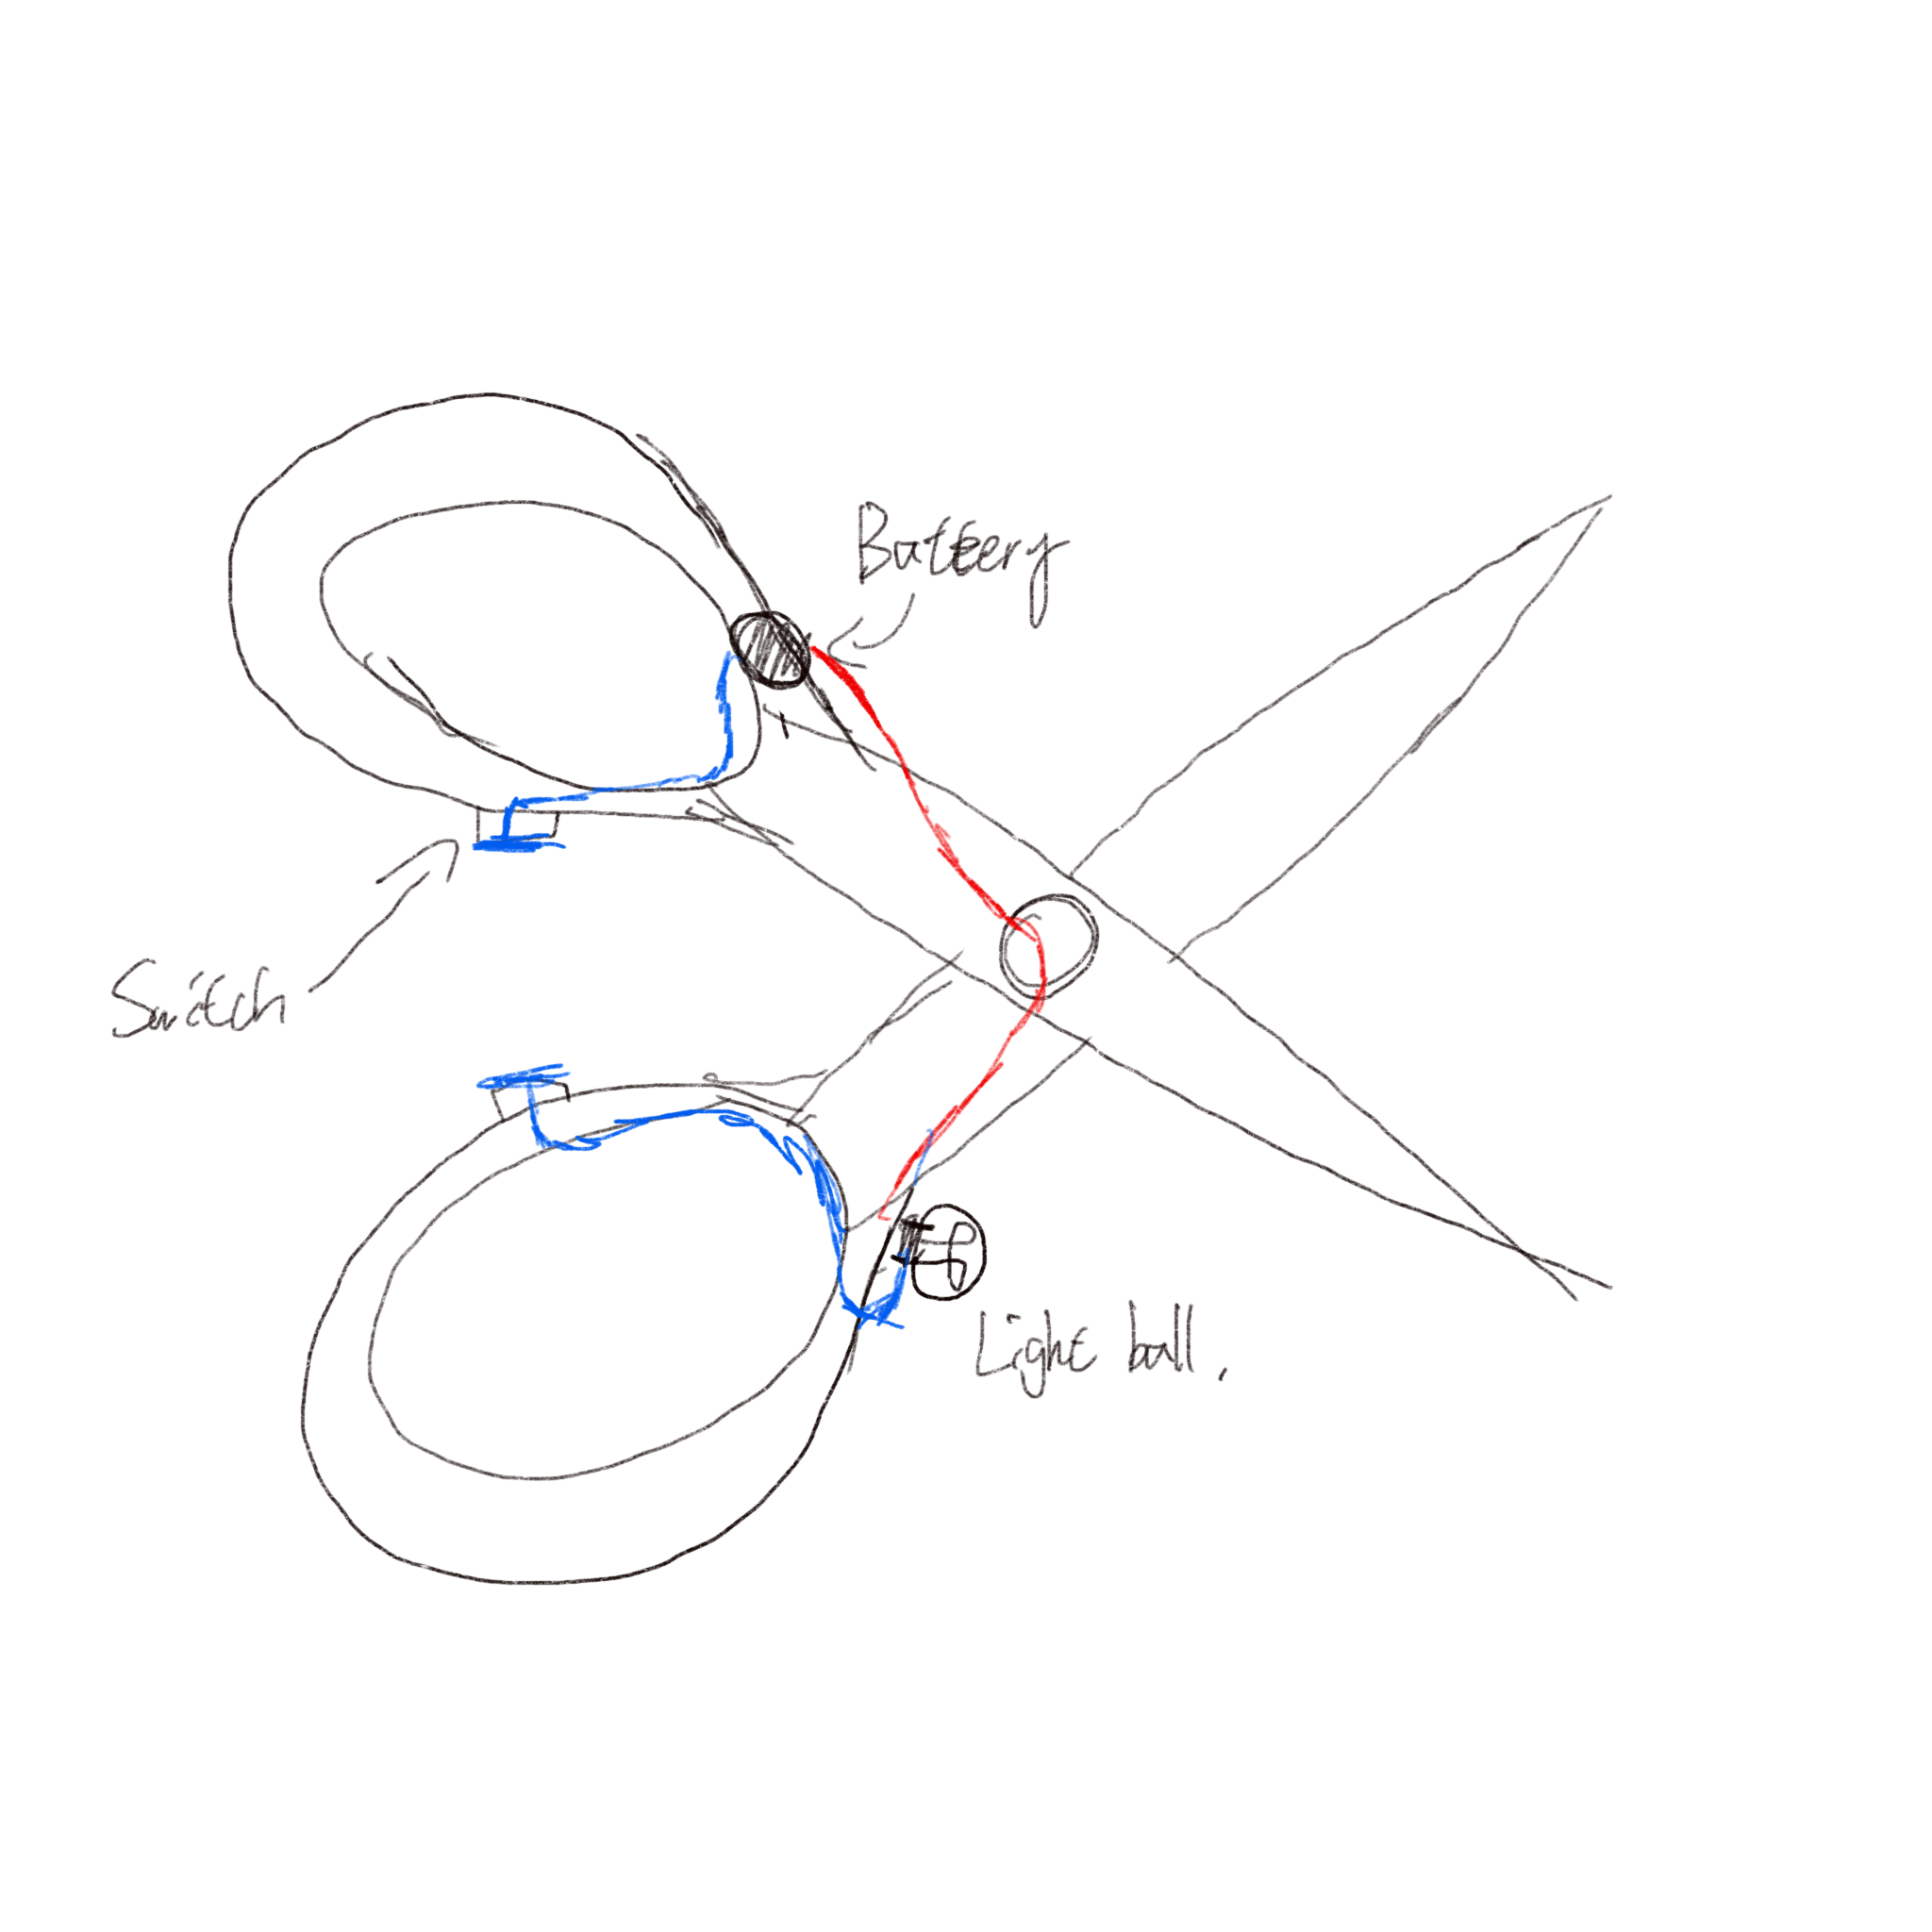
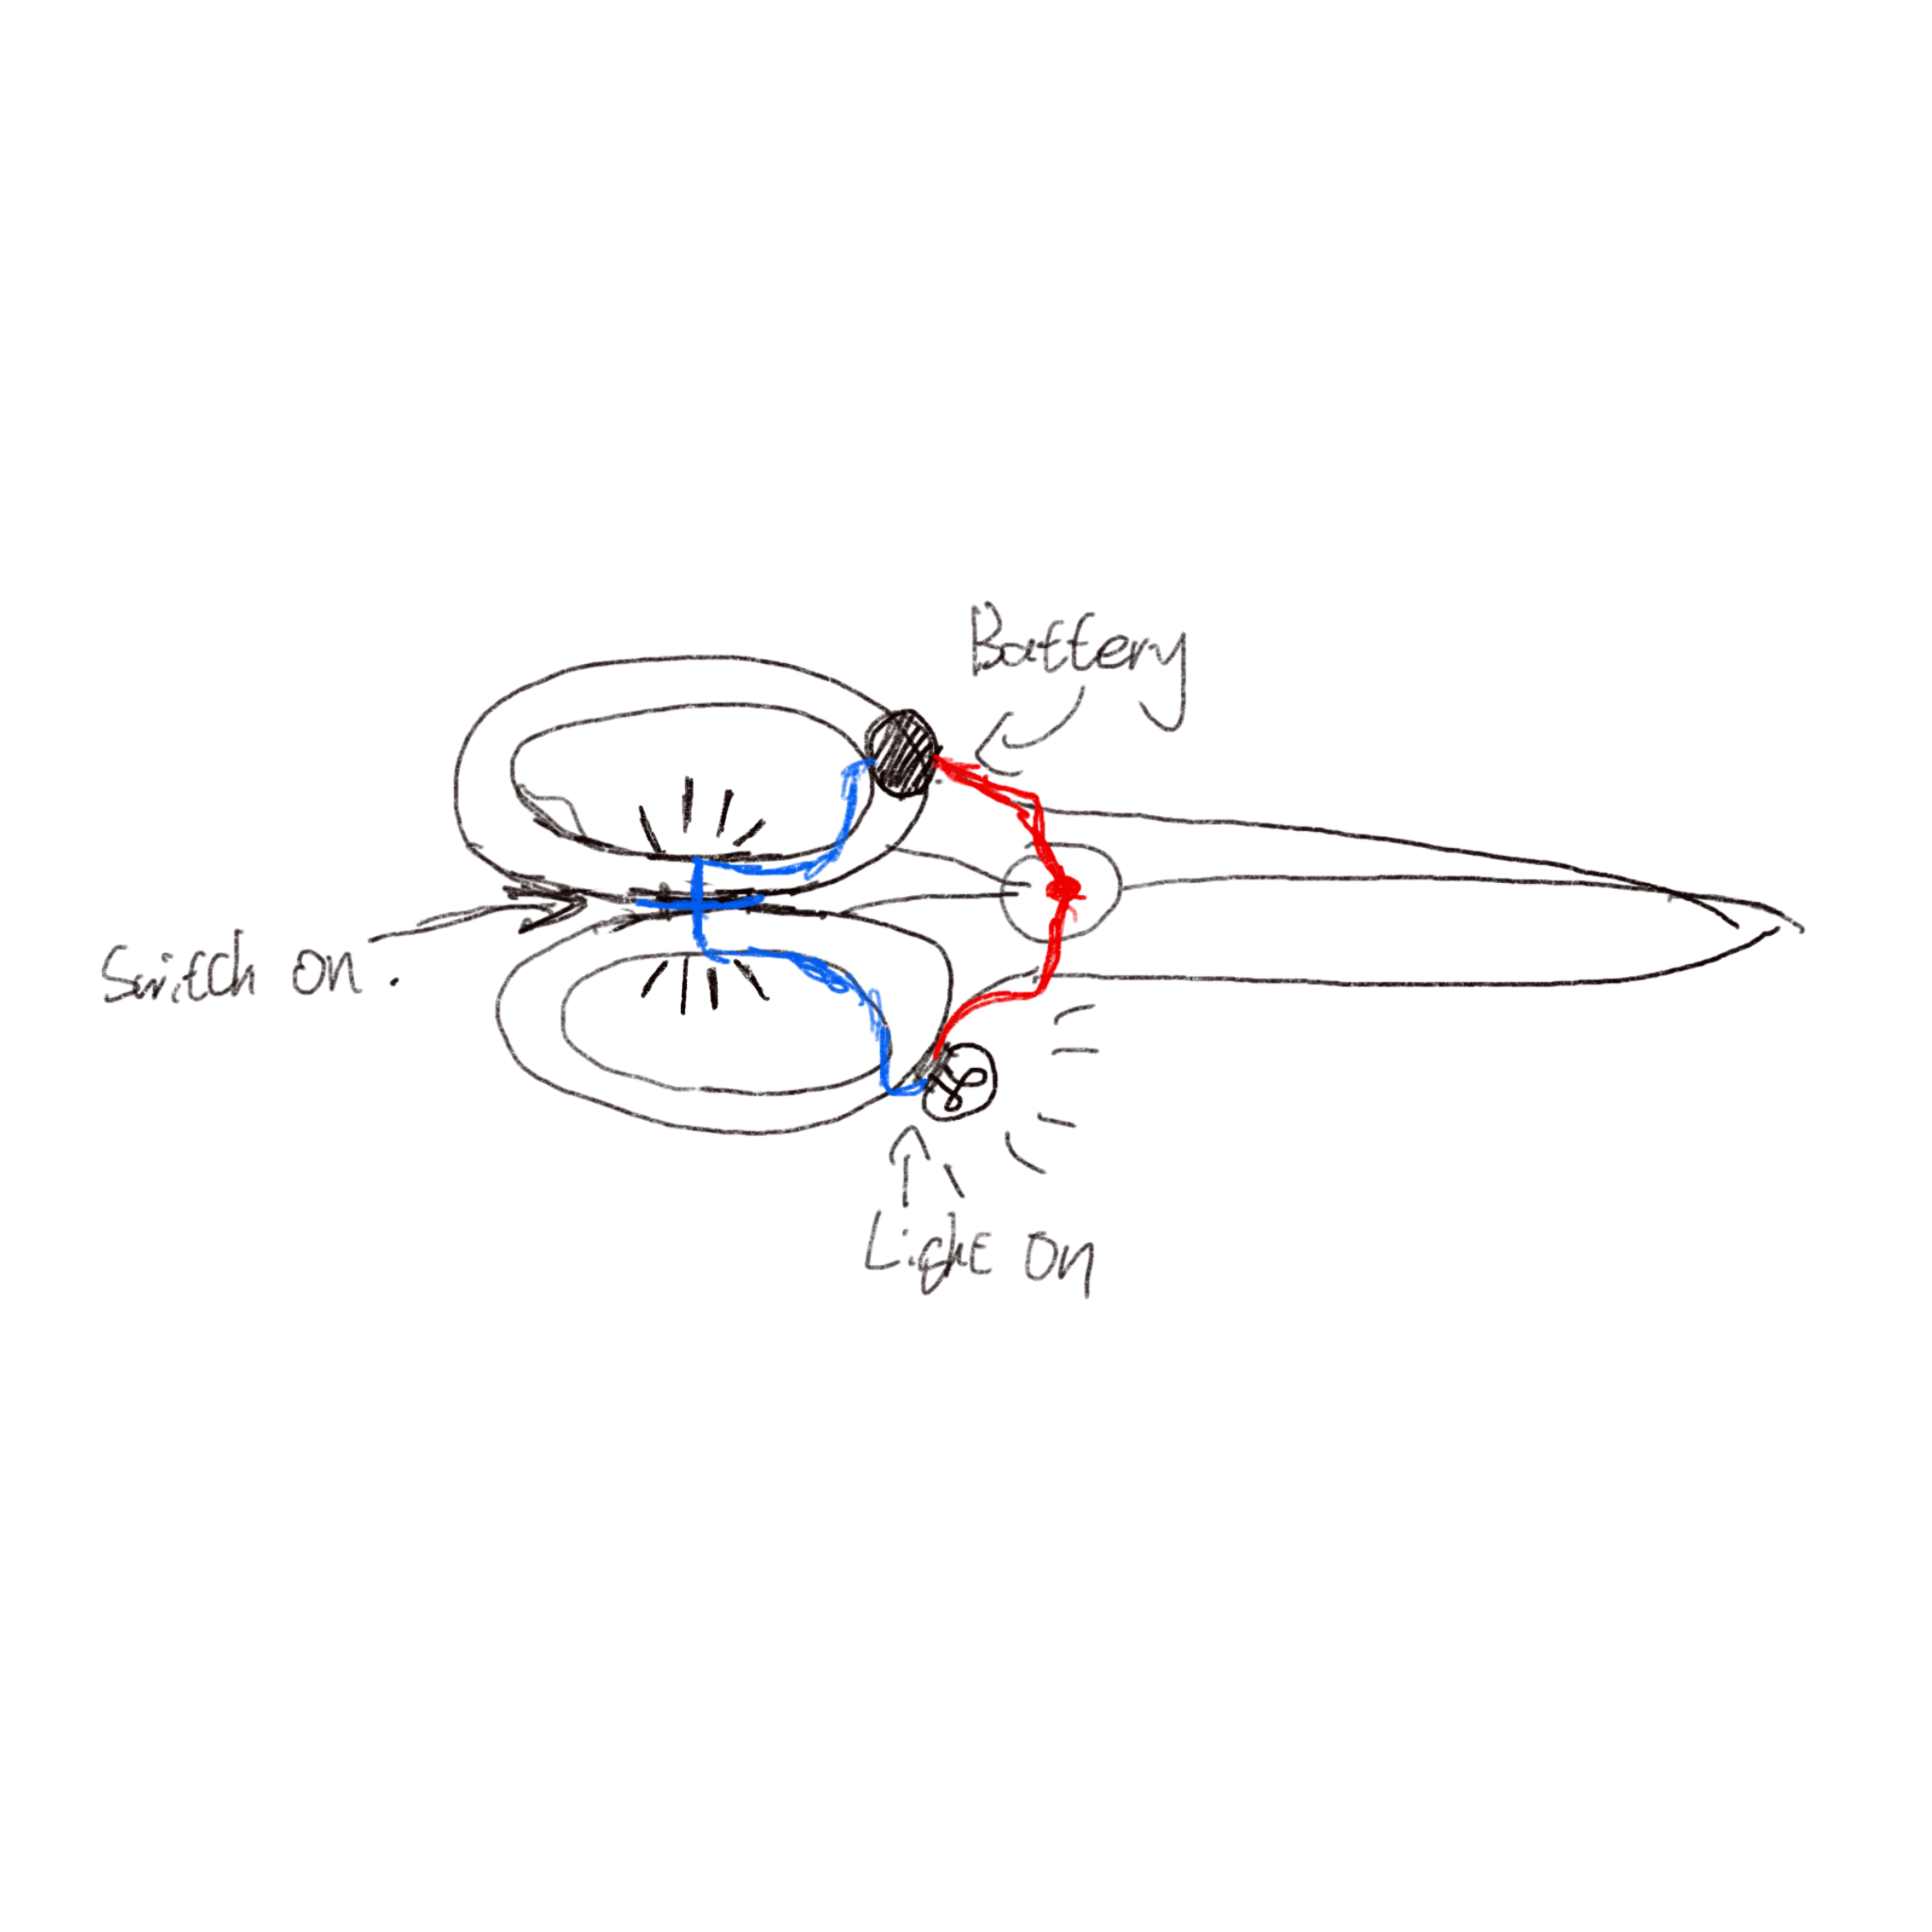
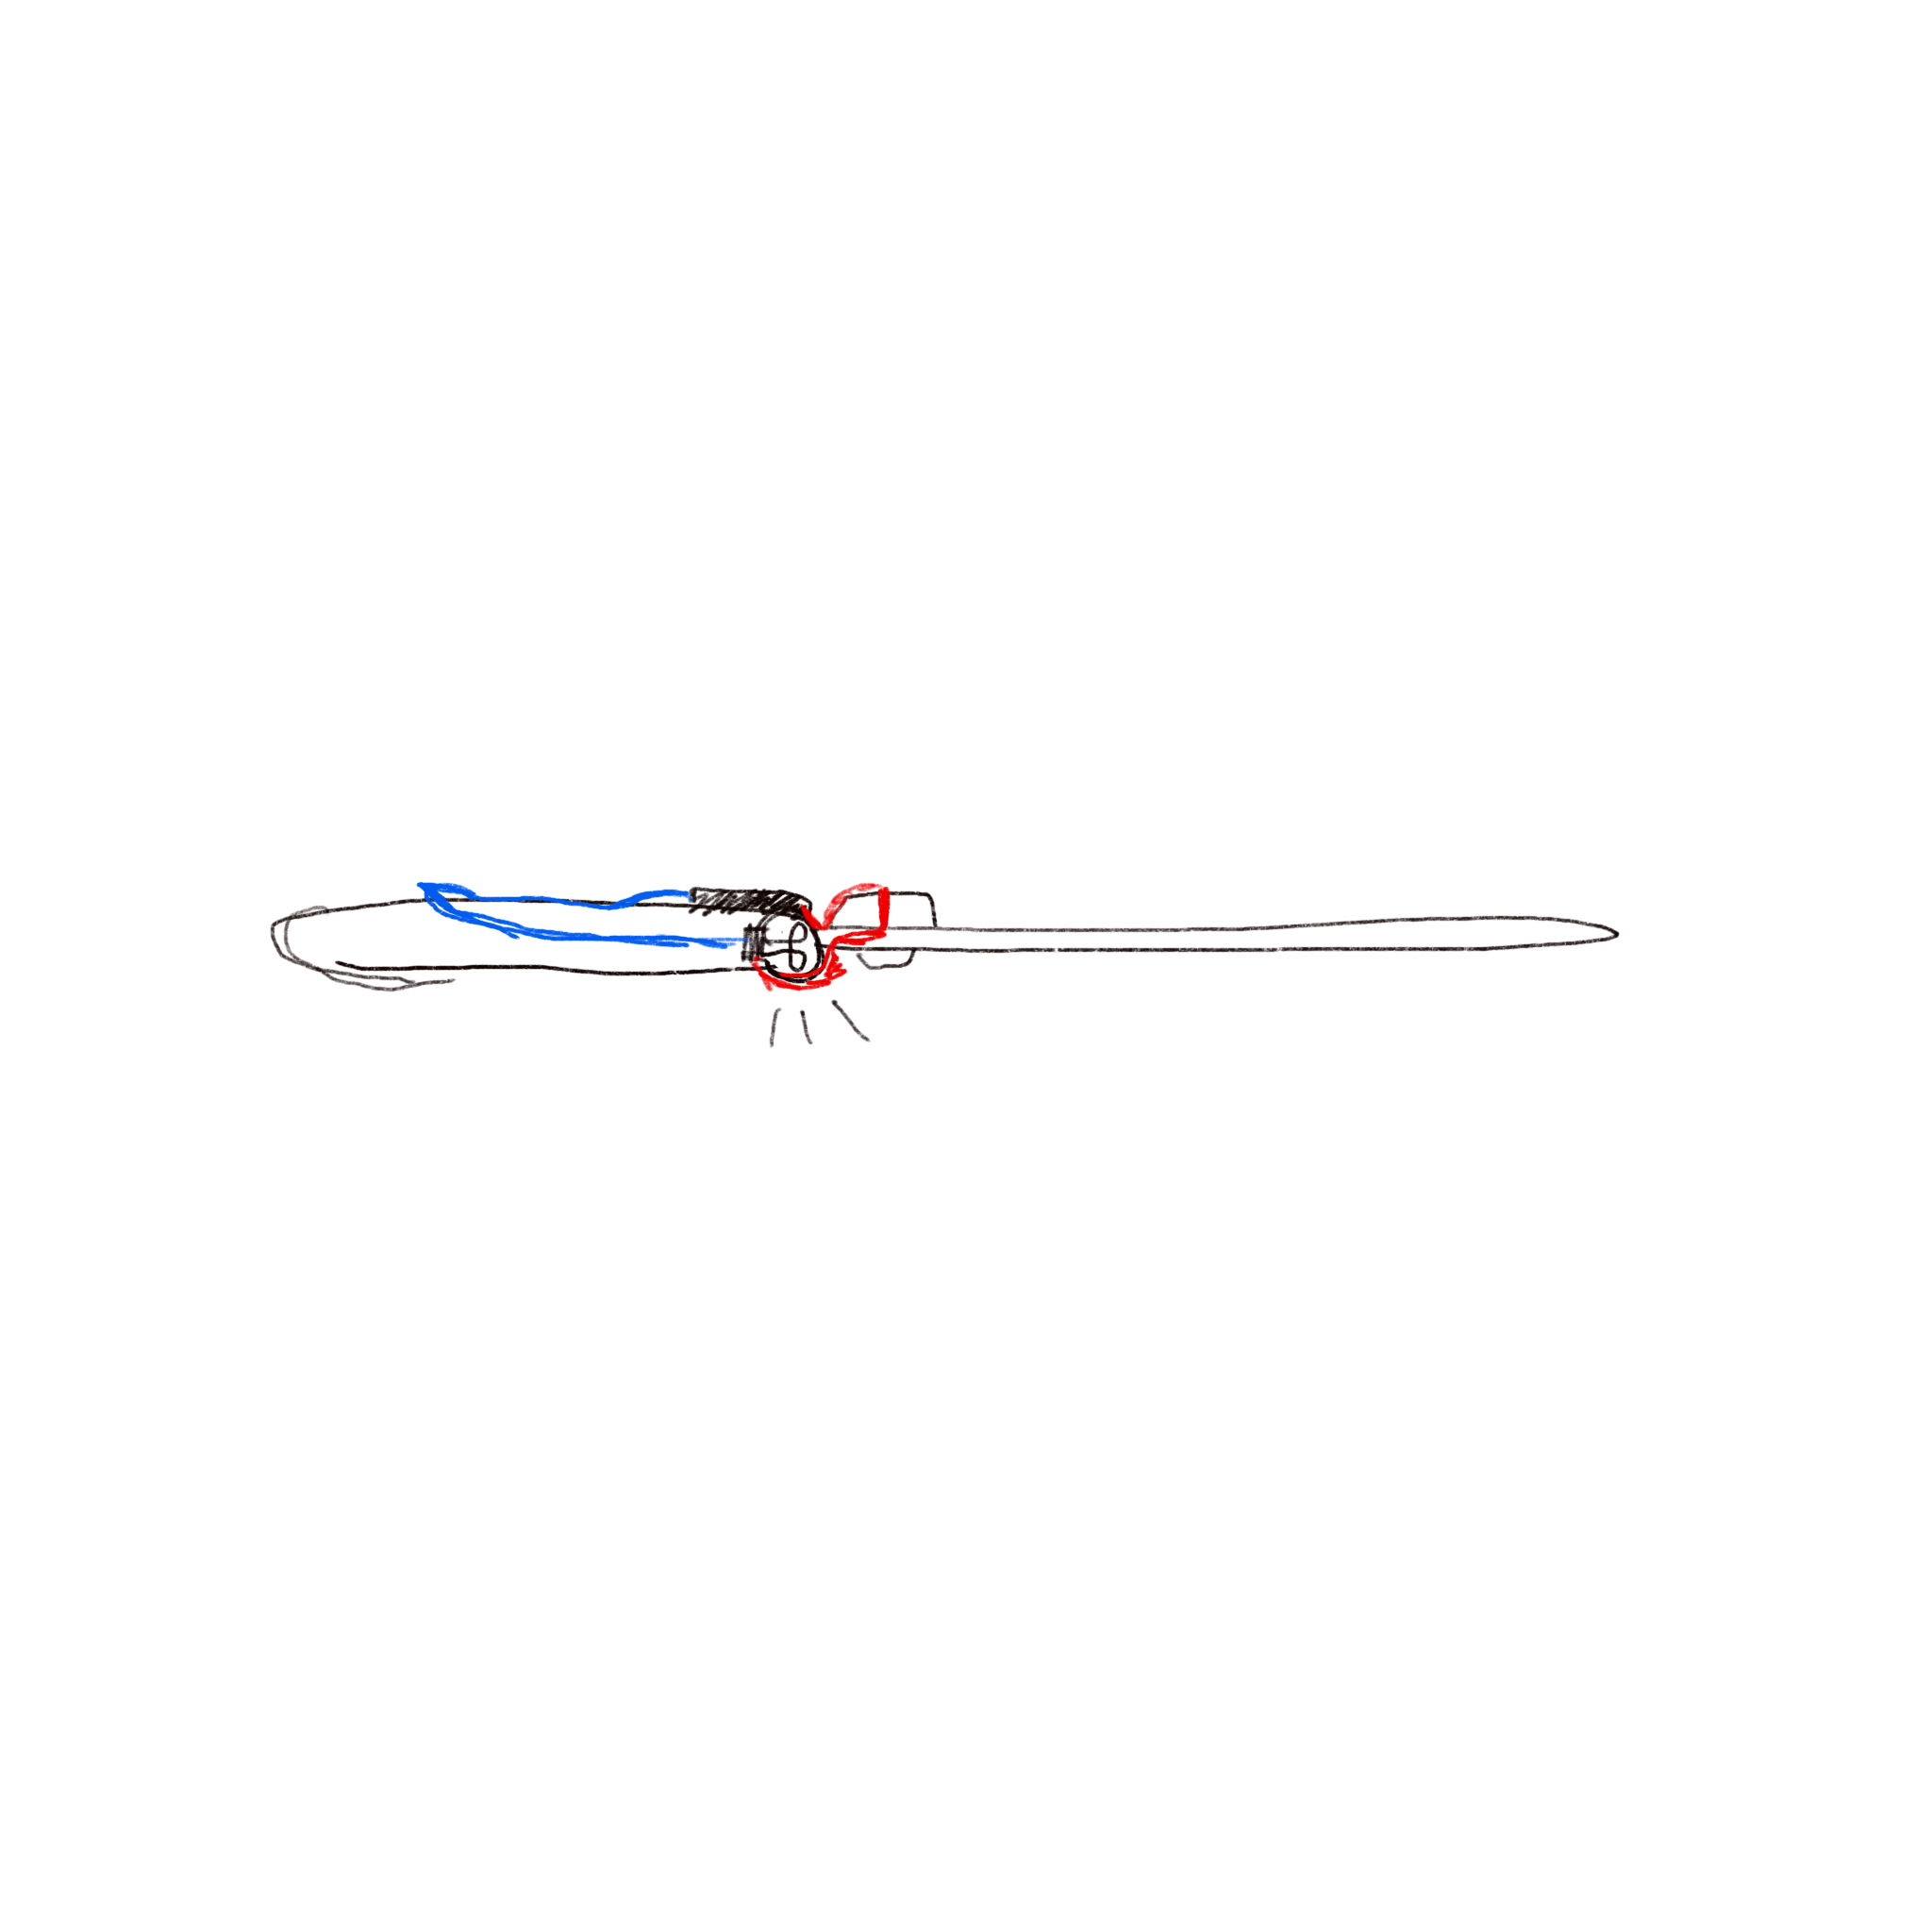
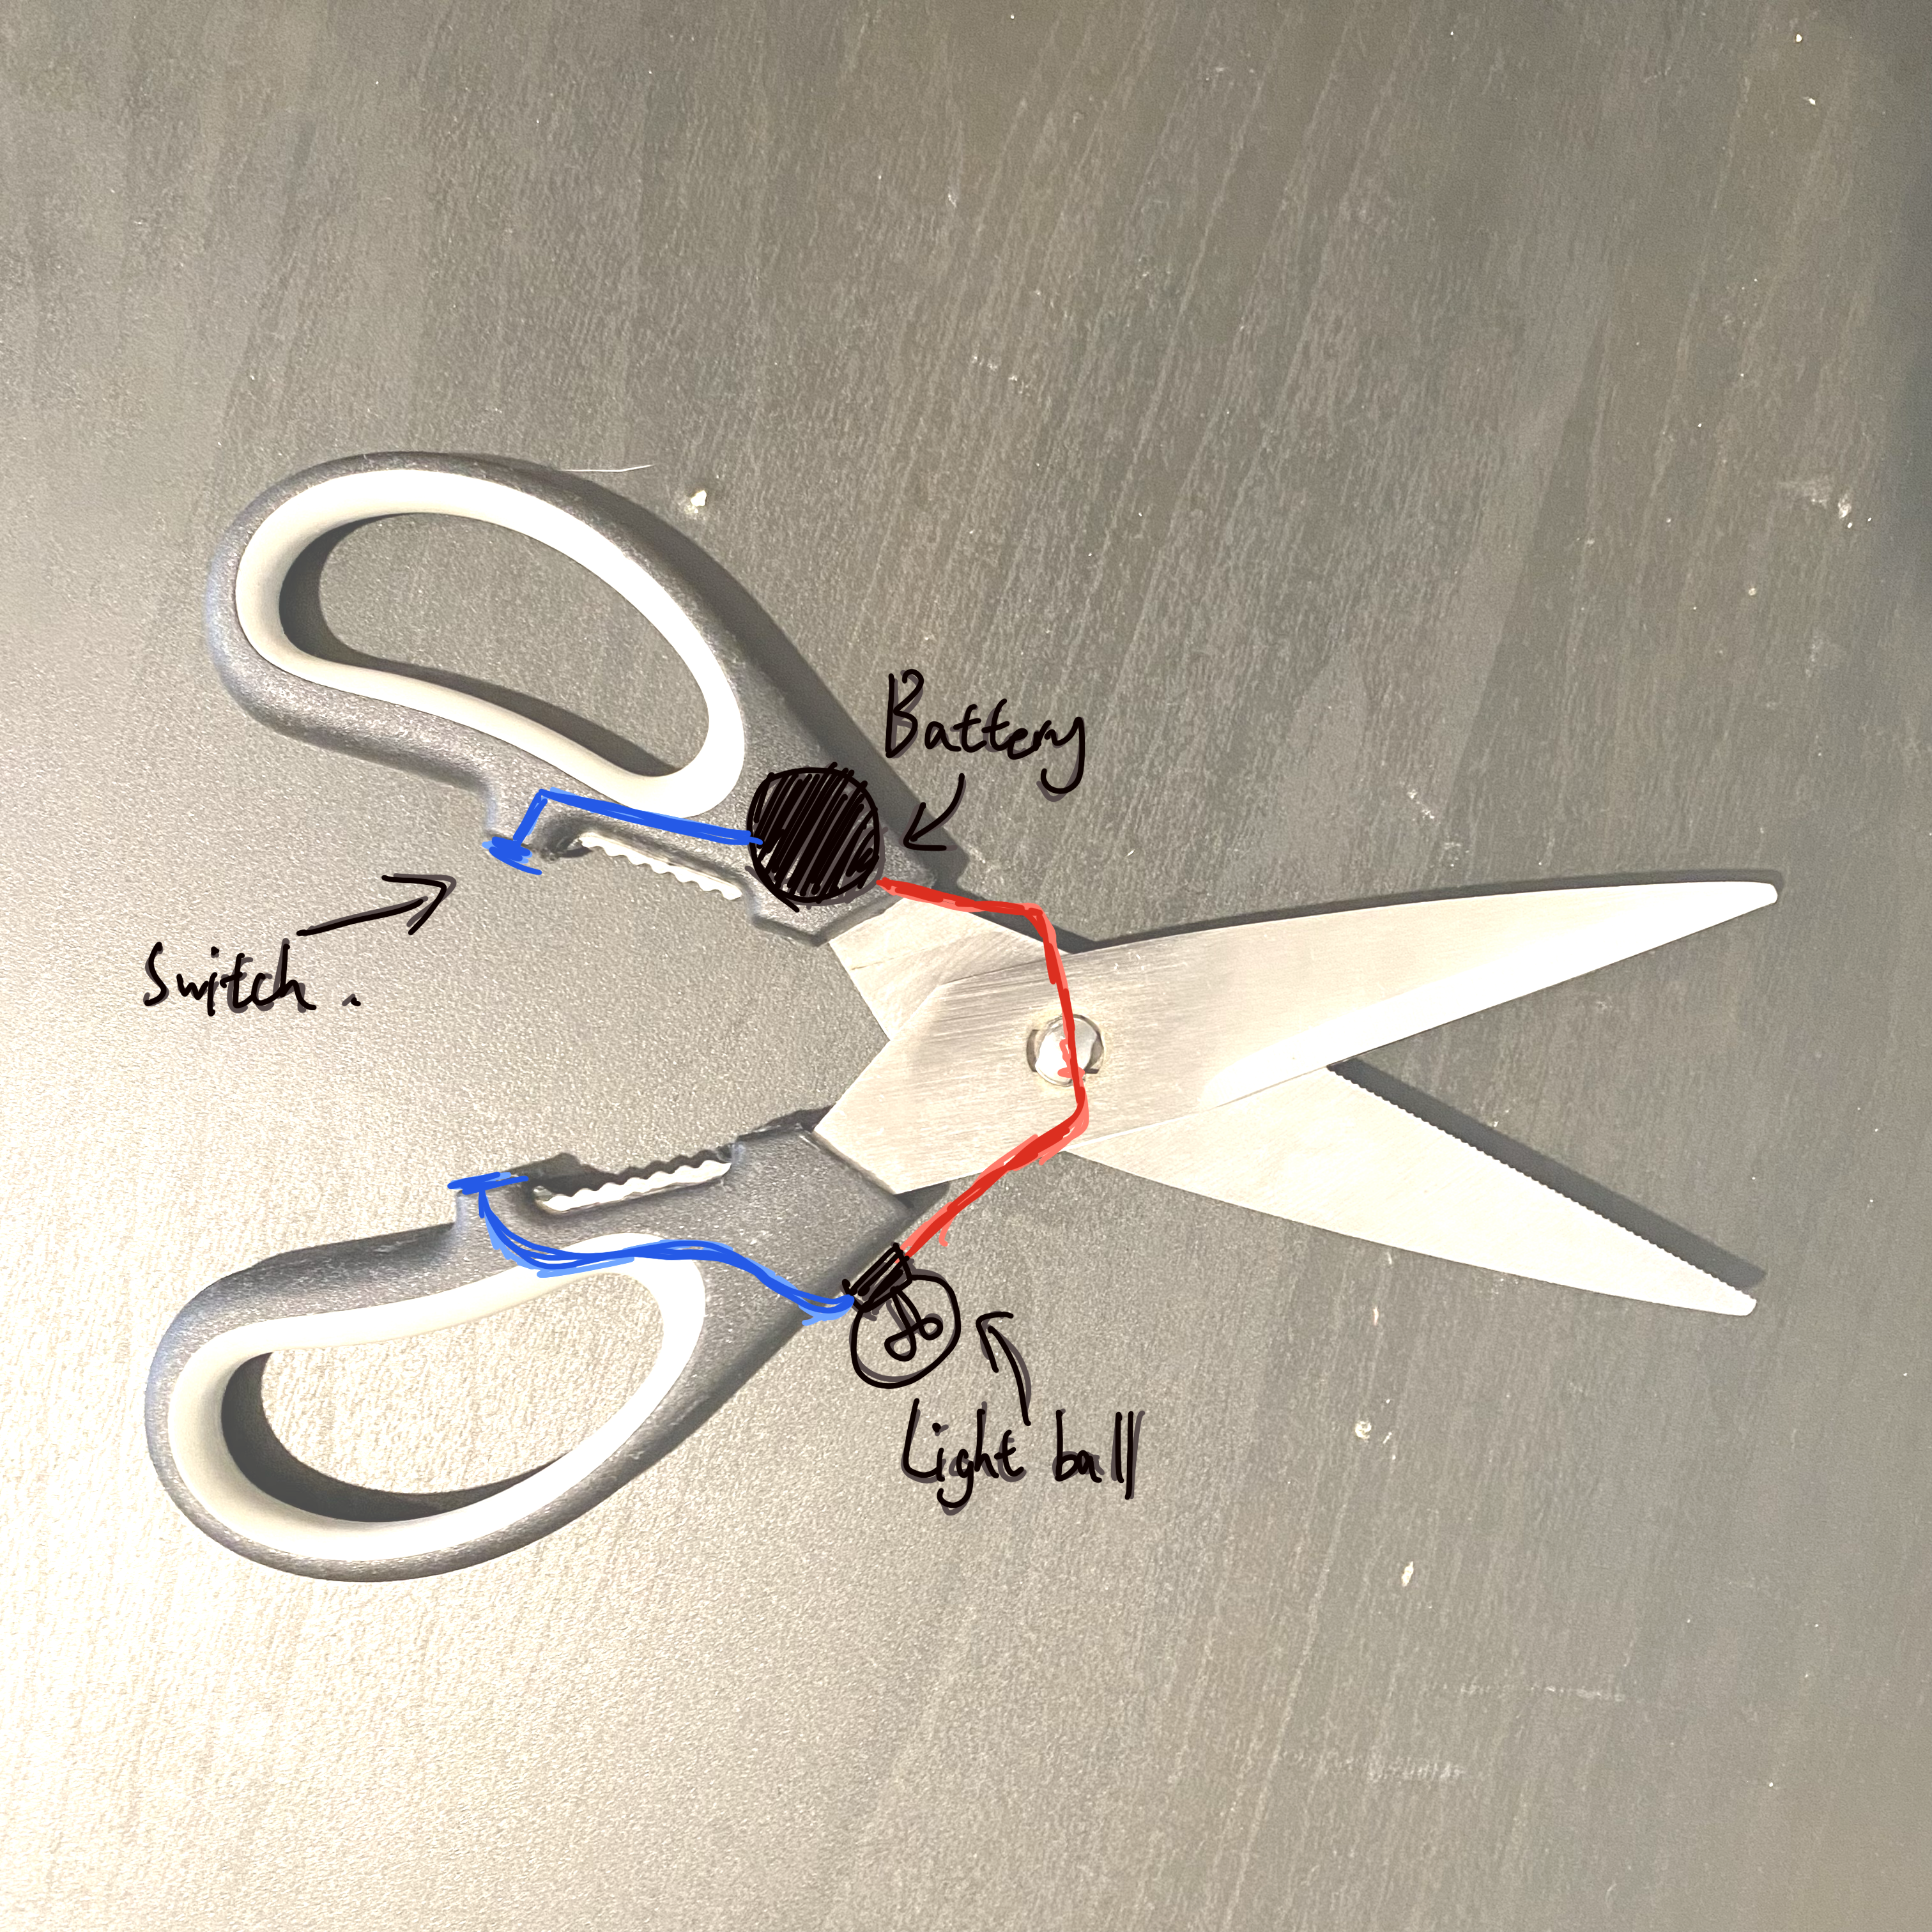
This final design is a pair of scissors with an added interactive circuit. I added an LED light on its side. It will light up when the scissors close. The key activation part is that when the handle is closed, it will cause the two conductive tapes to connect, thus forming a series circuit.
Powered by w3.css